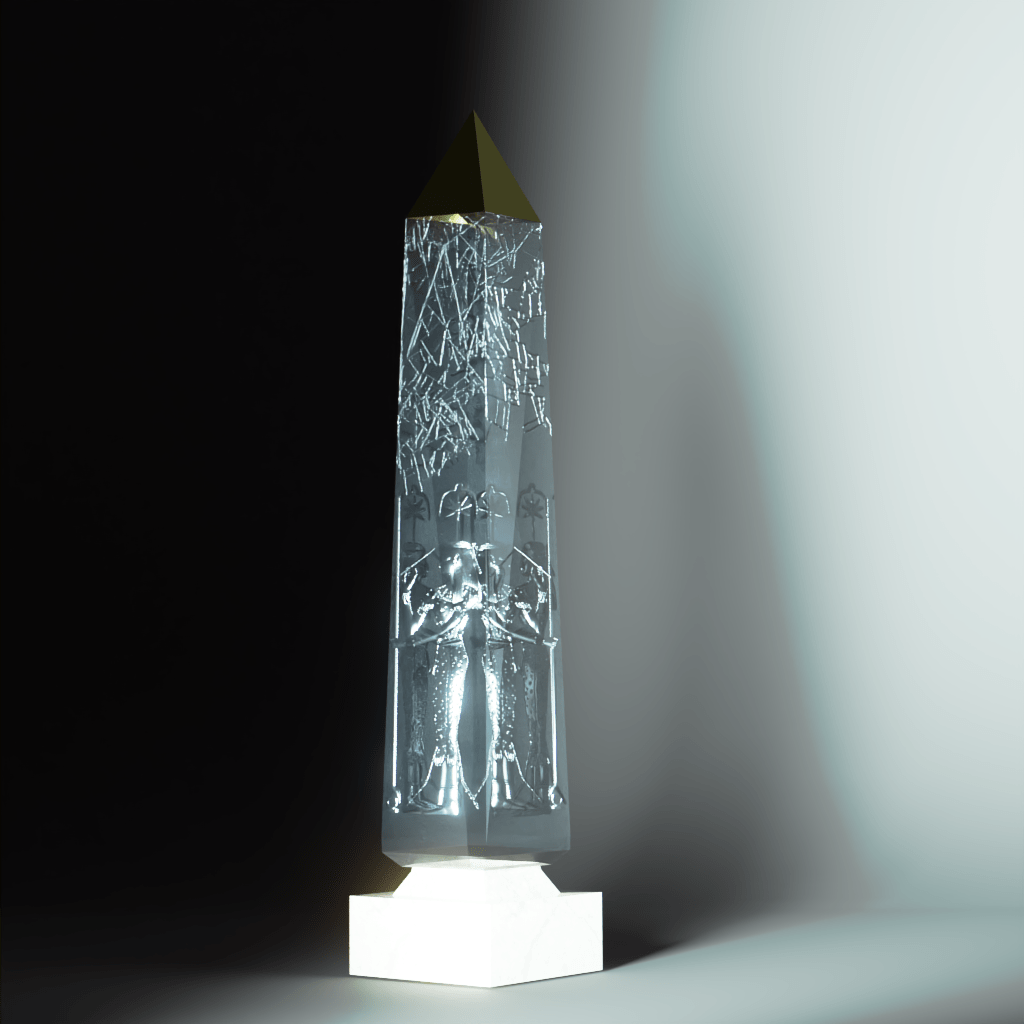
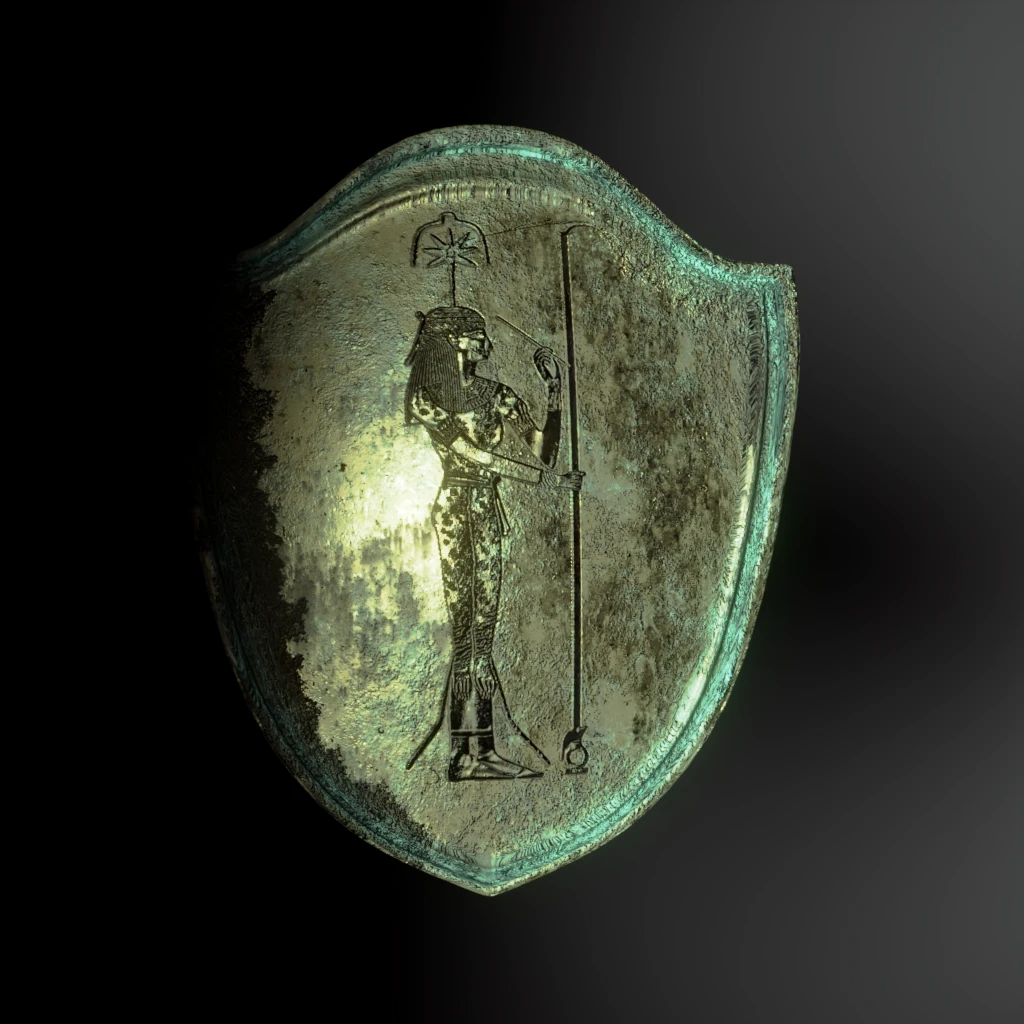
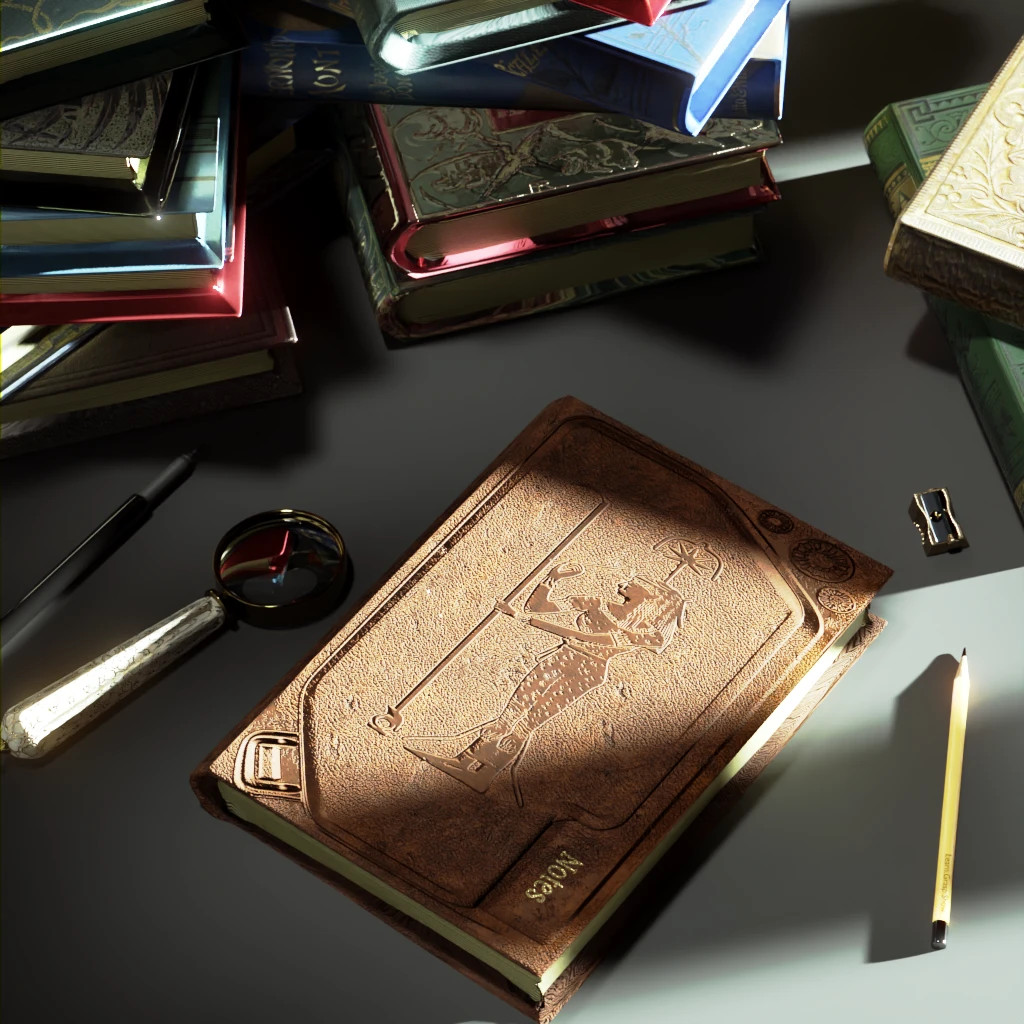
The tale of the two slabs
The following texts and images are the results of a training exercise to go from the pictures or the description of an artifact to the creation of a 3D digital double, sometimes restored version of it. If you wish to know more about the process, every explanations are in A journey into learning a (3D!) restoration process workflow article.
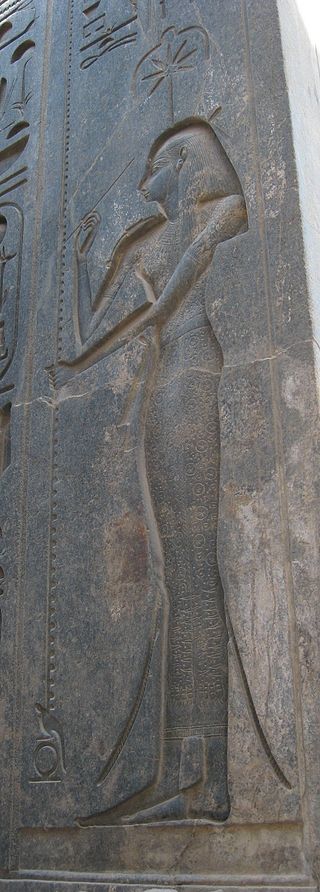
The idea for this project is to create a relief piece inspired by the 3Dviewer namesake, Seshat, using the 13th century BCE relief in the Ramesseum in Luxor as a main reference.
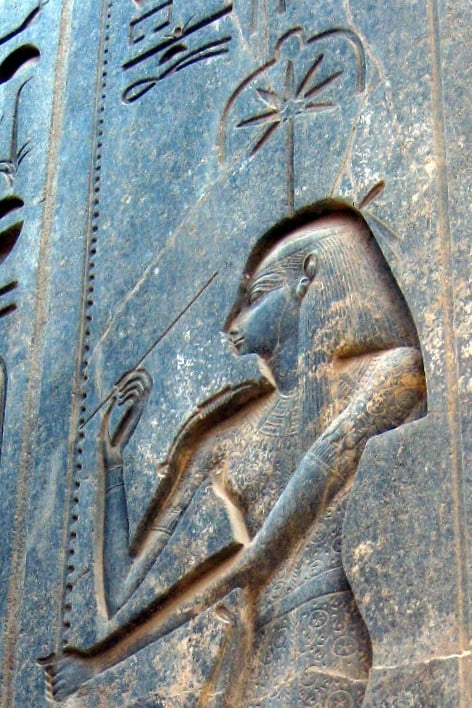
Title: Seshat goddess
Datation: 13th century BCE (-1250)
Provenance: Carved on the back of the throne of the seated statue of Ramses II in the Amun temple in Luxor.
Media: Sunken relief in red granite
Source: Close up of the head and shoulders of the relief representing the goddess Seshat, by Karen Green, via Wikimedia Commons
About Seshat
Myths and iconography of the subject
In the antique Egyptian mythology, Seshat is the divine measurer and scribe. She is invoked when laying out the foundations of temples and other important structures.
She is responsible for recording the speeches the pharaoh made during the crowning-ceremony and approving the inventory of foreign captives and goods gained in military campaigns. It was she who recorded, by notching her palm, the time allotted to the pharaoh for his stay on earth.
Seshat is “Mistress of the House of Books” and as such she oversees the mythical library.
Seshat also appeared in funerary contexts, where, along with Nephthys, she restores the limbs of the deceased.
Seshat was depicted as a woman with a seven-pointed emblem above her head.
This emblem is the origin of an alternate name for Seshat, Sefkhet-Abwy, which means “seven-horned”. Usually, she is shown holding a palm stem, bearing notches to denote the recording of the passage of time. She was also depicted holding other tools and, often, holding the knotted cords that were stretched to survey land and structures. She is frequently shown dressed in a cheetah or leopard-hide.
Inspiration elements for the 3D piece construction
There are not a lot of available and exploitable references online. The most detailed and easily decipherable is a relief from the back of the throne of a seated statue of Ramses II in Luxor Temple.
An outlined version of the relief, helpful for identifying the different parts, can be found here.
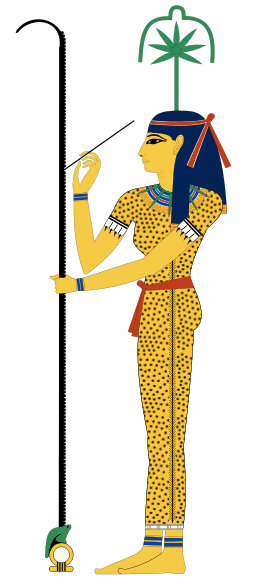
NB: I was not able to identify the symbol at the base of the palm stem. It looks like a mix between a frog and a crocodile. It appears on each version of the goddess where she holds the stem. I think it may be hieroglyphic related, but that’s just a hunch. If any of you, dear reader, knows more about it, please let yourself be known !
Workshop: 3D construction process
The tale of the 2 models
In the end, I made two versions of the piece, re-using the same figure but in two different contexts.
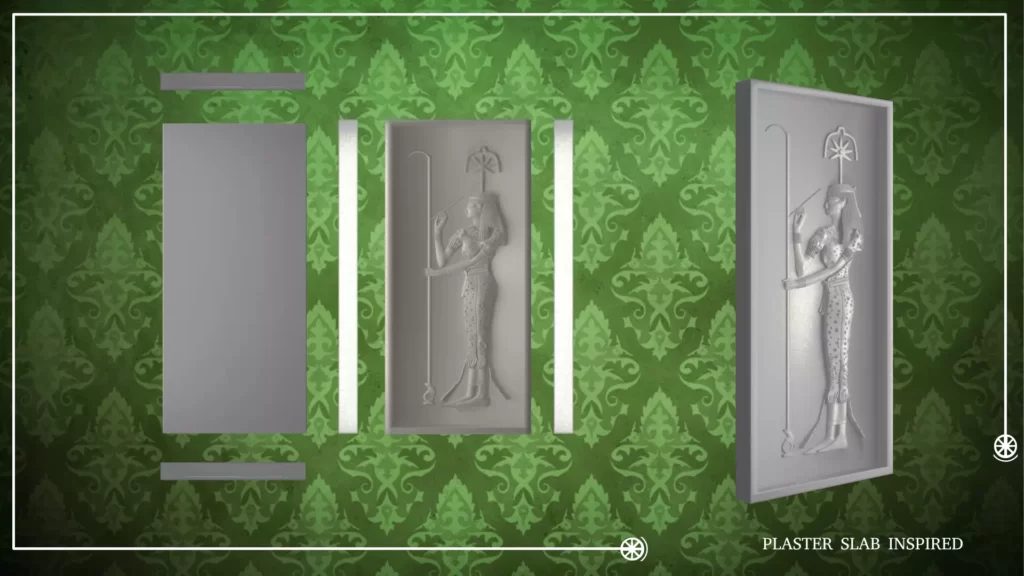
The first one is a simple plaster slab. It is there as a test piece for the Seshat3D Web Viewer, loosely inspired by 19th century pastiches and Victorian plaster copies that adorned the collections of so many people at the time.
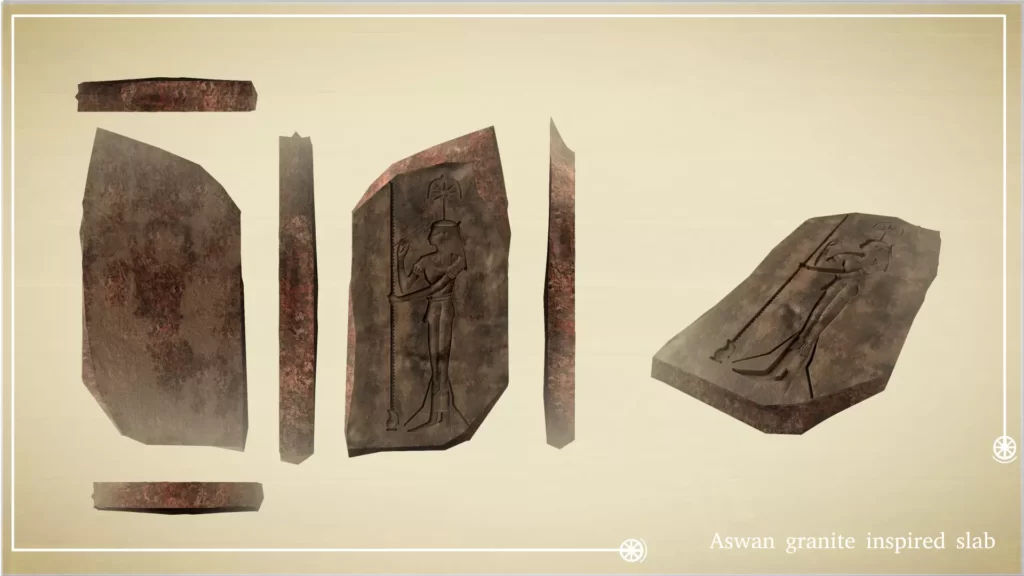
Then, I thought that I could maybe go a little further with the concept and illustrate another aspect of this period: the innumerable fakes being produced in and out of Egypt. Fortunes were made selling more or less “dubious” artefacts to rich collectors.
It was also an opportunity to train myself to texture using different methods.
Because this is a “made up” project, I’m not working within my usual restricted scope and I can let my stylus go a little bit more freely !
Here are the turn-around views of the two final objects:
Modelling the figure
Creating the outline
A prolific drawing first stage helps me identify and learn the shape. It’s something that came along with the digital sculpting process that I did not foresee. I was keeping second guessing myself as the sculpture went on about volumes and positions and how to render them.
I then went back to M.Lanteri’s 1917 lessons to find a way around that. Here’s what he had to say about that (volume 1, p 4):
“And as Drawing is the principal foundation of Sculpture, and a good sculptural work depends largely on good drawing, the student should draw as much as, if not more than, a student of painting…”
This century old advice is still relevant today.
I guess it sort of makes all the more sense today because the digital sculpting medium remains a 2D process all the way. Tablet’s styluses and mice only have two directions to go. I’m keen on trying the VR experience of sculpting at some point, though.
Back to the drawing board: it’s a messy process, and I’ll spare you the most dubious drawings and sketches. It’s not pretty, it’s full a trials and errors. The advantage of the digital process is that it doesn’t mess up innocent drawing paper !
Here are some quick (and sternly selected) sketches from different sources that helped to construct a version of the goddess to sculpt.
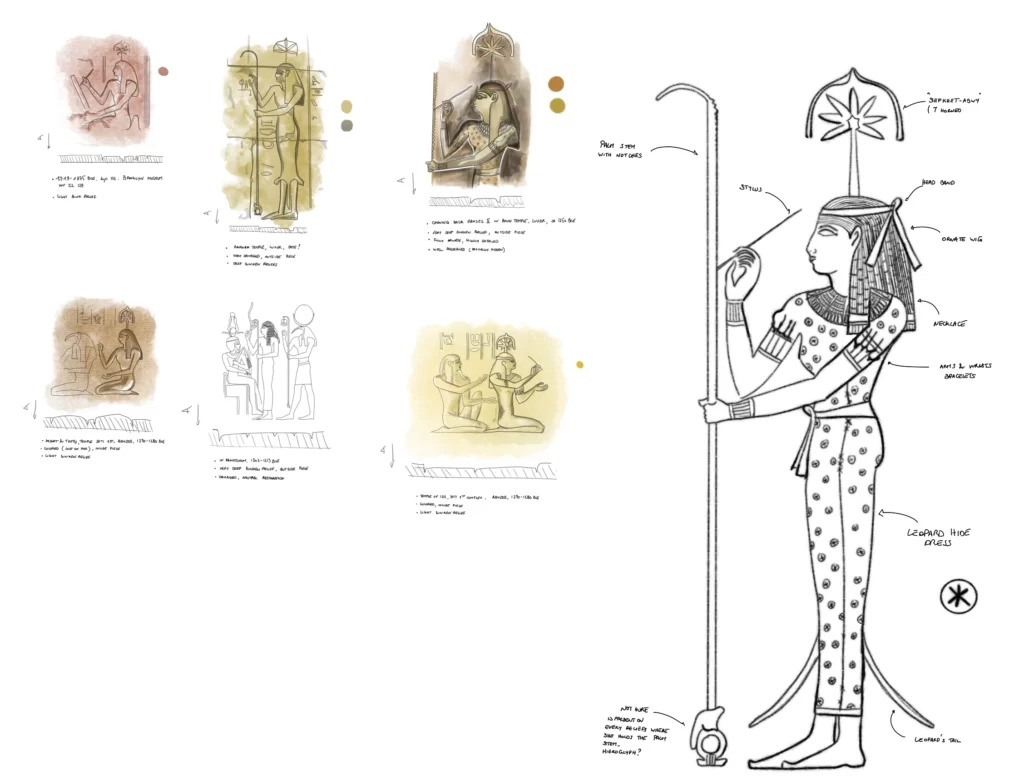
I have to make sure some elements are present because they are present on every example. These are: the palm stem, the stylus, the emblem, the wig, the leopard dress and the jewels.
Notes on the details of the sculpt
Leopard skin
The figure is wearing a leopard skin. This garment is often depicted worn by high priests and royalties. It’s a garment reserved to sem or lumnutef priests, whose role were linked to funerary and regeneration rituals.
The MET museum description of the mock-up leopard robe of the high priest Harnedjitef mentions that the garment was “fastened over a shoulder or hanging down the back”. Seshat’s iconography shows the female figure fully wrapped with it. I imagine that the pelt, or more accurately the two pelts, are sewn together. The seam is visible on the side of the figure. I can then interpret the two lines on the side of the legs as the tails of the animals.
I initially thought the goddess was wearing this garment as a chasuble or pinafore above the traditional linen dress. Archaeology literature seems to disagree and notes that Seshat is almost always only wearing the leopard dress. There are different opinions on why, ranging from her roles in rituals to the fact that she may be one of the oldest deities of the Egyptian pantheon.
The leopard’s murder mittens stops somewhere around the middle of her arms, and the hind legs paws are seen on her calf. The Ramesseum relief shows that there seems to be a dress underneath that goes just over the goddess’s ankles.
Necklace
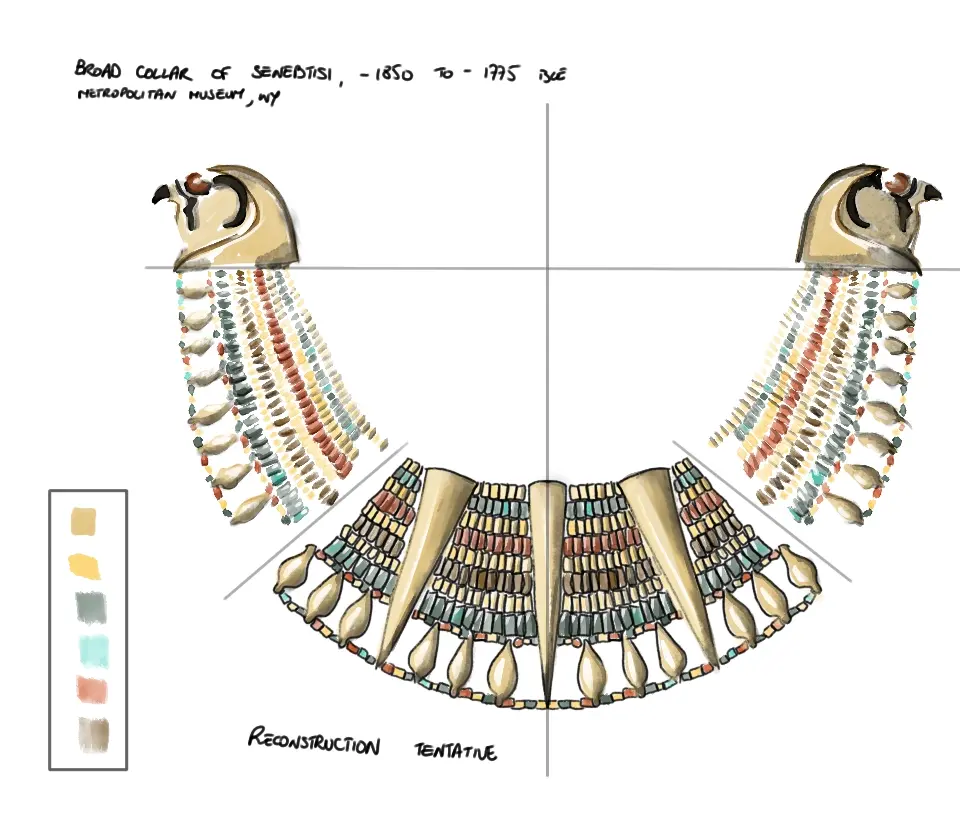
On the Ramesseum’s relief, the lady wears a rich broad collar necklace that I identified as something along the shape of the broad collar of Senebtisi, in the Metropolitan museum’s collection.
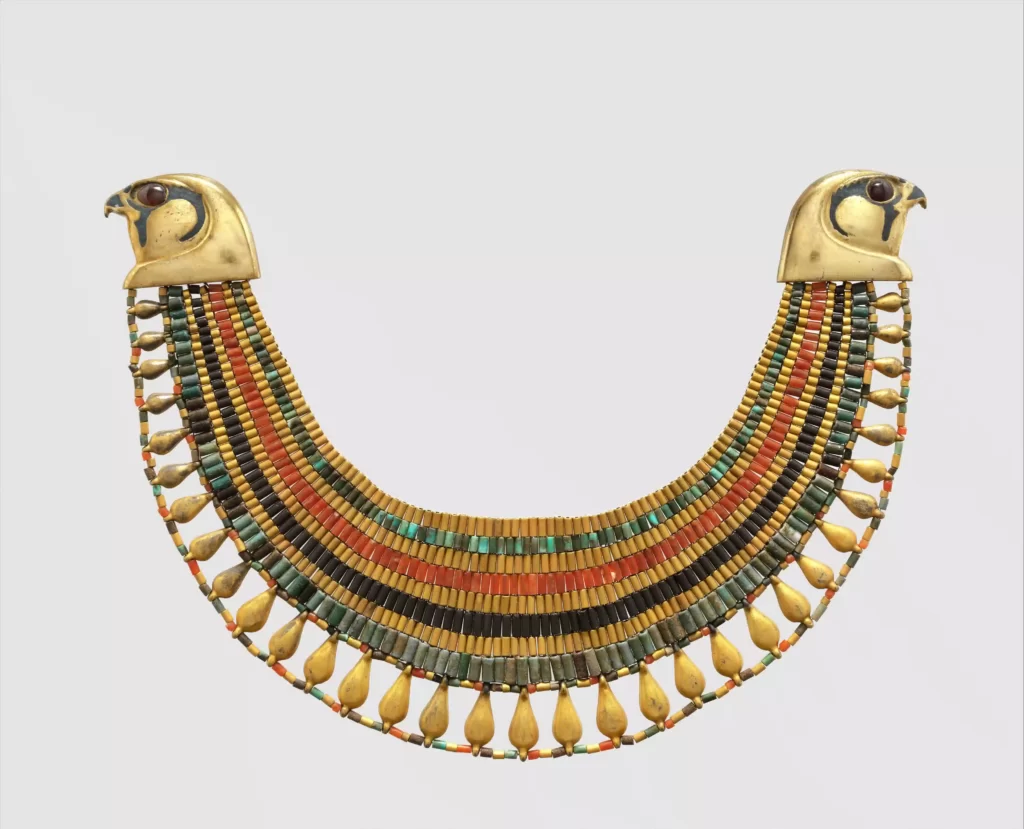
There seems to be triangles pointing downward that I’ll have to integrate somehow.
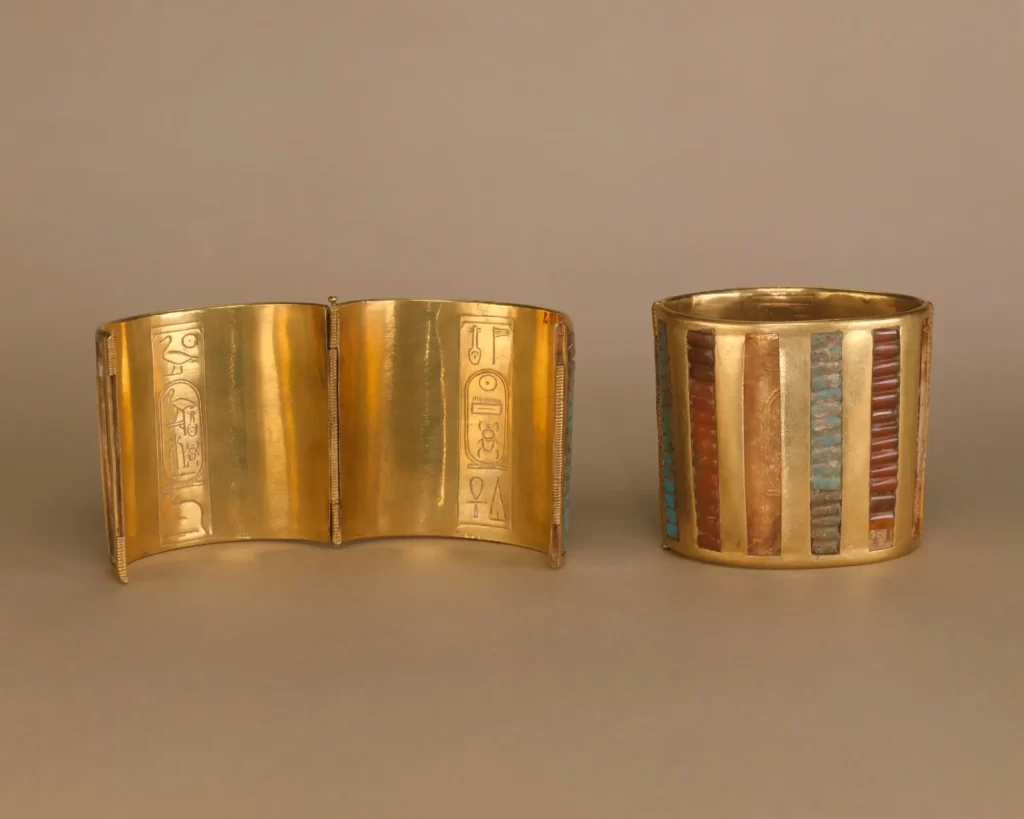
The bracelets are not always present on Seshat’s figure reliefs. As a statute symbol, I think I should try to integrate them.
I found this example of hinged cuff bracelet made of burnished gold inlaid with carnelian and turquoise and dark blue glass also from the Metropolitan museum collection.
Slab shapes : the old and the new
Overall shape
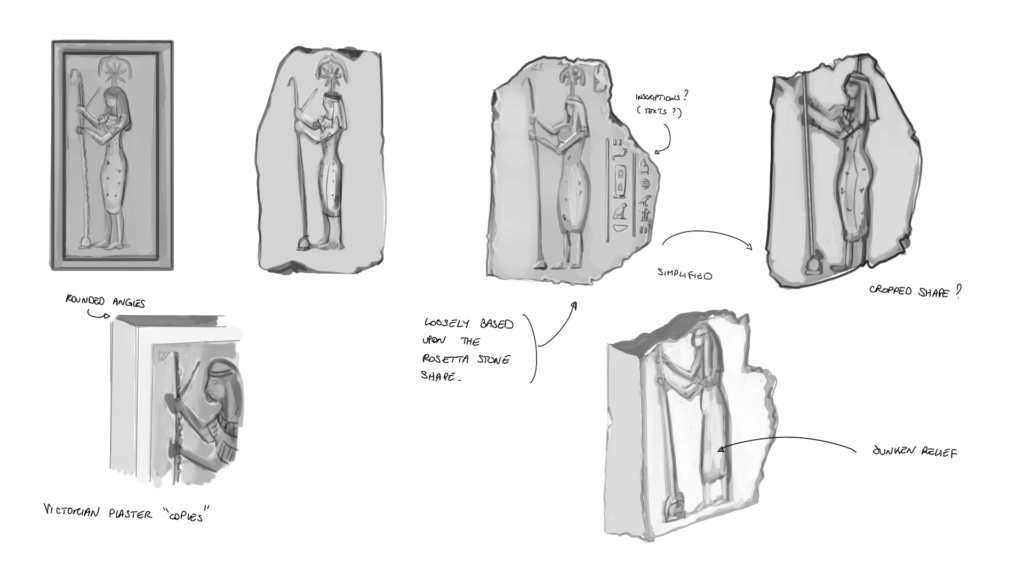
These thumbnail sketches for the overall shape of the piece show the path I took for creating the slab on which the figure lays. It was initially a very simple rectangle with a border. The figure would stand as a regular relief.
Then, with the idea of the realistic-ish fake, came the importance of the sunken relief and the irregularity of the shape. As if the carved piece was taken either from rubbles or hammered out of the stone, breaking along its weaker lines.
Here came the notion that viewers might respond better, albeit unconsciously, to a known shape. What is one of the most well known piece of that kind ? In my opinion, I think most people would recognize the Rosetta Stone. Both historically important and endlessly referenced in archaeology related movies and series.
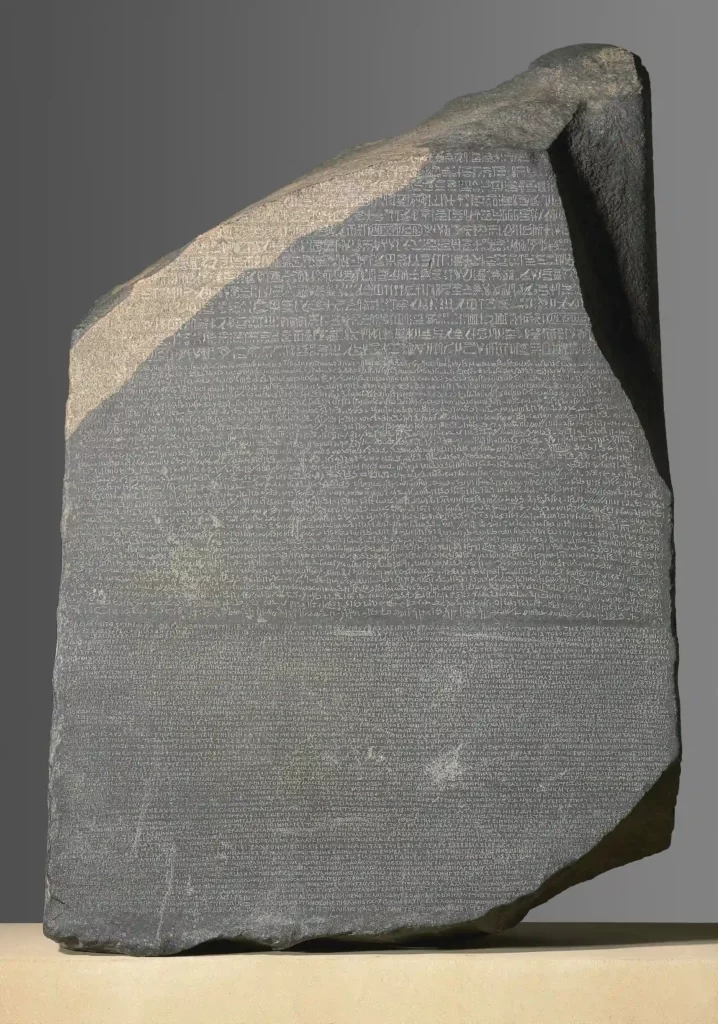
In both cases, the simple rectangle and the irregular shape allows for a lighter geometry density for the slab alone. That is good for a web version.
However, the figure itself is highly detailed, therefore with a very dense mesh. That is bad for a web version.
One solution is to create a high poly and a low poly version of the piece, and then bake the normals from on to another to extract the figure shape. Then, this map can be used in the render engine to trick the light into shaping it while viewing.
It works well with a little tweaking and refinement.
But it renders a regular relief. That is fine for the plaster inspired idea. But I need a sunken relief for the archaeologic one.
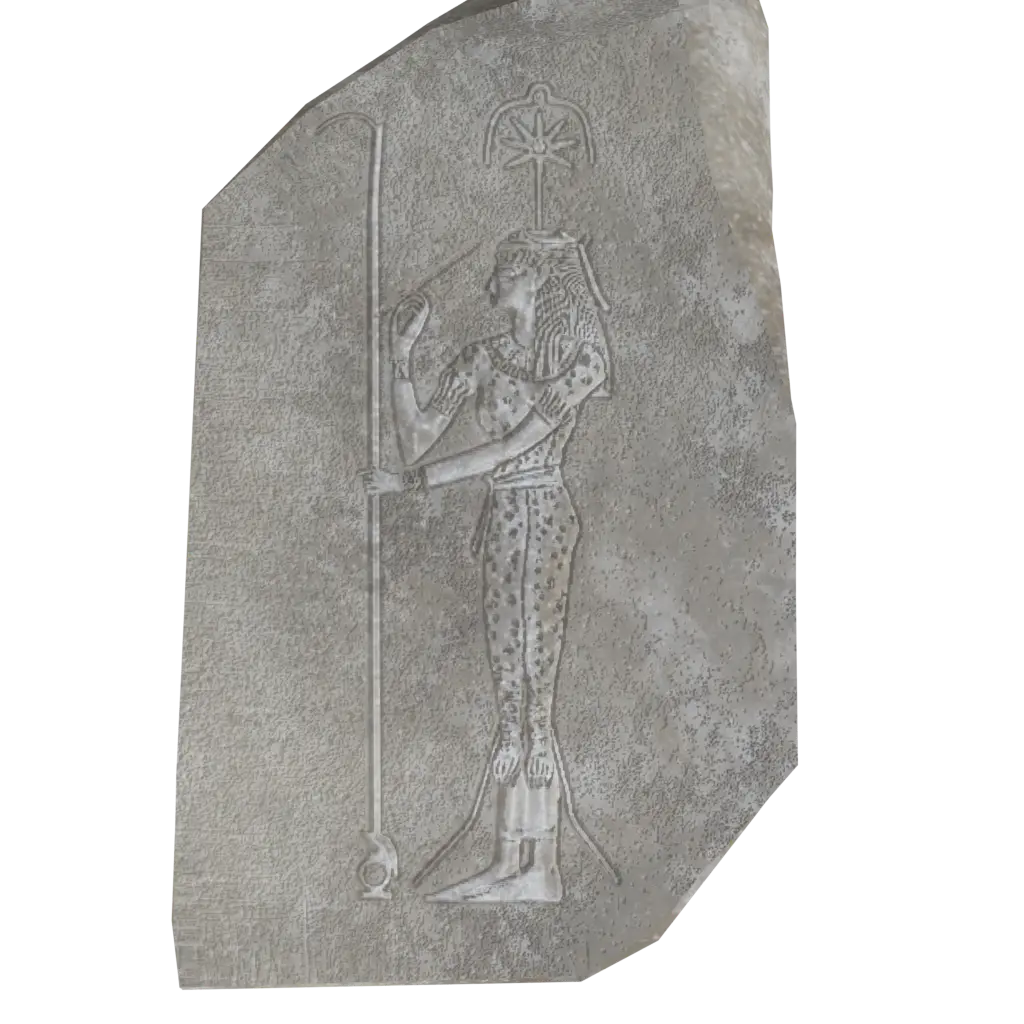
Sunken relief and paracetamol
And this is where the headache begins. Resulting in me trying to carve a bar of soap to try to understand how I can do things “cleanly” while not making my PC overheat !
Note: The soap is fine, albeit a little diminished.
What’s a sunken relief? It is a technique of relief sculpture in which reliefs are carved and set within a sunken area. The relief never rises beyond the original flat surface. This technique seems largely restricted to Ancient Egypt.
Apparently, researchers have tried to emulate an automatize creation of sunken reliefs technique. In a paper from 2018, they details the tests and creation of a mathematical solution for extracting sunken relief from a single image using line enhancement. I was unable to find a user-friendly method to do so that gives the results I wanted, and the maths involved in the paper are above my capacities ! Also, I wouldn’t know how to implement them using the tools I have.
So, back to the trials and errors method. It still is somehow scientific. I cling to the idea that no result is still, technically, a result…
So far, I have these conclusions:
- Boolean operations are not a good idea because the cleaning time is outrageous (no real surprise there).
- UVs and Normals are the way to go, but this creates artefacts that I can at best try to hide or lessen the impact of.
- The “regular” baking operation from high definition to low definition doesn’t work out-of-box in that case. The still renders are okay, the web version is not. I need to do heavy adjustments to obtain decent results.
Materials soft and hard
Plaster
The plaster material isn’t that much of a difficulty for that piece. A simple PBR node system in Blender should suffice.
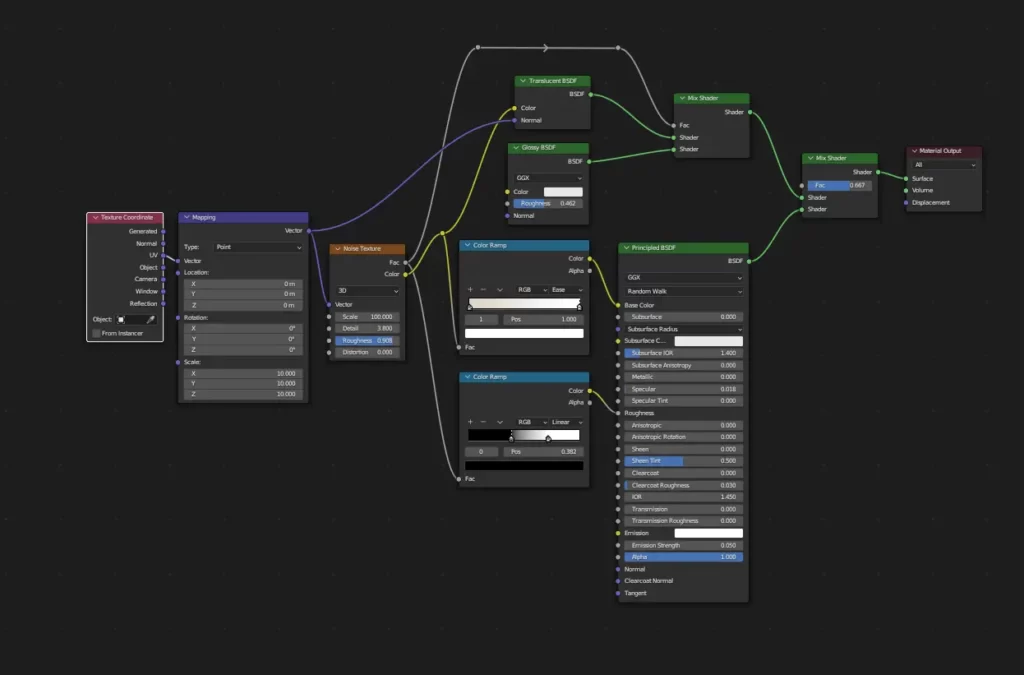
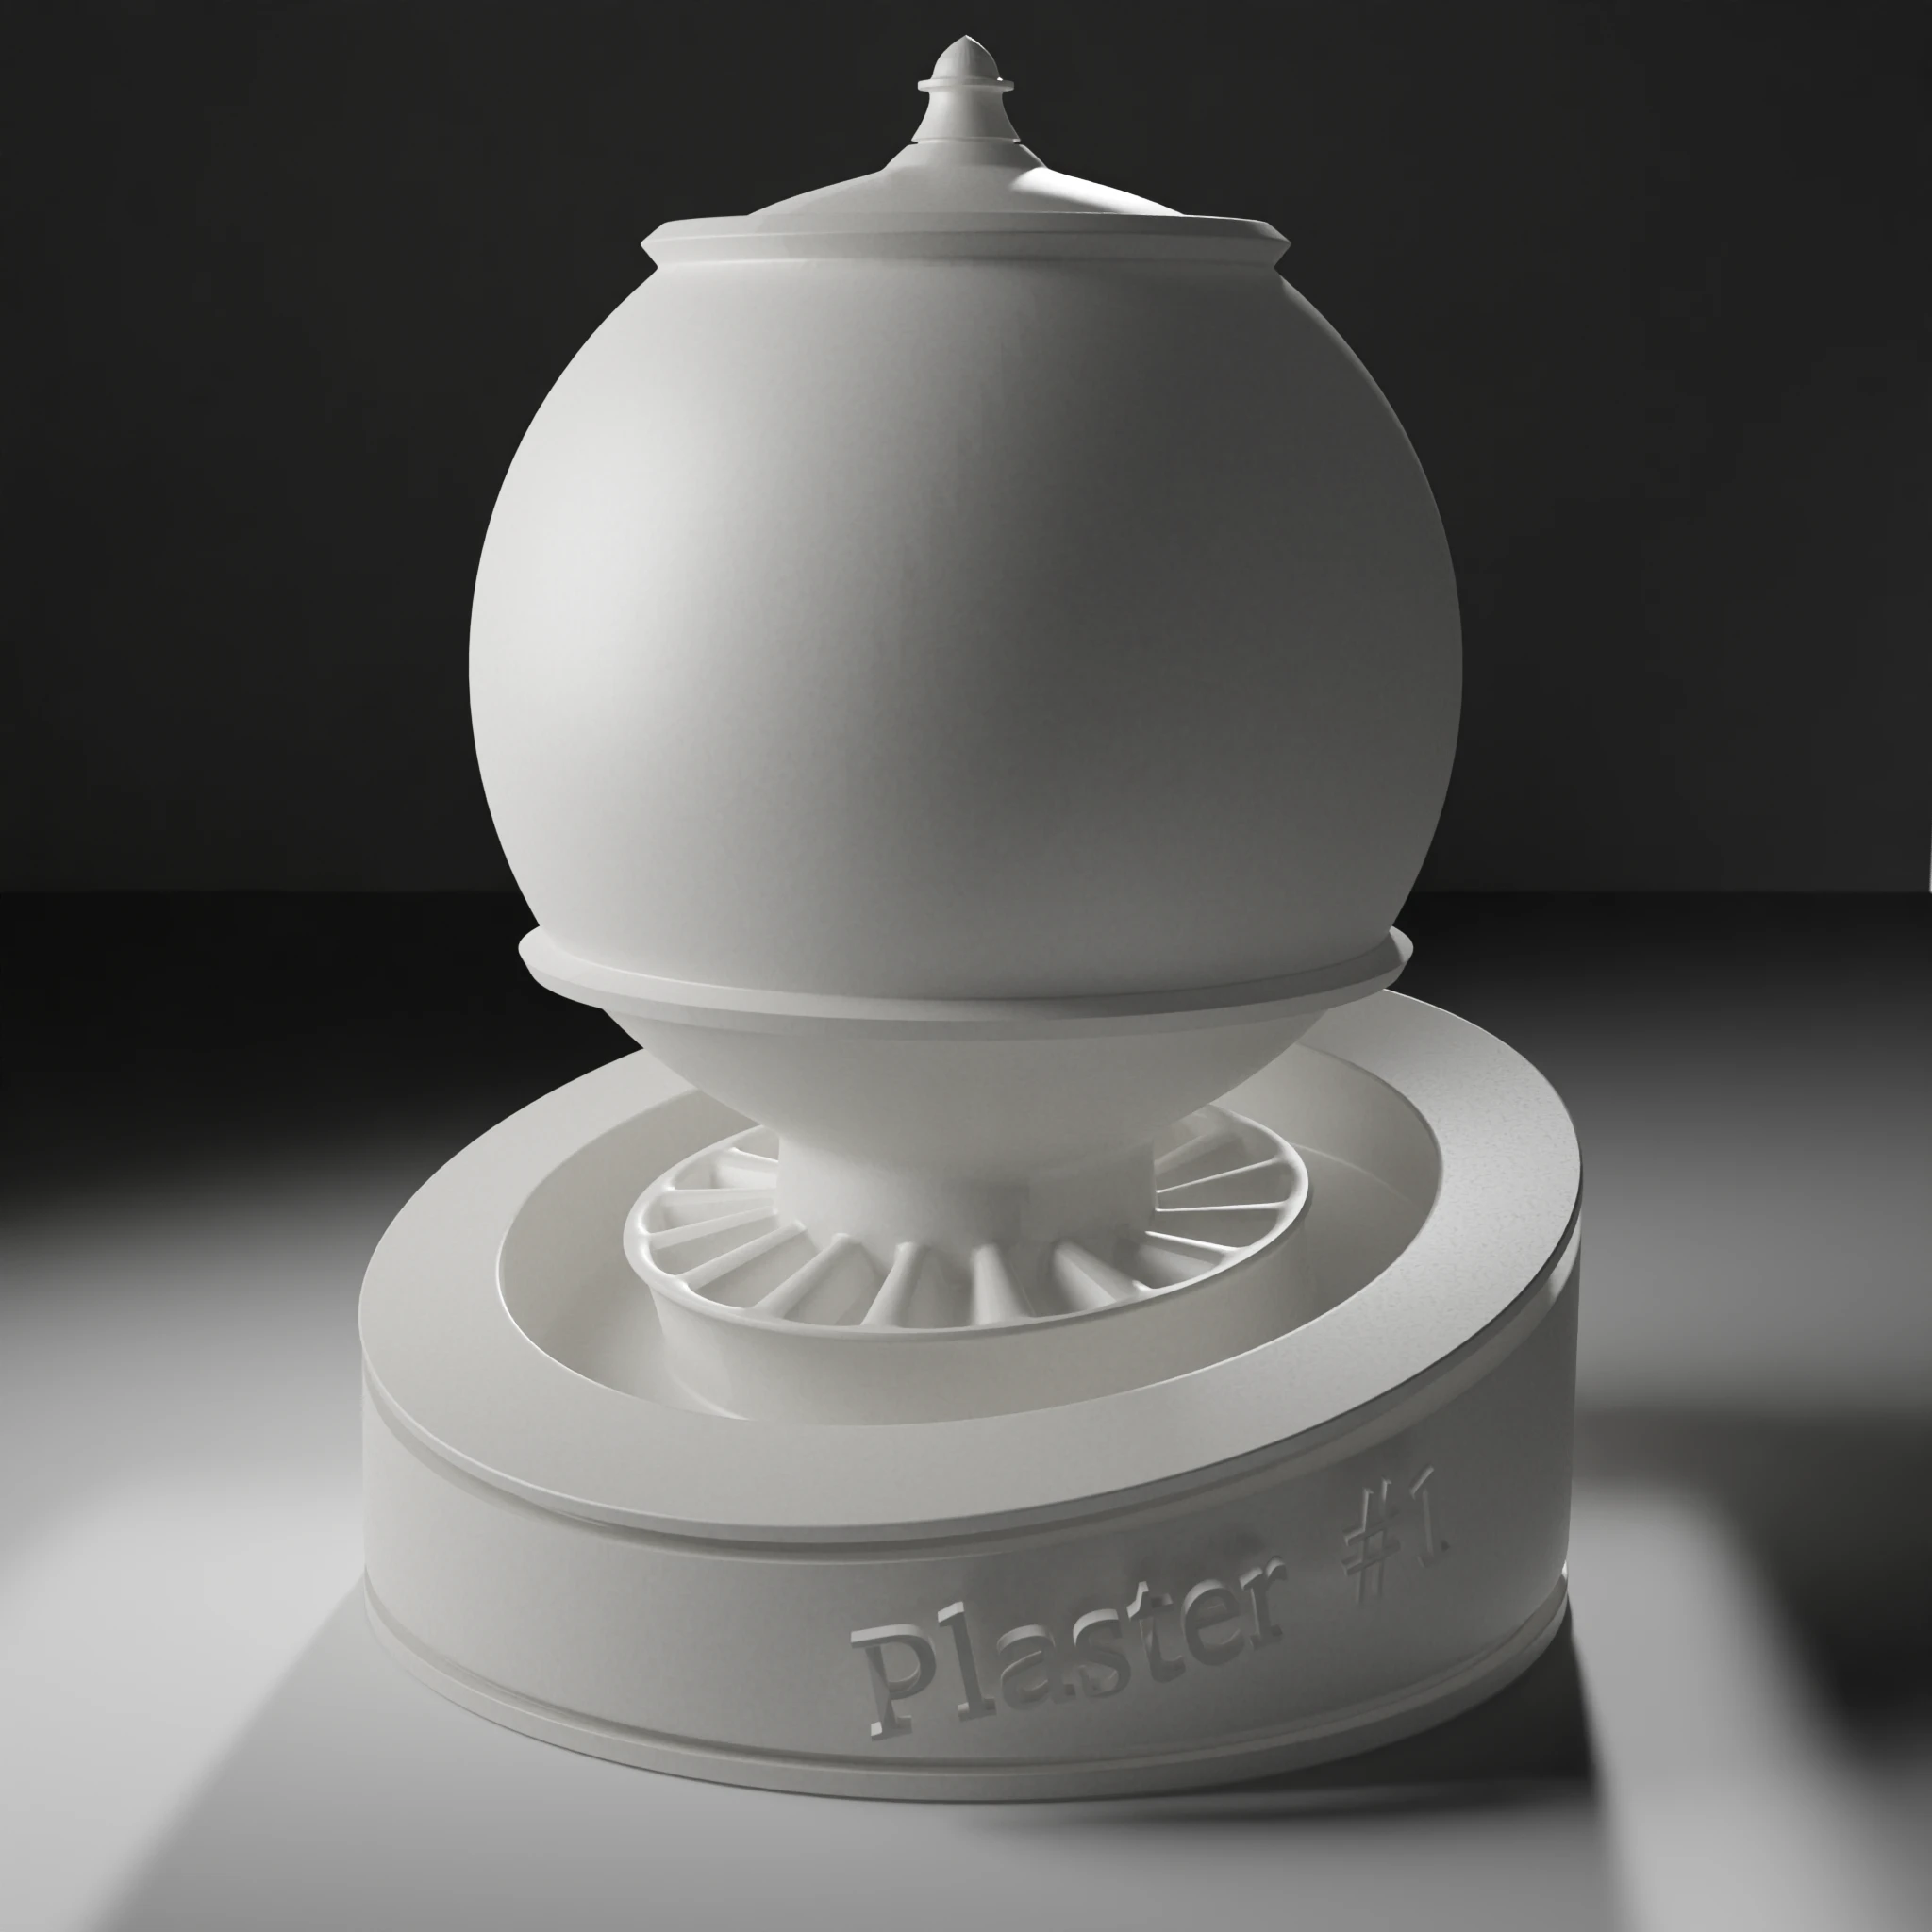
Because of the way my 3D web viewer is coded, using texture maps is easier than creating a material in Three.js without taking too much calculation weight. So, this material will be baked into maps.
Granite texture
The inspiration for the second material comes from the original granite statue in Luxor that bears Seshat’s most famous representation.
Situated on the back panel of the throne of the western colossus of Ramses II at the entrance of the Luxor Temple, it is made of “red granite”.
Granite as a power status
This article from the British Museum mentions that the statues from the temple were carved out of granite from the royal quarries at Aswan, in the far south of Egypt. The article mentions that “only the king was allowed to use this stone, which, as well as being very beautiful, is extremely hard, heavy and durable. These qualities make granite ideal for a sculpture intended to last forever, but also mean it is difficult to carve and transport. Granite sculptures were therefore an important statement of the king’s wealth and power. To enhance their impact, many royal statues were painted, and some were even inlaid with precious metals and stones.”
I will not try to paint or inlay the piece, I don’t have enough references for that.
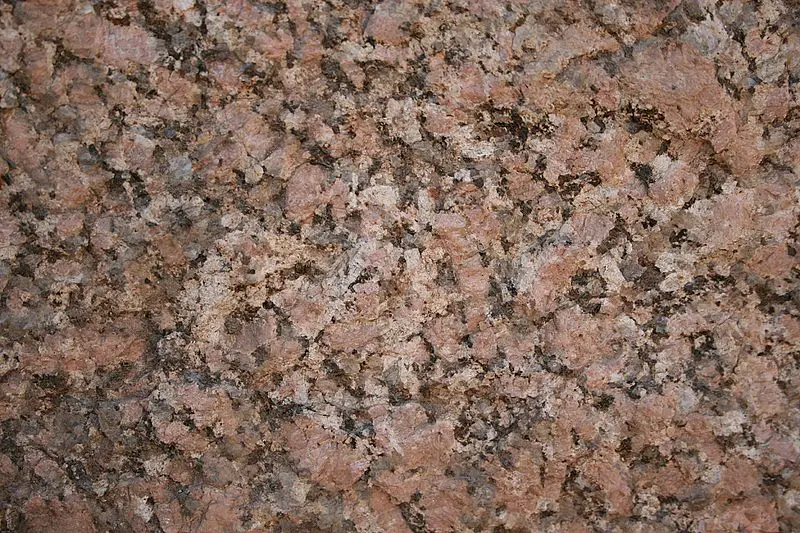
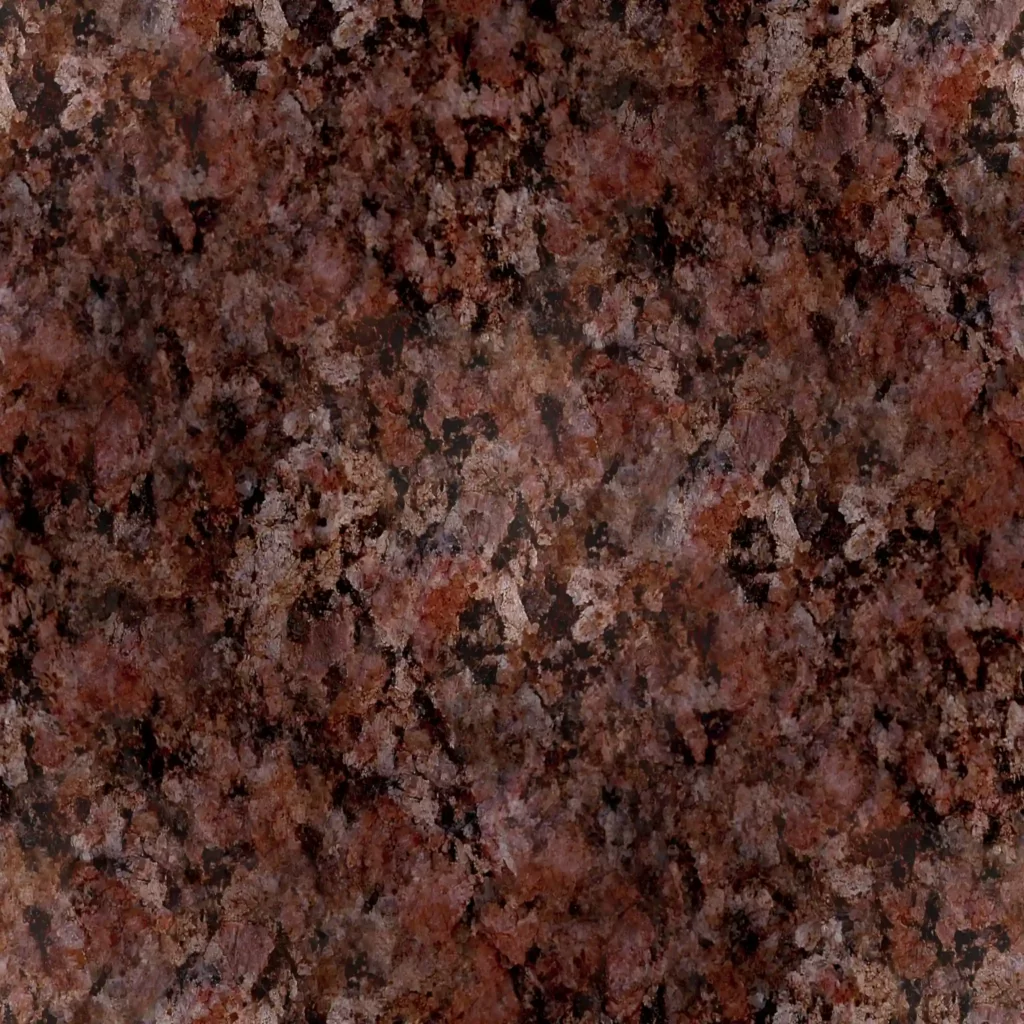
Southern quarries of Aswan, Reddish-pink hues and coarse grains material
The southern quarries of Aswan are also known as “The shallal quarry” or “Ramses II Statue Quarry”. There doesn’t seem to be any archeological evidence of that but the remains of a large statue of the king as Osiris laying there.
There have been extensive studies of the quarries such as this survey done by the Supreme council of Antiquities in Egypt and the Geological Survey of Norway society. In this study, the archeologists and geologists note that “the most widely used type is the Aswan red or pink granite, which is essentially coarse grained to very coarse grained…”
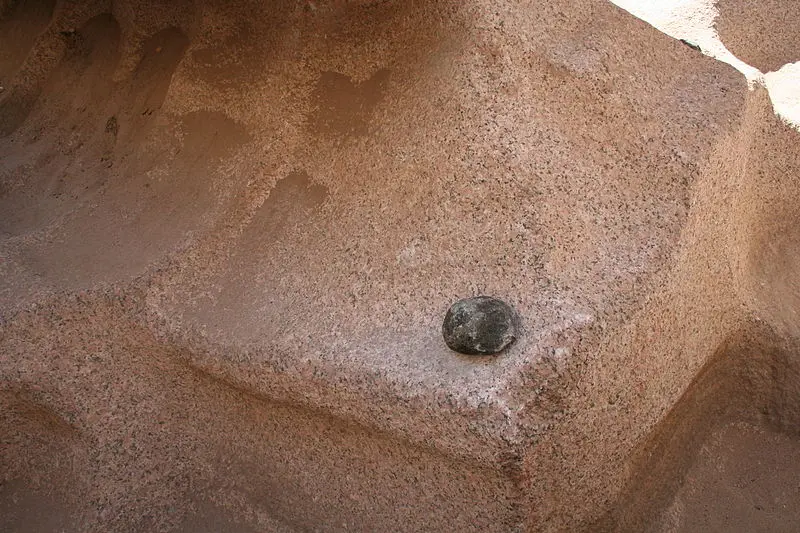
For those of you that wonder what it looks like, here it is:
Dust, sand and heat
But one has to make do with Egyptian climate too ! That means sand, wind, bright light and heat that dull, crack the material and fade the colours.
Besides, there is a darkening of the surface of the stone that takes the form of blackened downward streaks. I’m not certain where it comes from.
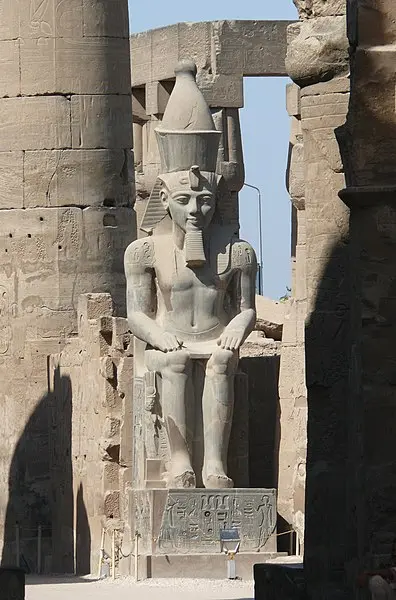
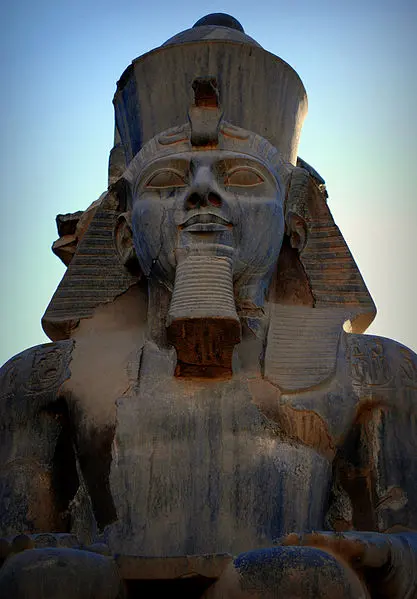
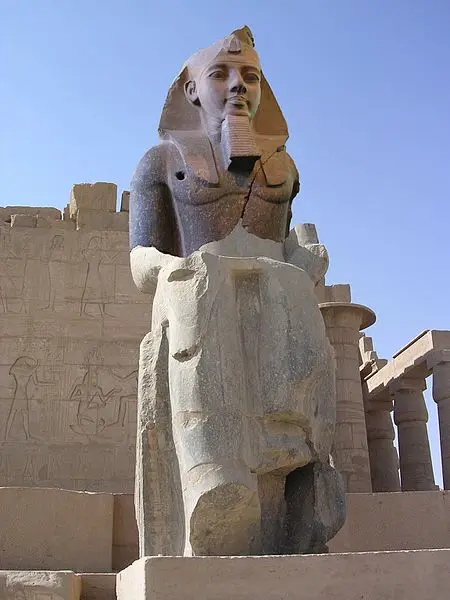
The juxtaposition of the two stone’s condition, one restored and one kept on site, is particularly interesting in the last image. It shows the gap between the base material and the actual condition. It gives us a direction in order to create a convincing material.
Every artefact has a story, even a made up one
Remember I’m trying to emulate a “realistic” piece. Let’s create a little story to that effect that can justify the choices I make from now on.
Let’s say the relief was looted from one of the side temples on one of the known sites under the cover of night. It then was hidden for a while and went from caves to shady shops storage rooms until it was sold to a wealthy person. It then was treated as the crown piece of a collection, thoroughly guarded and jealously kept out of sight of most to be reserved for the viewing pleasure of selected fews.
Now, you probably think it’s too much for a spoof piece. It may be. But I like telling stories !
Also, the conservator deep inside me sees a few reasons to be as thorough:
- the side temple situation allows the loot story to be realistic. Most archeological digs do not have enough man power to protect every part of a big site. It is true now and it was true then (insert any period of times). The side structure and parts deemed of less interest are easy prey. Yet, the operation must be quick and as quiet as possible. That’s not a easy task when you have to hammer and crowbar a sculpture from a wall ! Chances are there will be casualties. Hence the irregular shape and cracks of the piece.
- the cave and storage part allow for the piece to have been de facto protected from further alterations. At best a very light cleaning could have taken place but most assuredly the piece was mainly moved. Besides, it emphasizes its origin and can seduce a client. The surface of the piece can now reflect that: the underlaying red-pink hue is considerably lessen by the weather condition but less so than the pieces still in place.
- inside the collector’s house, the piece would be protected from the elements and also from light. Regularly dusting and careful manipulation can have a effect on the surface removing a little of the dust at a time. The relief can then be cleaner and the colours a tiny bit shinier. To be close to old conservator’s tale about these pieces, there can also be a few cleaning tentatives on remote places on the piece. As well, there almost certainly will be a light yellow tinge. Why you ask ? Tobacco smoke. Ask any conservator and they can tell you about that time they spent hours removing the darn brown-yellow oily, sticky foul substance from the surface of an object.
Process
Now, the recipe for the material is made relatively simple.
First, the base is the Aswan red-pink granite, made tileable and color tweaked.
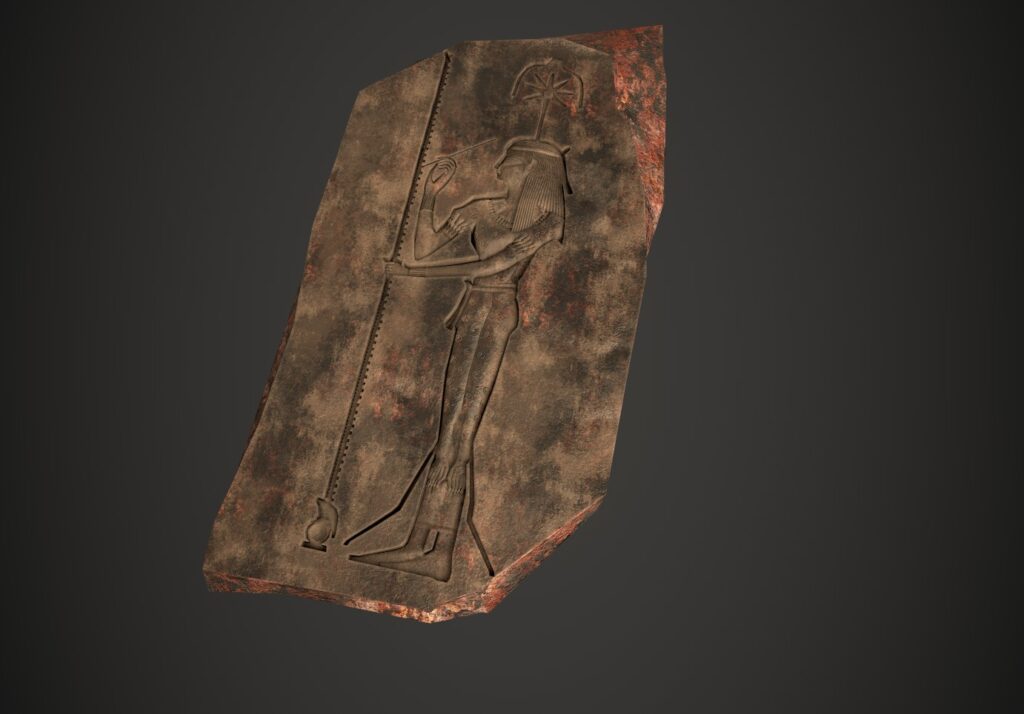
Then, add the reliefs from mineral concretions and deposits. Top it off with a sprinkle of caked dust and a dollop of nicotine.
Here’s my result made in Substance painter (and I stop there, despite the little voice inside of me saying I can go further). I do have the plan to redo the whole material using Material maker, but to keep moving on, it’ll be for another piece.
3D view rendering
After a passage in the dark side to prepare it for the viewer, here’s the final result !
See the full screen view (this will open a new tab in your browser).
How about a little context, now ?
Now we have a satisfying piece, why not try to go a step further and add a new part of our object’s story ? Let’s say the old collector passed away.
Sorrows, prayers and all that.
Being a respectable English Lord, his collection is then dispersed to various heirs and some of it end up in a museum. Because of reasons.
No one would dare ask for the provenance of the pieces from a family that is a pillar of society.
So, let’s put the piece in its new forever home. And let’s keep the Victorian theme started with the plaster version and take this whole thing to 1850s.
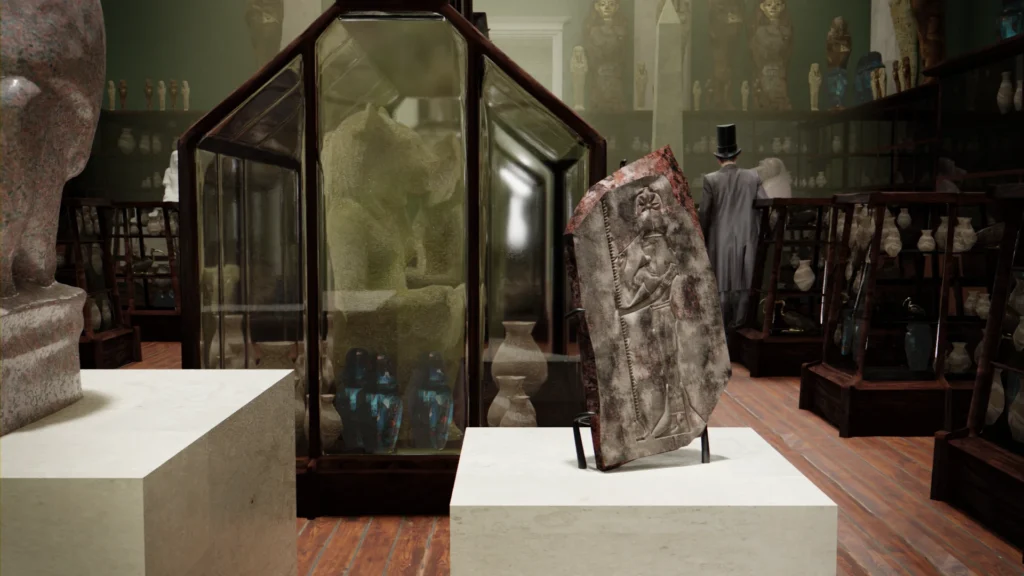
If you’re interested in the odds and ends about creating a Victorian Egyptian Gallery on the fly, follow this link to learn how I constructed this scene !
Cabinet de curiosités
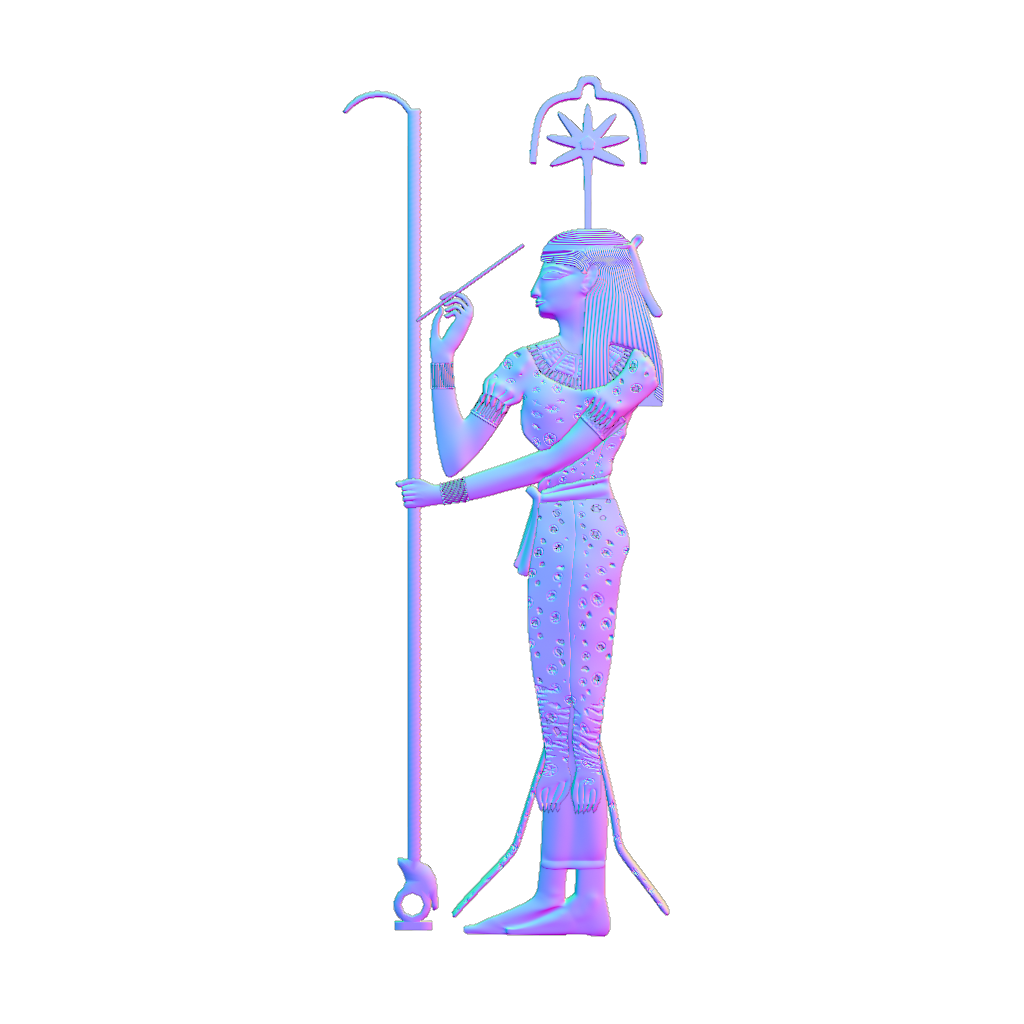
I’ve thought about what you, dear reader, can gain from my little foray into antique Egyptian archaeology. Maybe you’d like to incorporate the goddess inside your crafts pieces to diffuse the idea of knowledge she represents ?
Your turn to play !