

A pastiche hypothesis
The following texts and images are the results of a training exercise to go from the pictures or the description of an artefact to the creation of a 3D digital double, sometimes restored version of it. If you wish to know more about the process, explanations are in A journey into learning a (3D!) restoration process workflow article.
It all started on a dark and gloomy night when my insomniac self was perusing the depth of eBay. I was not really looking into anything, I swear. I stumbled upon this derelict little box, advertised as “to be restored”. That is an understatement to say the least. I’ve already encountered these type of boxes before and know two things. They are widely found all over Europe and the metal they’re made of is “almost impossible to restore neatly”, to quote a metal conservator colleague (though her very words were more, shall we say, “floral”?).
I’m always looking for 3D practice pieces and after a quick glance at the very low price, decided upon buying it. My idea at the time was to model a digital version of it to try an hypothesis of reconstruction, then contextualize it as best I can. This is what we are endeavouring to do here, with the added bonus of attempting an actual transformation of the piece using 3D printing. I will try my best to treat the artefact just as I would any other left artefact in my care for the initial phase of research. Those of you that are not used to these proceedings can have a (very limited) glimpse of what a restoration process entails.
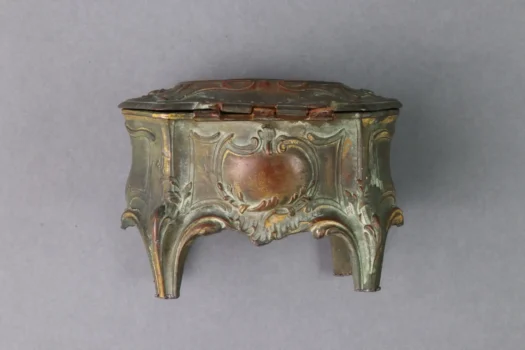
Title: Jewellery box in the Louis the XVth style, with a genre painting scene on top
Datation: ca 1914
Provenance: Europe
Dimensions: Height 78 x Large 108 x Depth 77 cm
Media: Metal (spelter?)
Description and Historical context
Dating a pastiche
First thing first, despite its sorry appearance the overall shape and decor can clearly be identified as Louis XV style. It imitates Louis XV style furniture commodes, with the added bonus of the genre painting scene on top. The overflowing decor and the -heavy- silhouette give a distinctive Rococo feel. You can think of it as Louis XV look with added marshmallows and diverse sugary things, all topped with -horror- ribbons and bows everywhere.
However, the omnipresent vegetal theme and its controlled sinuosity raised an alarm bell in my head because of its almost art nouveau look. Also, 18th century pieces are never that cheap whatever state they’re in. A little research on the web produced a plethora of similar boxes, stylistically close. I was then more or less convinced of it being a modern pastiche from the beginning of the 20th century (they usually are).
I managed to find an actual reference to it in a catalogue: “Jouets, étrennes, étrennes 1914 Louvre, Noël 1913-étrennes 1914, catalogue commercial”, from the Grands magasins du Louvre. The box is clearly described, being sold as “made of golden metal”, and the dimensions are congruent with our piece.
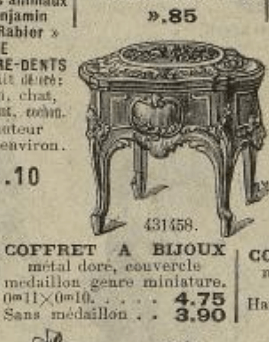
On an auction website, page now gone, an exact copy in good condition was described as “Old spelter (“régule”) jewellery box with golden patina, height: 10 cm, length: 11 cm” and sold for 15€.
The deliciousness of trinkets and knick-knacks
As you may have deduced from the catalogue’s title, such boxes are sold as presents for the holiday season. The word “étrennes” refers in French to gifts given in December and January, though initially more intended on celebrating the new year.
These objects are mass-produced and their quality is, well, in relation to their relatively low prices. French INSEE gives a conversion price at around 17€ for our box.
Finishing works are meant to be kept at a minimal and moulds are eroding fast. In our case, the decor is sometimes barely there, only a soft bump on the metal skin but most likely deemed “good enough”.
But, with its golden look and shiny surfaces, I’m certain it made someone happy. Remember, it’s the thought that counts !
Condition report
Because this is an exercise, I will try to do as full a documenting survey of the piece as I can and as I would any object I’m working on in the workshop. I will have to amend scientific requirements a little though because I do not have access to specialists and heavy lab equipment for analysis.
Photographic survey
Reference photographies
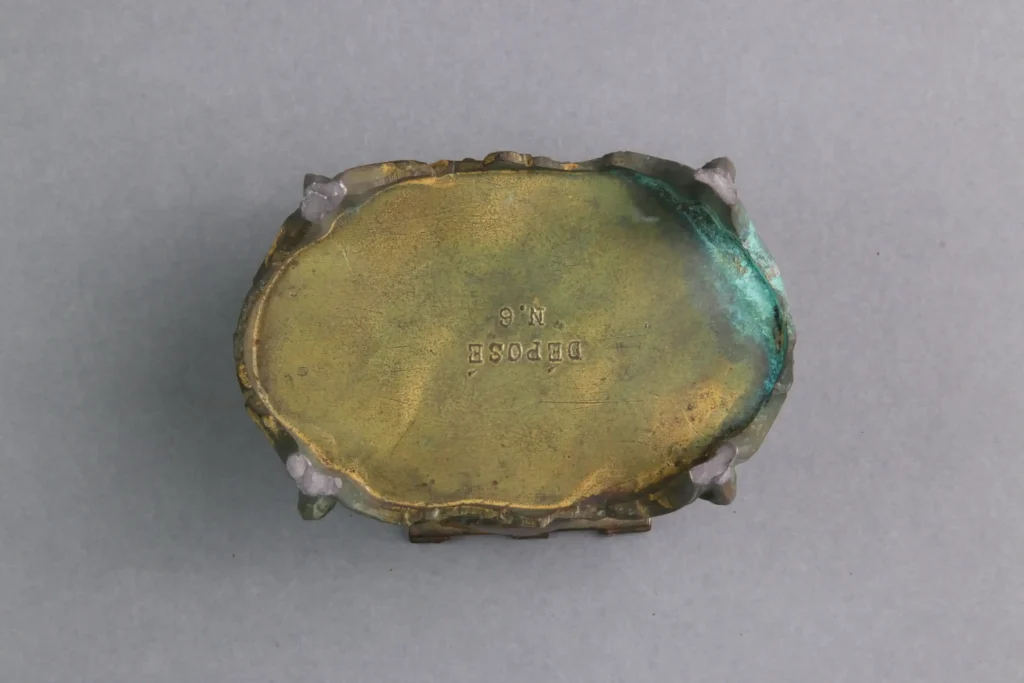
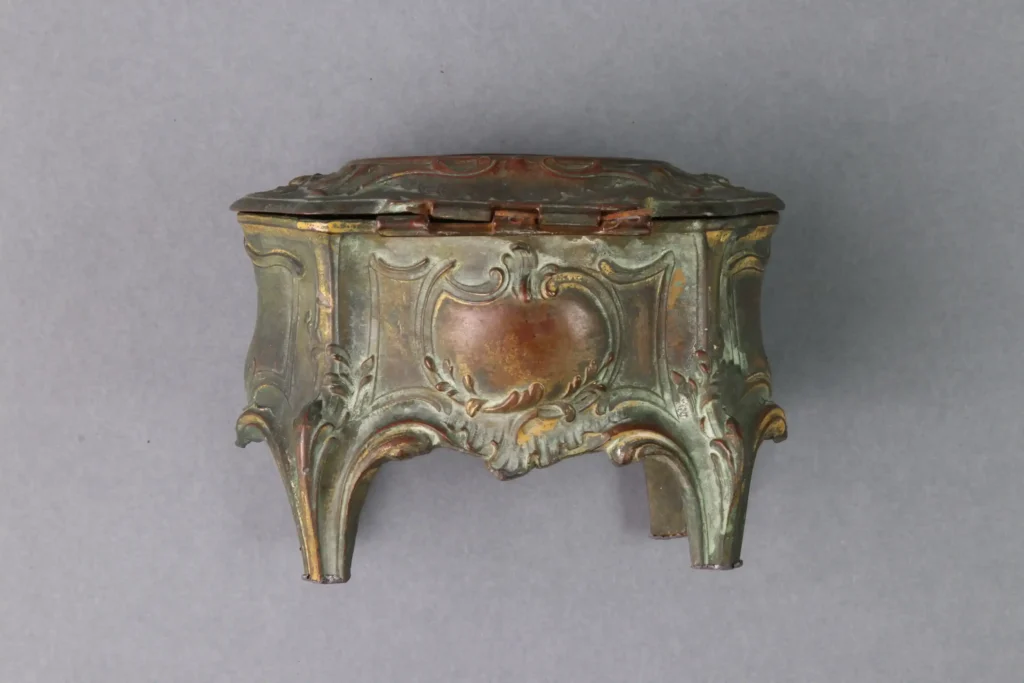
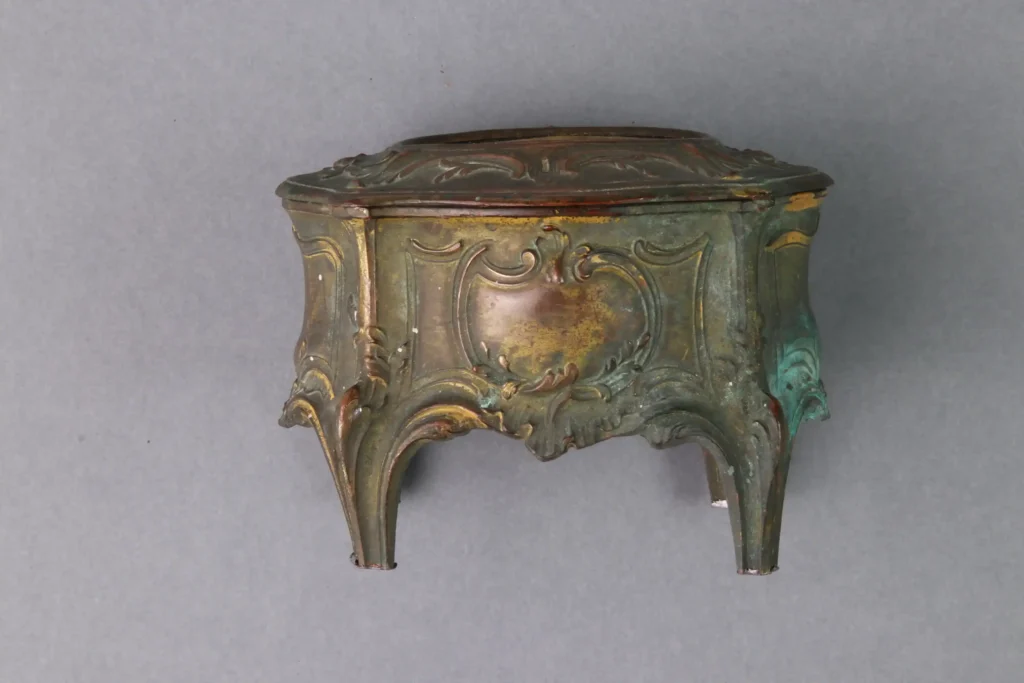
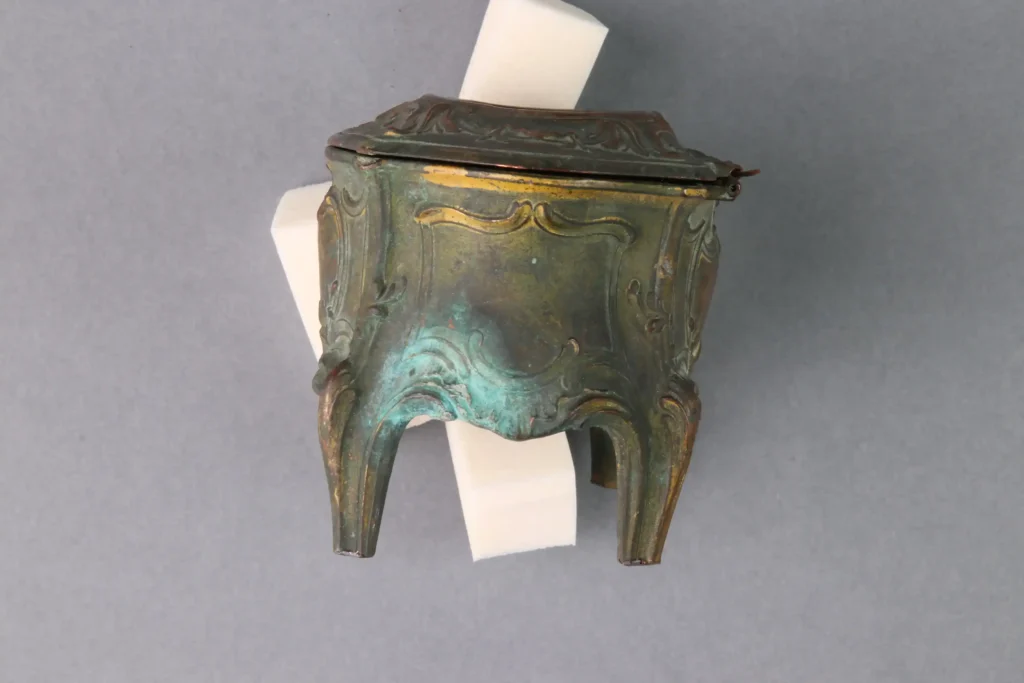
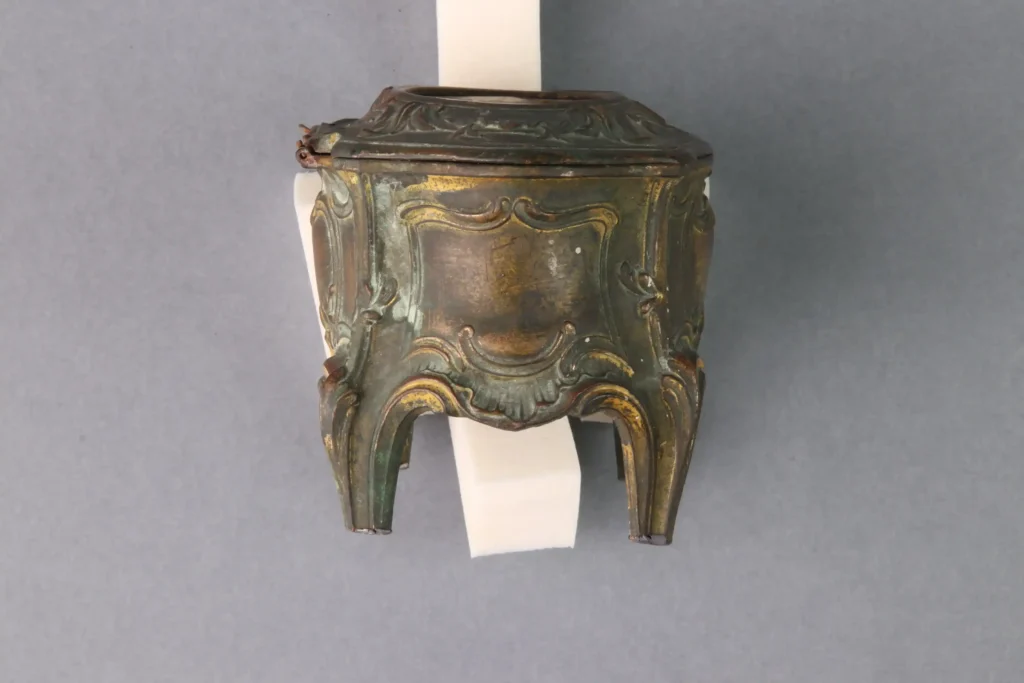
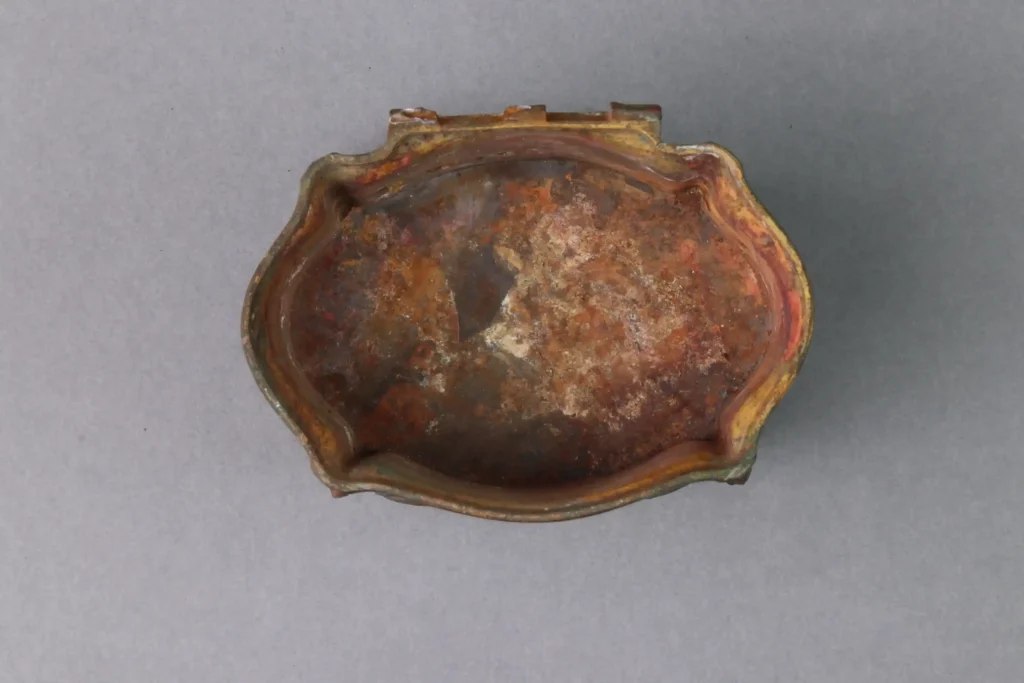
Let’s start off with a regular photographic covering of the piece. It’s done in controlled light, with colorimetric references for white balance.
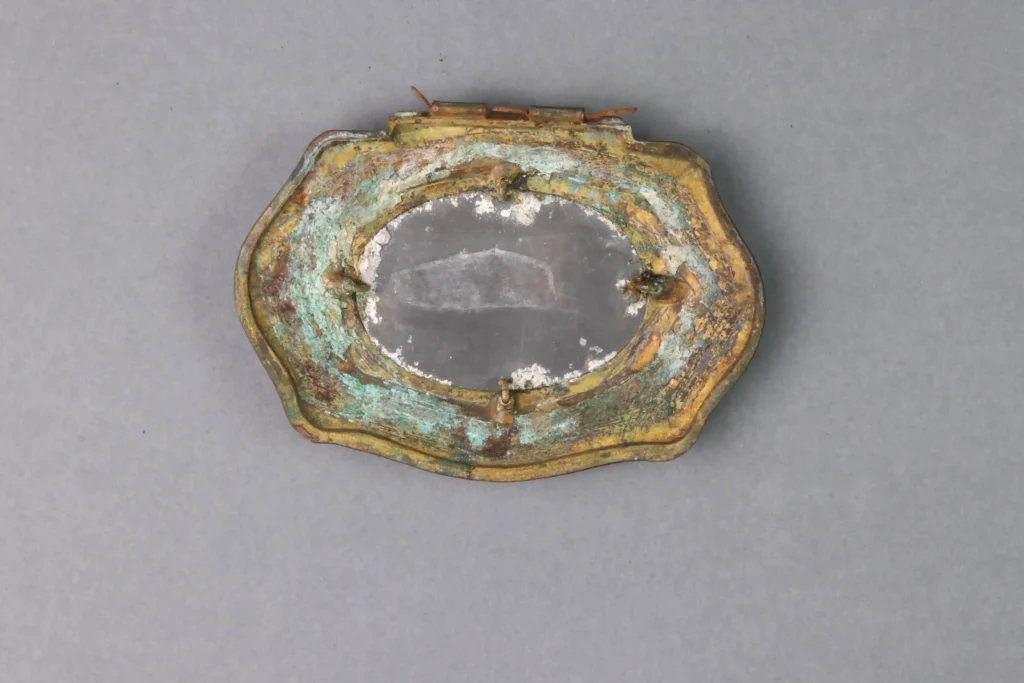
Microphotography
Using my trusty-ish hand held USB microscope, I was able to get the following images of areas of our object.
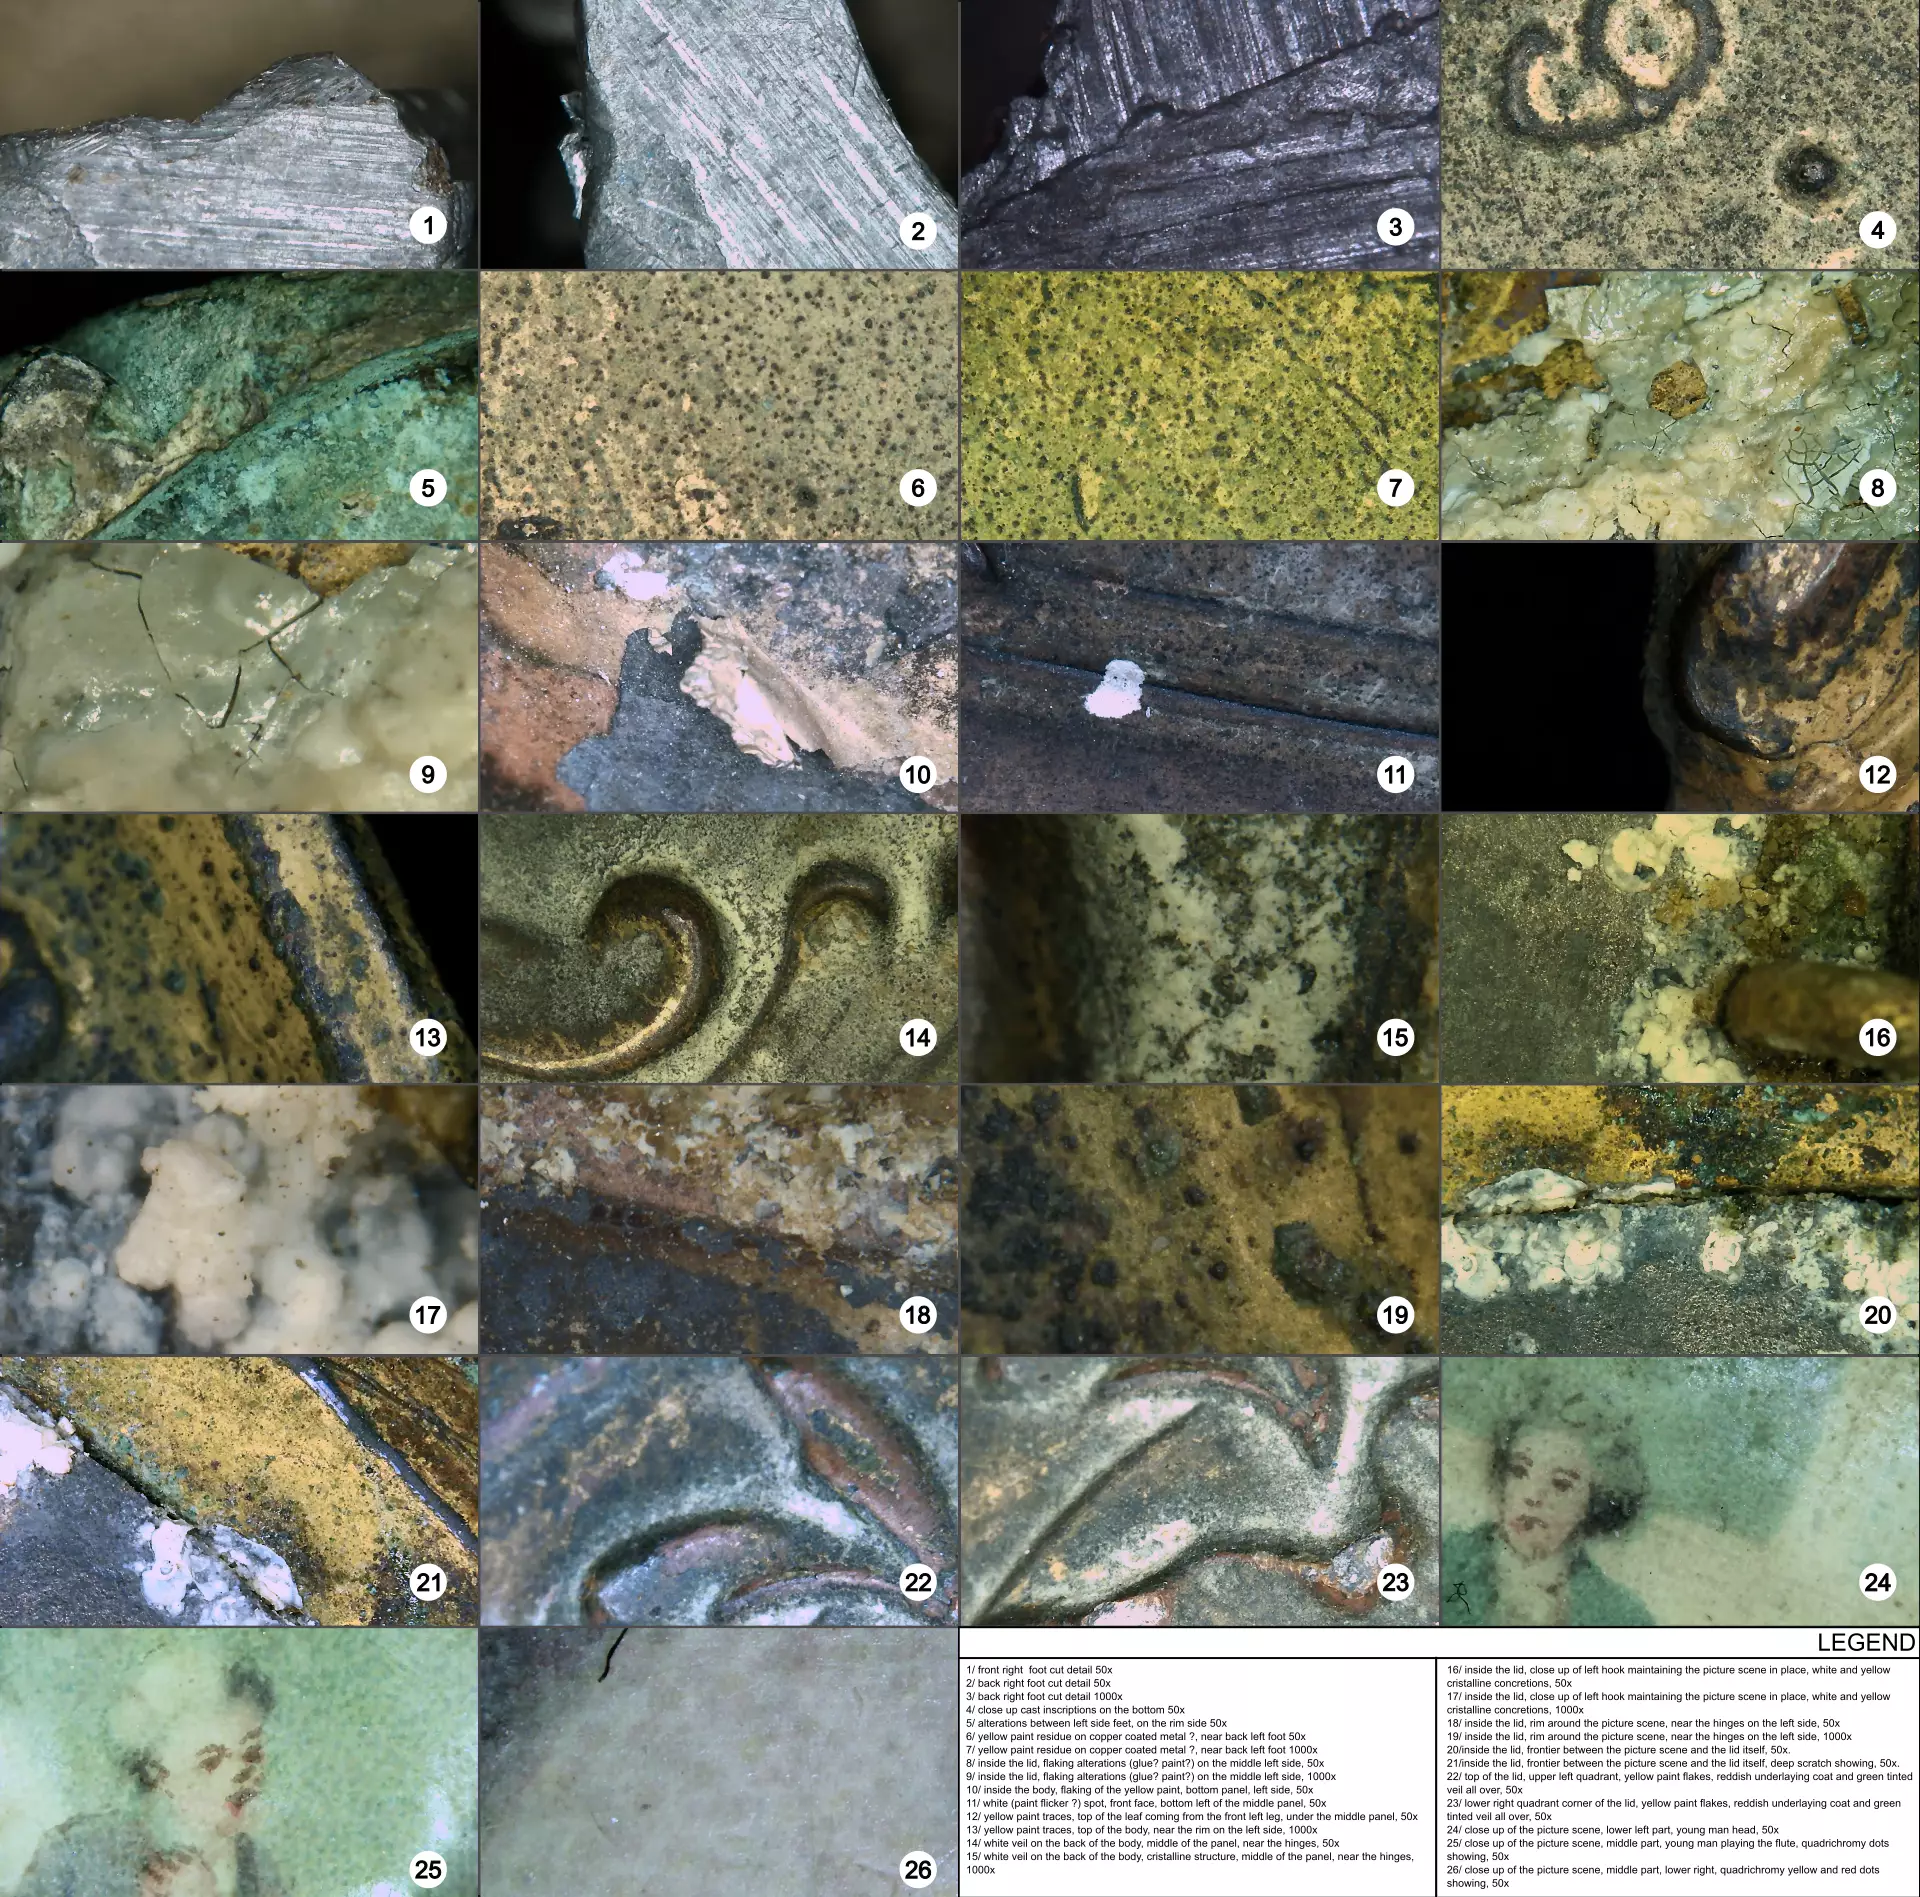
1/ front right foot cut detail 50x, showing white metal
2/ back right foot cut detail 50x, showing white metal
3/ back right foot cut detail 1000x, showing white metal
4/ close up cast inscriptions on the bottom 50x, yellow paint spots and dark metal
5/ alterations between left side feet, on the rim side 50x, thick layer of verdigris
6/ yellow paint residue on copper coated metal ?, near back left foot 50x,
7/ yellow paint residue on copper coated metal ?, near back left foot 1000x,
8/ inside the lid, flaking alterations (glue? paint?) on the middle left side, 50x
9/ inside the lid, flaking alterations (glue? paint?) on the middle left side, 1000x
10/ inside the body, flaking of the yellow paint, bottom panel, left side, 50x
11/ white (paint flicker ?) spot, front face, bottom left of the middle panel, 50x
12/ yellow paint traces, top of the leaf coming from the front left leg, under the middle panel, 50x
13/ yellow paint traces, top of the body, near the rim on the left side, 1000x
14/ white veil on the back of the body, middle of the panel, near the hinges, 50x
15/ white veil on the back of the body, crystalline structure, middle of the panel, near the hinges, 1000x
16/ inside the lid, close up of rusted left hook maintaining the picture scene in place, white and yellow crystalline concretions at the base, 50x
17/ inside the lid, close up of left hook maintaining the picture scene in place, white and yellow crystalline concretions, 1000x
18/ inside the lid, red rust rim around the picture scene, near the hinges on the left side, 50x
19/ inside the lid, red rust concretions and yellow paint on the rim around the picture scene, near the hinges on the left side, 1000x
20/inside the lid, frontier between the picture scene and the lid itself, yellow paint, verdigris, red rust and white crystalline concretions, 50x.
21/inside the lid, frontier between the picture scene and the lid itself, deep scratch showing, yellow paint, verdigris, red rust and white crystalline concretions, 50x.
22/ top of the lid, upper left quadrant, yellow paint flakes, reddish underlaying coat and verdigris veil all over, 50x
23/ lower right quadrant corner of the lid, yellow paint flakes, reddish underlaying coat and verdigris veil all over, 50x
24/ close up of the picture scene, lower left part, young man head, quadrichromy dots showing, chromolithography (?), 50x
25/ close up of the picture scene, middle part, young man playing the flute, quadrichromy dots showing, chromolithography(?), 50x
26/ close up of the picture scene, middle part, lower right, quadrichromy yellow and red dots showing, chromolithography (?), 1000x
Dimensions
Calipers on hand, we can get all the measurements we need.
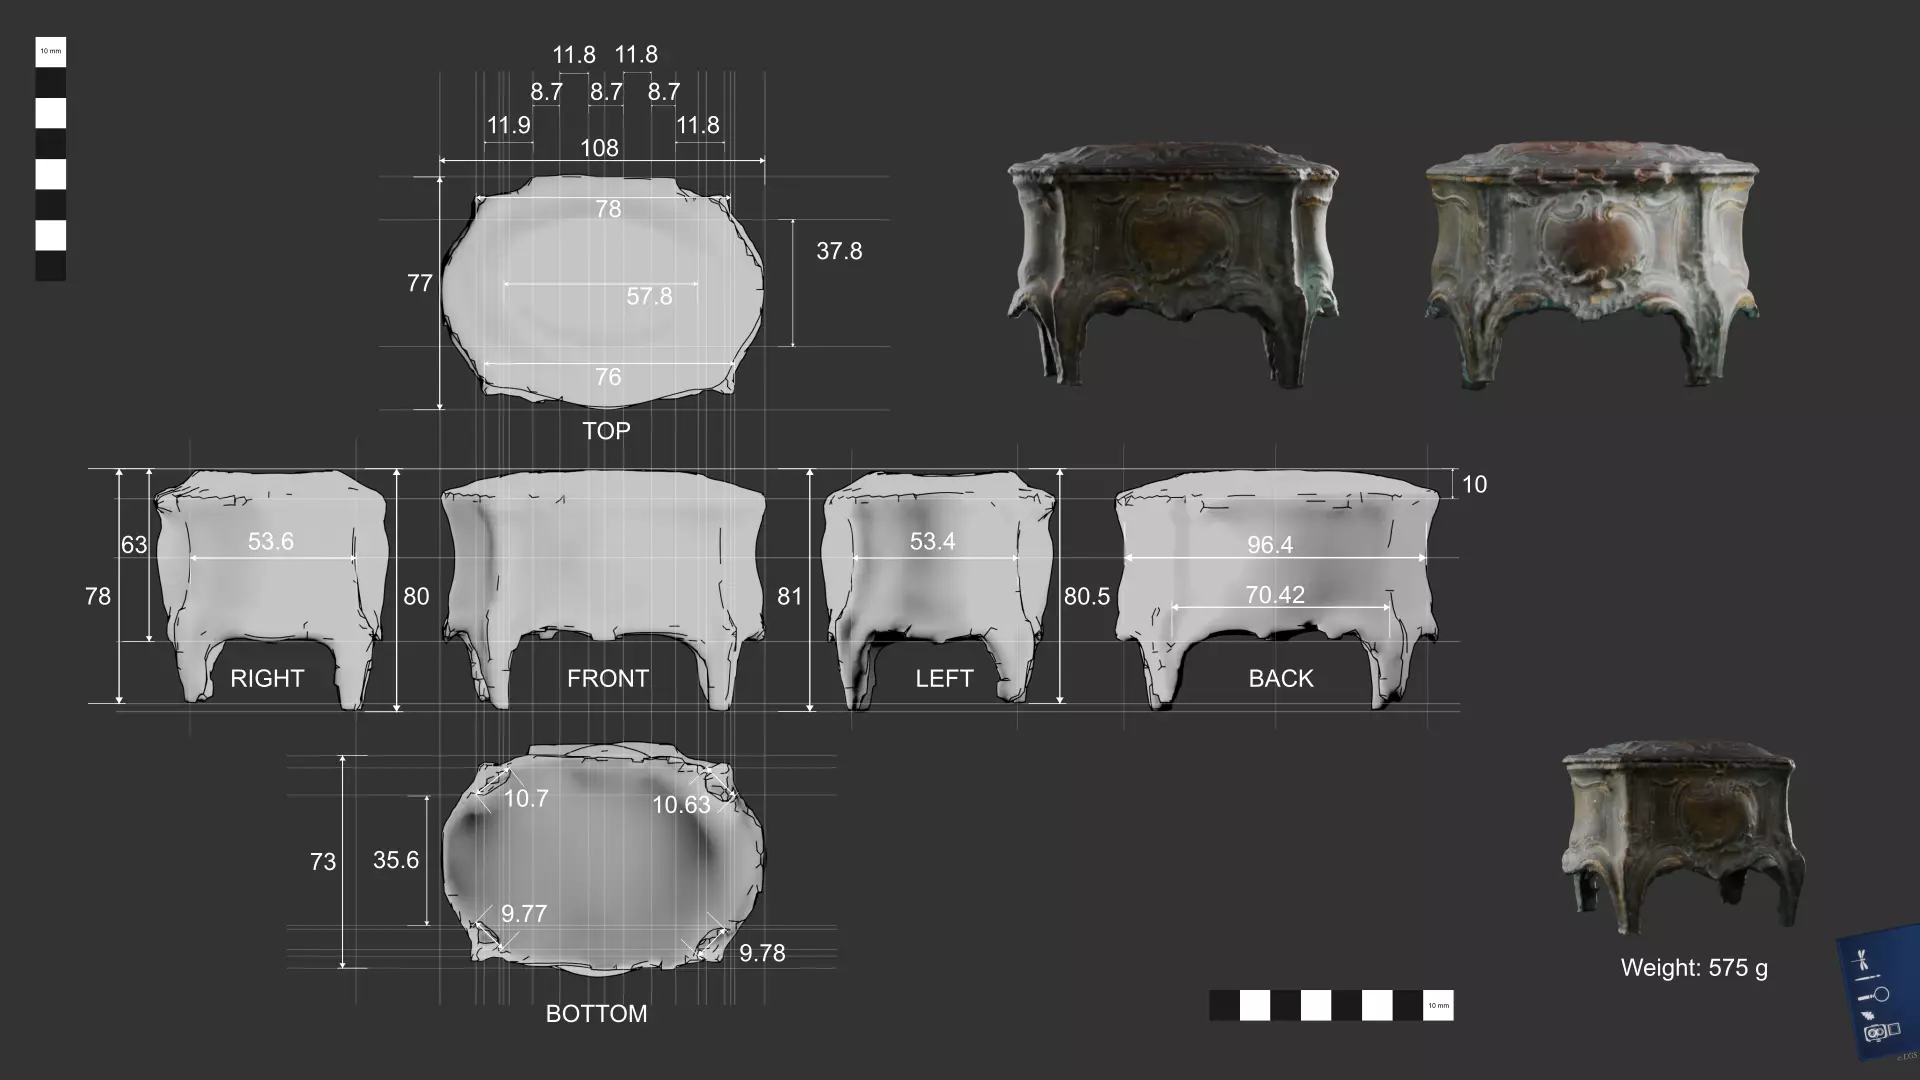
Creating a 3D model using photogrammetry
Let’s try a pass at photogrammetry as a first condition report photographic survey.
I used Meshroom and Blender to create and clean the model. The capture was done in two sets, both with a Canon EOS 8D DSLR with a 50 mm lens.
This gives us a good spatial reference of the artefact’s state at a given point in time. I think it still needs a documented (written) description of the alterations present. Maybe I’m old-fashioned but I feel this type of imagery still requires an interpretation.
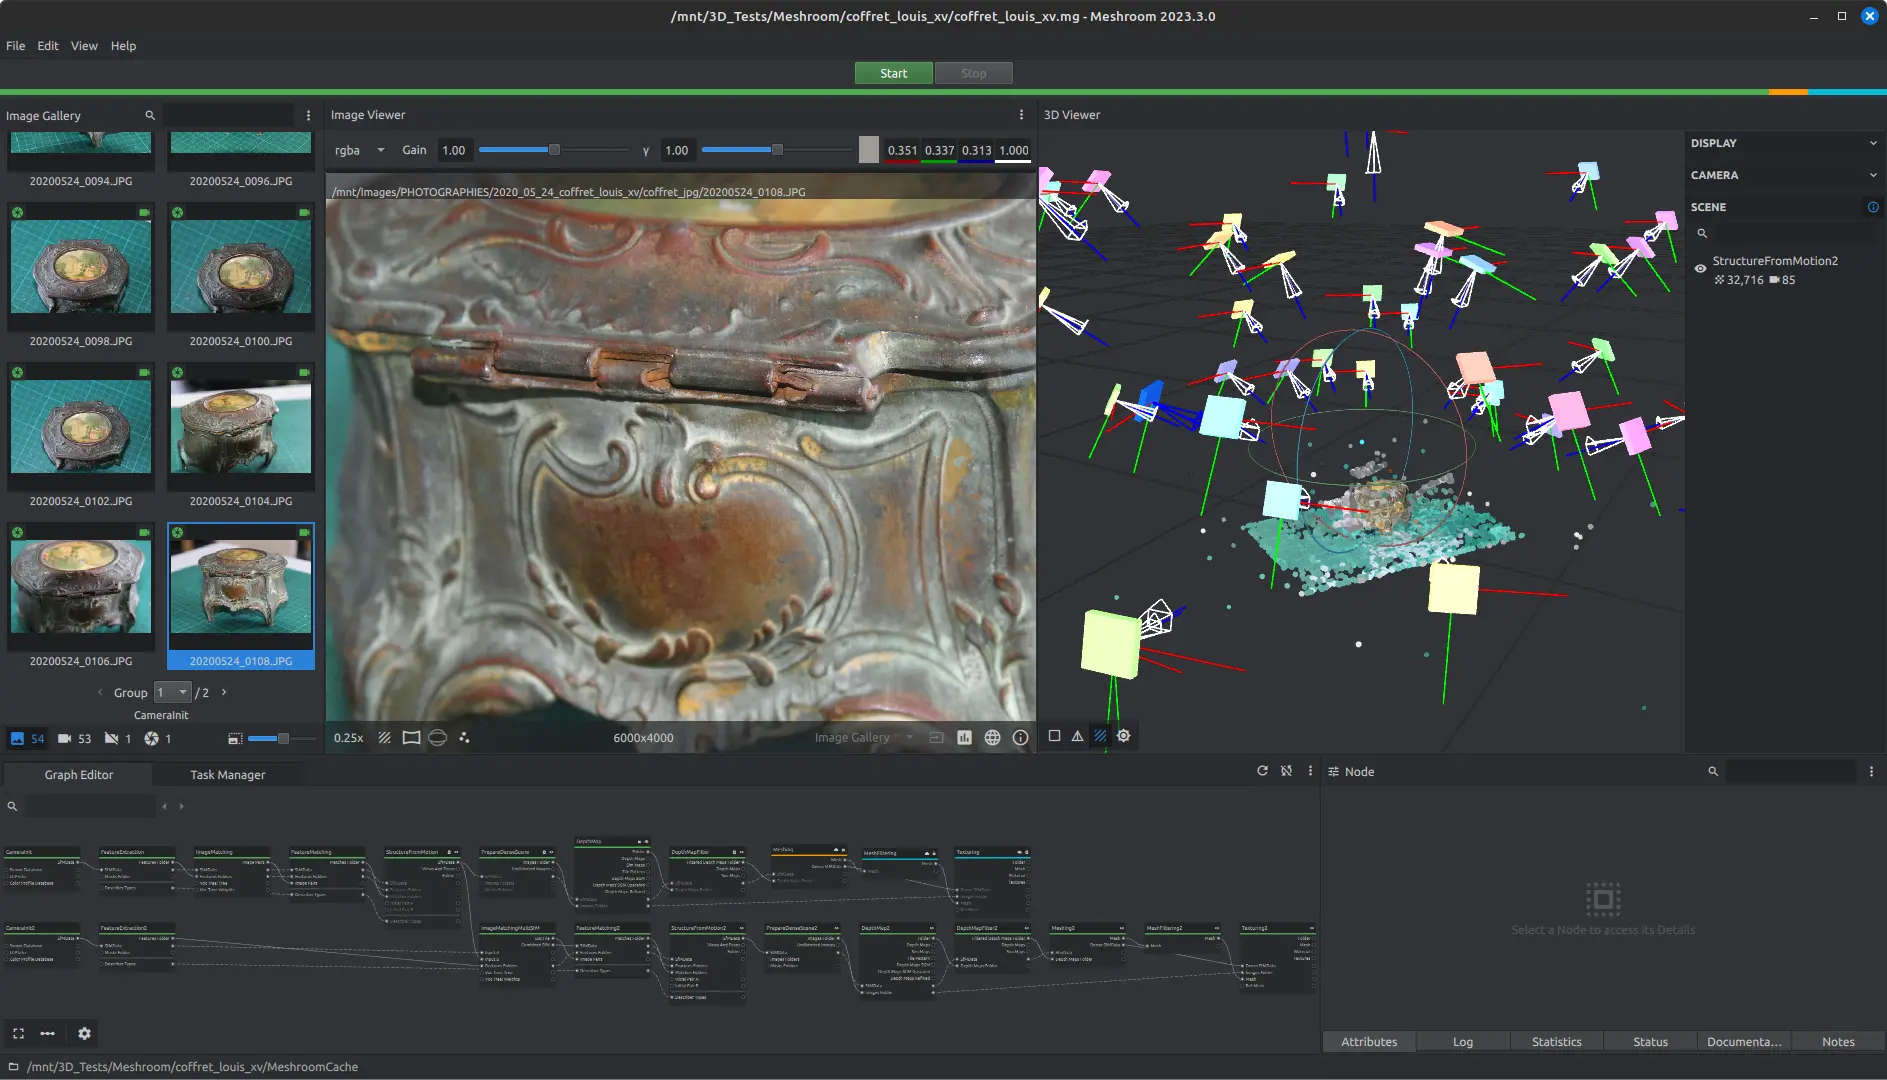
You’ll notice the underside is not as smooth rendered as the rest of the piece. Getting into the nooks and crannies of the underside was not as easy as I hoped? The framework had to make correction points where there was no clear data available. I theoretically could do another set of photos, but I am not at the moment able to merge them in the program to obtain a fully satisfactory result.
The drawback of the method is that most of the decor details are only rendered by the final texture. The mesh do not present them. This is a known and common issue with the process without further proceedings. The common solution is to increase the number of vertices, increasing the size of the file exponentially.
Disclaimer : technical limitation to material render in web app can let artefacts show, particularly in zoomed views.
See the full screen view (this will open a new tab in your browser).
On a side note, I also tried to put the image references through various “AI” image to 3D model tools. I can honestly said that the first impression is good. However, they do not withstand further scrutiny. The new tools advertise a high resolution model and truly delivers it but at a concerning technical cost. They are, in essence, photogrammetry tools and suffer the same drawbacks as well as limiting your input to one image in most cases. Moreover, as the LLM models do, they hallucinate half the results. In our case the shape is right but decor however almost correctly placed is wrong, invented in a lot of places.
All these would need to be fully redone. That means more re-work than with traditional photogrammetry to have an equivalent result and be considered conservation and curation ready. For the time being, as these tools are right now, they are not (yet?) an interesting option for this kind of project.
Measurements and structural deformation
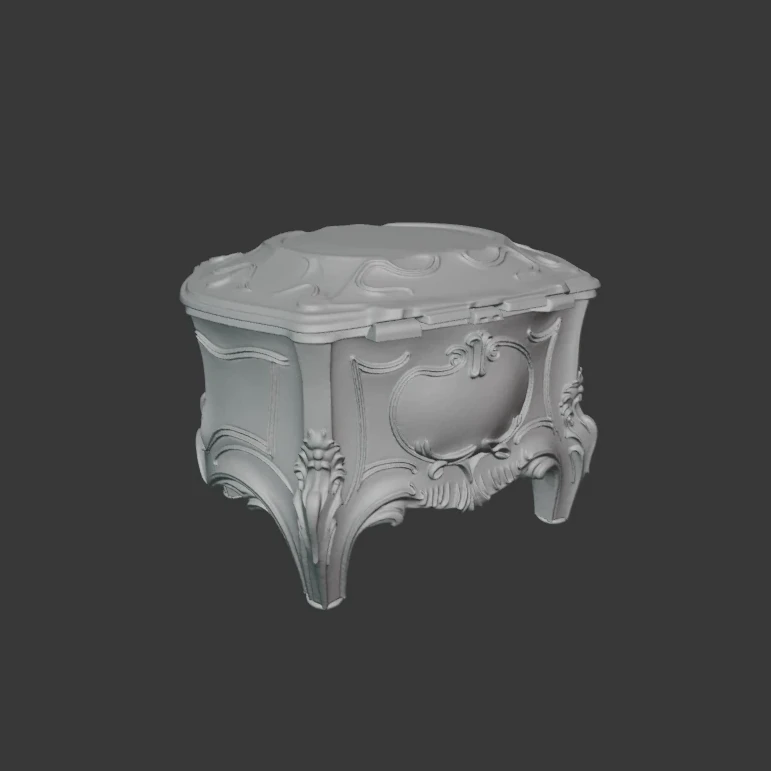
Let’s tackle the elephant in the room: the box is missing its feet. The catalogue mentions a height of 11 cm, and we can measure, well, 8 cm on average. That’s 3 cm missing, right there. The feet have been sawed in an irregular fashion: the back remaining legs are longer in the back and on the right.
There are metal coils at the cut area as if it was somewhat melted. Whaaaaat ? I don’t know about you, but I have so much sci-fi scenarios in my head right now.
There is a significant dent in the middle of the lid. The lid itself is skewed: its bottom right corner is lower than the front left one.
Of course, I did not do what any good and conscientious curator must do when acquiring a new piece: make a full interview with the seller to have the object’s story. Remember, it was late etc.
We are therefore limited to hypothesis. On the plus side, I can totally have laser rays and ominous portals involved as probable alteration causes.
Yes. Yes, I can.
Metal identification: alloys are a mess
Nearly all the object surface is showing metallic alteration of some kind. Three colours are present: red, green and white.
Which bears the underlying question: what metal are we talking about, and what happened to it (and how many dragons were involved) ?
Before trying to figure out any metallic related hypothesis, here’s what observation and the information found can tell us:
- the inside of the box was lined with a satin padding
- the genre scene is printed on an oval-shaped grey coloured metallic sheet
- the hooks maintaining the genre scene are soldered
- the outside was supposedly “golden”. For this period of history, that either means a varnished yellow hued metal, a paint, or a form of electrotyping.
Let’s deal with the genre scene metal plate first. It’s the only part of the artefact showing a white crystalline powdery alteration. I am no metal expert : I think I would go for something like zinc or tin, in whatever variation was cheap at the time.
Scratches and the feet having been cut shows a white metal underneath: we now know it’s not a yellow-hued base metal.
White metals are notoriously a pain to identify. Why ? Because as alloys, their exact composition have historically been fluctuant, not to mention using the same names for different ones.
As a tiny first foray into white metal identification territory, here’s a short list of potential candidates:
| Name | Ingredients (order per decreasing qty) | Remark |
|---|---|---|
| Spelter (various mixes proportions) | Sn, Sb (antimoine), Cu, Pb… | Known before XVth century, war time copper, identification mandatory after 1915 as “imitation” |
| Britannia metal (pewter alloy) | Sn, Sb, Cu… | – |
| Pewter | Sn, Sb, Cu, (Bi), (Ag)… | Bronze age identified |
| Lead based pewter | Sn, Pb, (Cu) | Bronze age identified |
| Zinc based Spelter | Zn, Pb, Sn | ca 1850, identification mandatory after 1910 “imitation” |
However, there is something weird here. There are seemingly specks of red rust all around, and the inside of the body is clearly red. That would be consistent with an iron based alloy or anything without copper enough to tint its mass. The outside of the box though is showing verdigris, both as an overall veil and as distinct patches. That is consistent with a copper based alloy.
From all I can see, the body was moulded in one go and the ulterior additions are only on the lid. There is a good chance the body and lid are the result of sand casting, a common, very old and very efficient casting technique allowing for fast and cheapish production. Upon closer inspection, the inside red hue looks more like a colour than an alteration. There are very limited crystalline occurrences.
My guess is it’s a dye transfer from the padding that used to be there; I’ll even hazard a guess as it having been red satin !
Remember the mention of “régule” in the object’s auctioned cousin ? “Régule” is french for tin based spelter. It was heavily used from 1860 to the 1920s to produce cheaper metallic object. Most were galvanized with copper to give them a golden shine, sometimes patinated to protect the surface while enhancing the gold effect. This type of golden patina is more matte than the real deal, very thin and ages dull. It can be mistaken for paint.
So, my guess is the object is made of spelter (exact composition unkown) and then electrotyped in copper to give it a golden shine. But then again, I might be completely wrong…
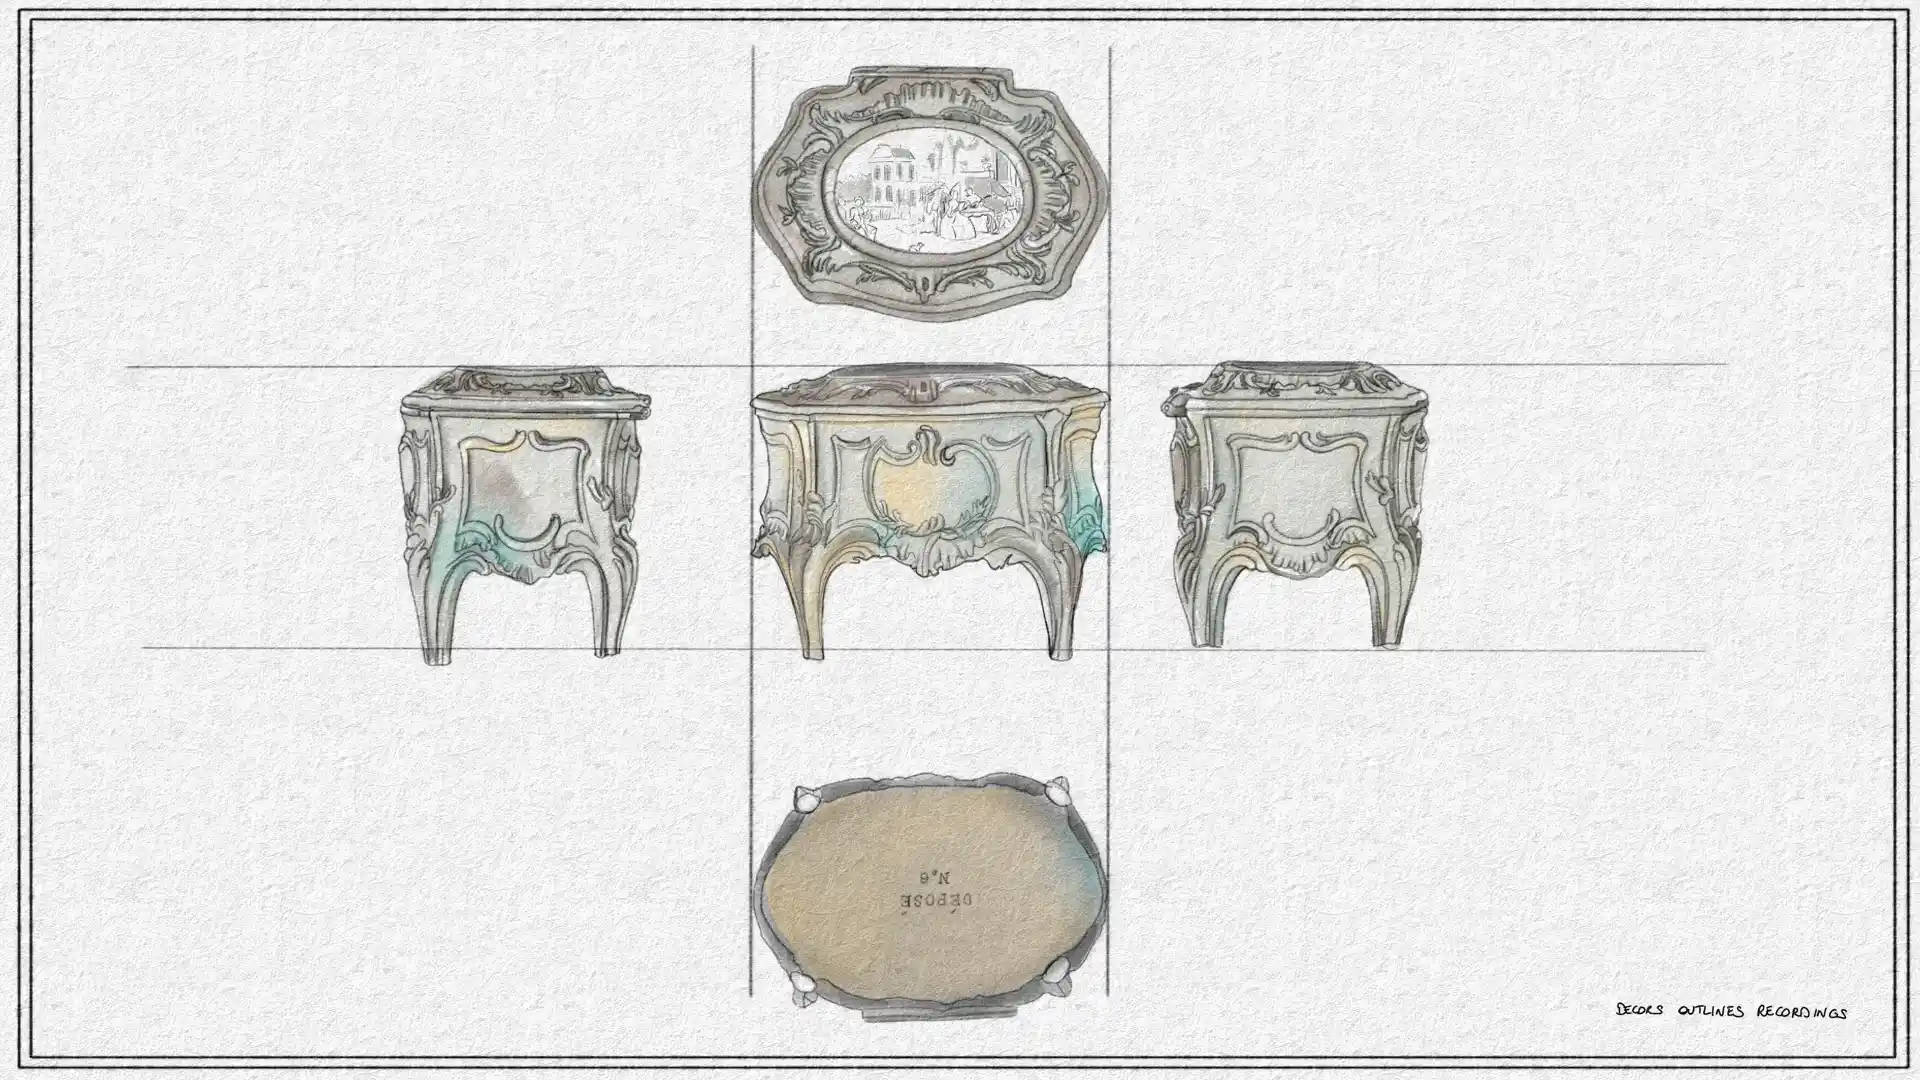
Decor outlines survey
There is an erosion of the decors: it is hardly visible on some parts. Wear, tear and metallic alterations on a weak relief based are to blame, I’m afraid.
As you may have noticed, photogrammetry was only able to pick up on the most protruding reliefs. It is therefore an interesting idea to make a survey of them so that the next steps of the process have a little more guidance. Not to mention enrich the piece documentation.
Creating a 3D model of the piece and then some
This is an exercise, shown for documentation purposes only.
What to do : analogue and digital choices
We have choices here.
We can go full conservation mode: using traditional curation and conservation methods to create a digital memory twin.
That means:
- doing a full survey : size, weight, details, decors (photos and drawings). We’ve already done that.
- creating a digital double of the actual state. Add every bit of information we have about the piece and the work done in a data file to create a memory twin: metadata, para-data, contextualization references and notes. Been there, done that. If we choose this path, all we have to do is put it all in a file using the IIIf and Glam3D specs. Ideally a retopology should happen, the file is unnecessarily heavy right now as most of the decor are supported merely by textures information.
- proceeding to do a full cleaning of the tangible piece then taking curative (lid correction etc.) and preventive conservation actions.
Once the piece is treated and secured and as far as curation and conservation jobs are concerned, we would then be done. The piece can now enter a collection where it will be preserved for the years to come and its complete files will serve as documentation.
Because we can trace the former aspect of the piece with relative certainty, we could go one step further and add a restoration action. We have the capacity to create and adapt new feet on the piece to replace the ones it lost. In order to respect every professional guidelines, this process needs to be fully reversible without causing any damages to the piece. I mean the poor little guy has been through enough already ! Using the memory twin as a reference, we can create new feet to be 3D printed and fastened passively to the piece. That can give us a display ready piece, where the new additions are the support and securization of the artefact.
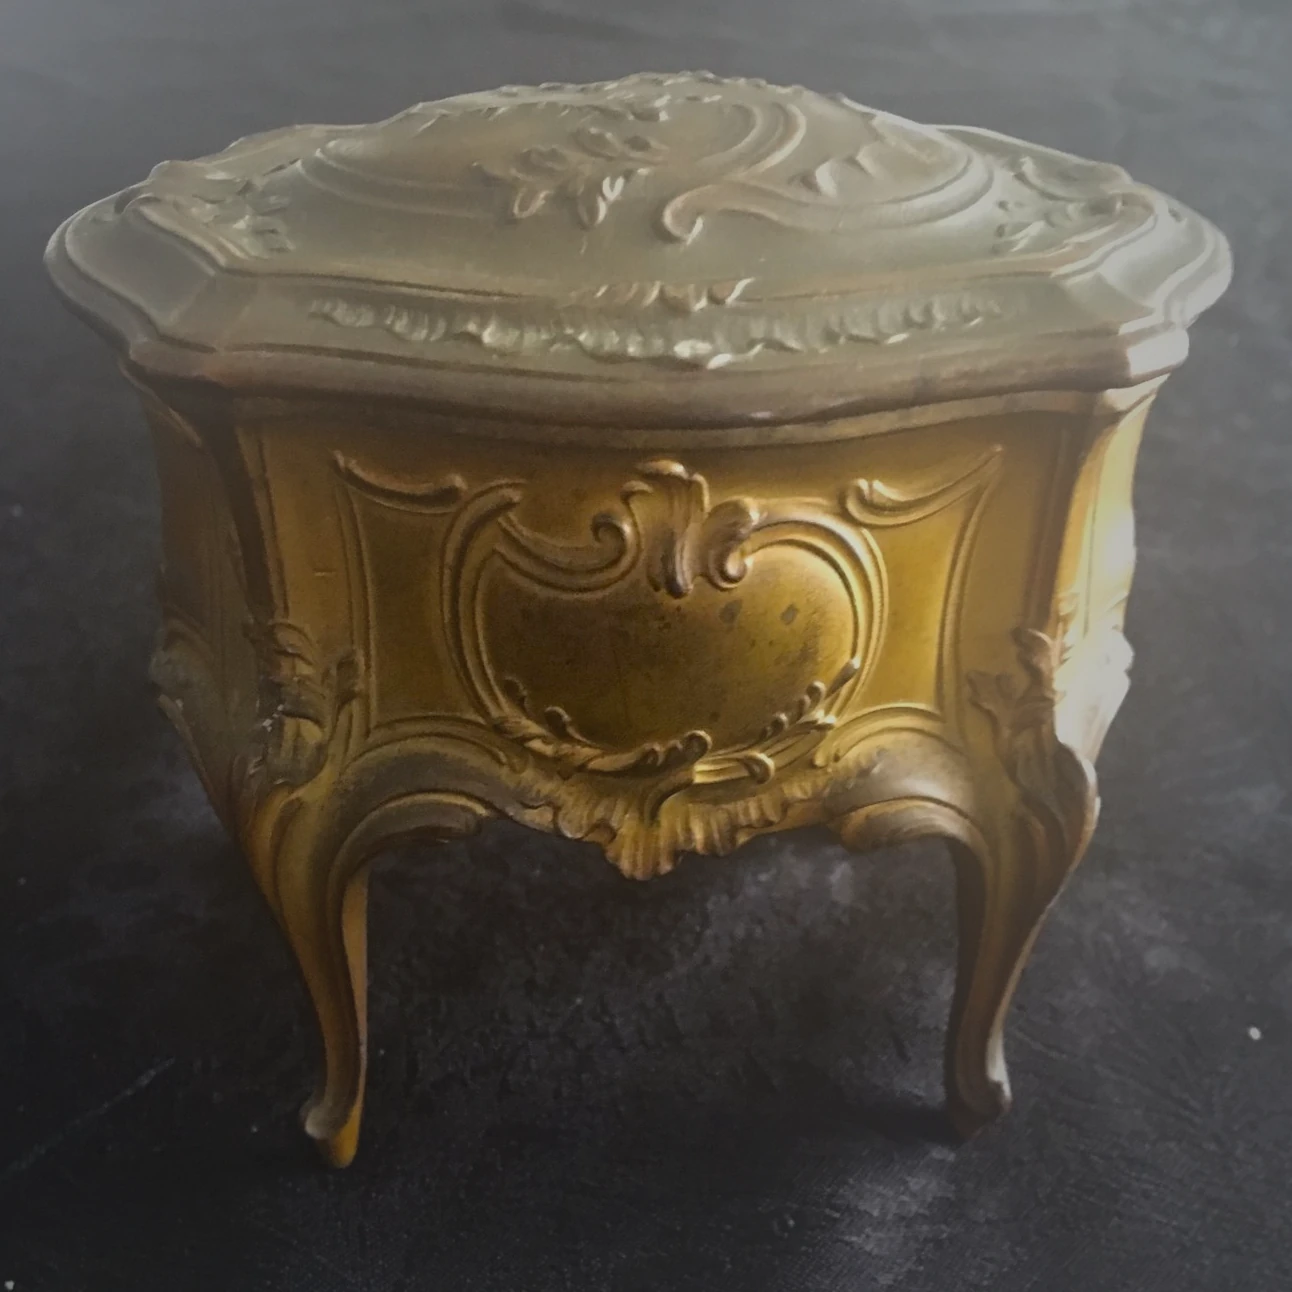
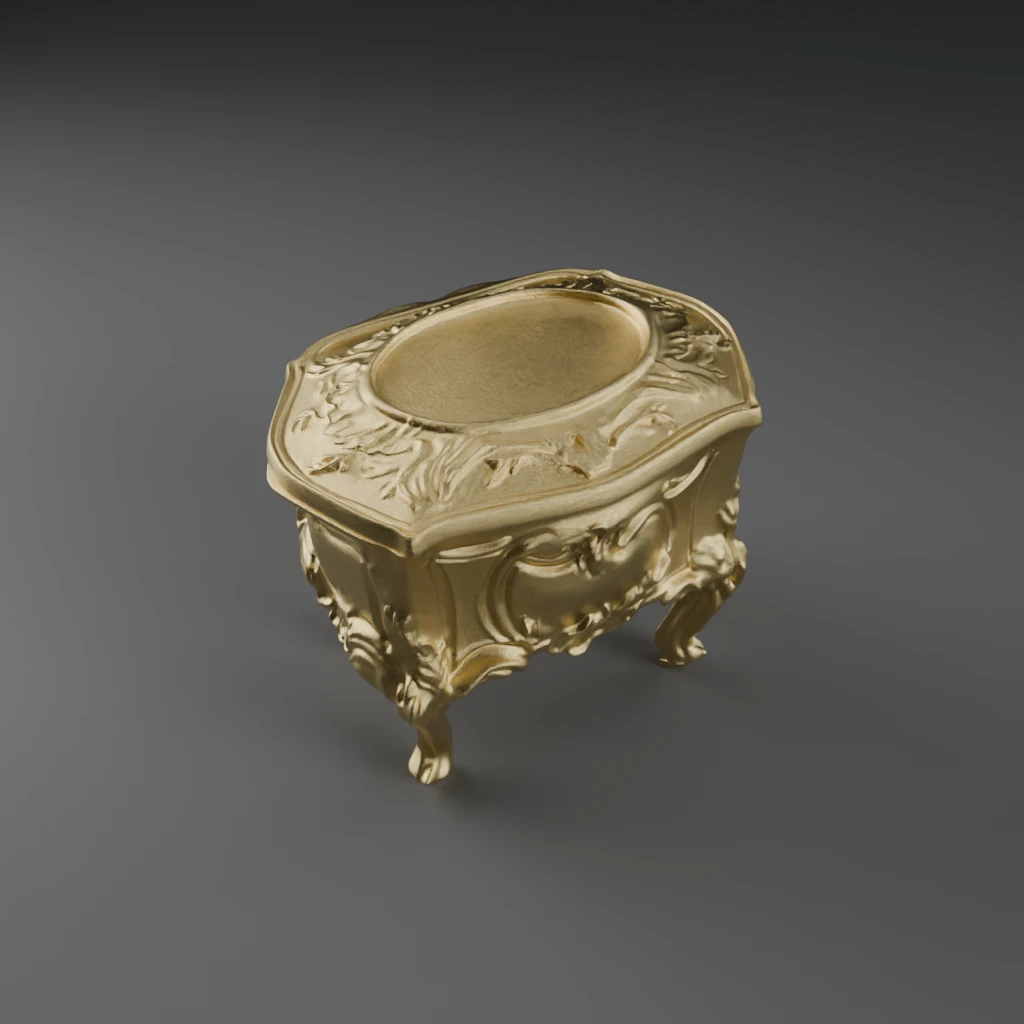
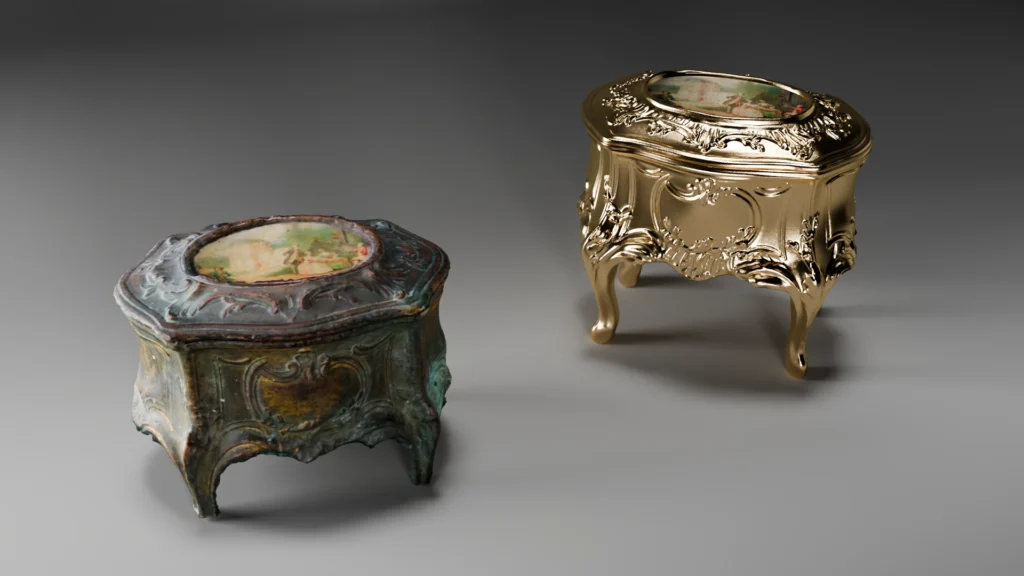
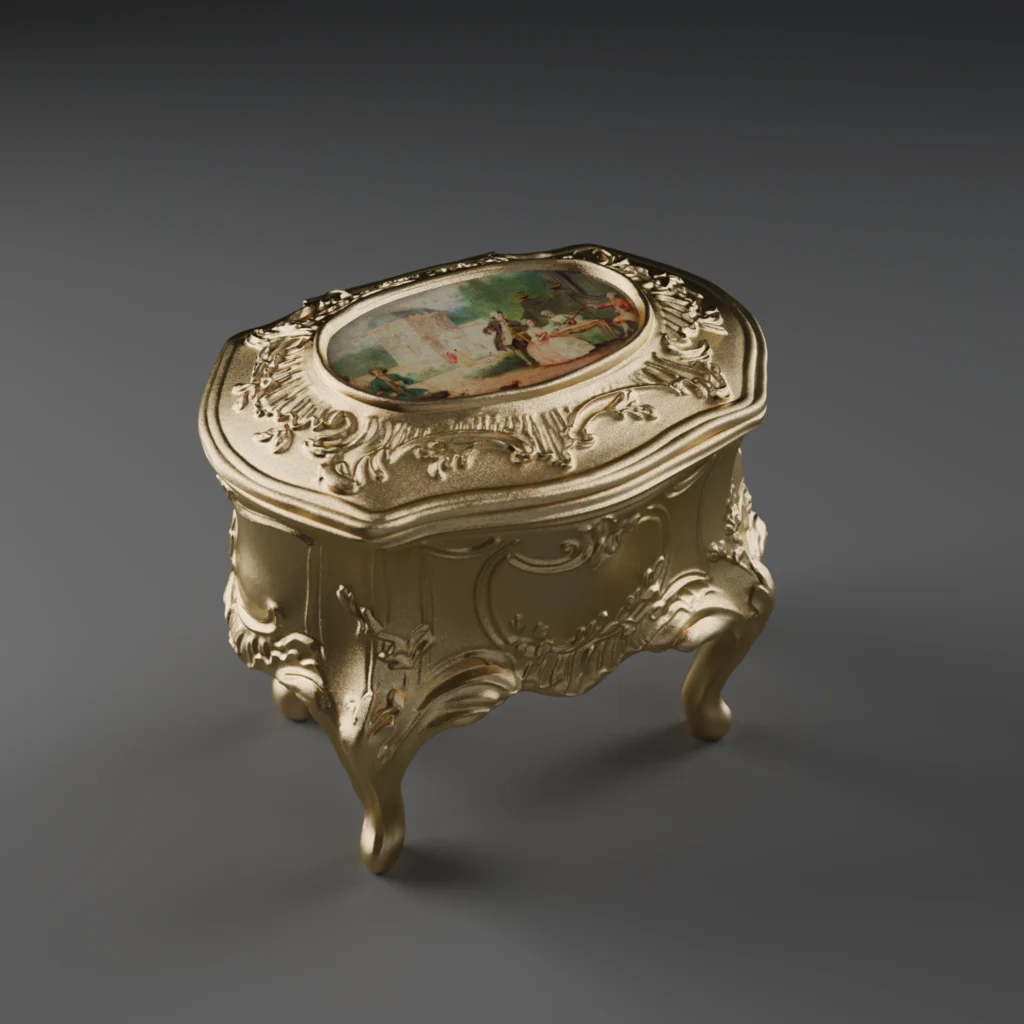
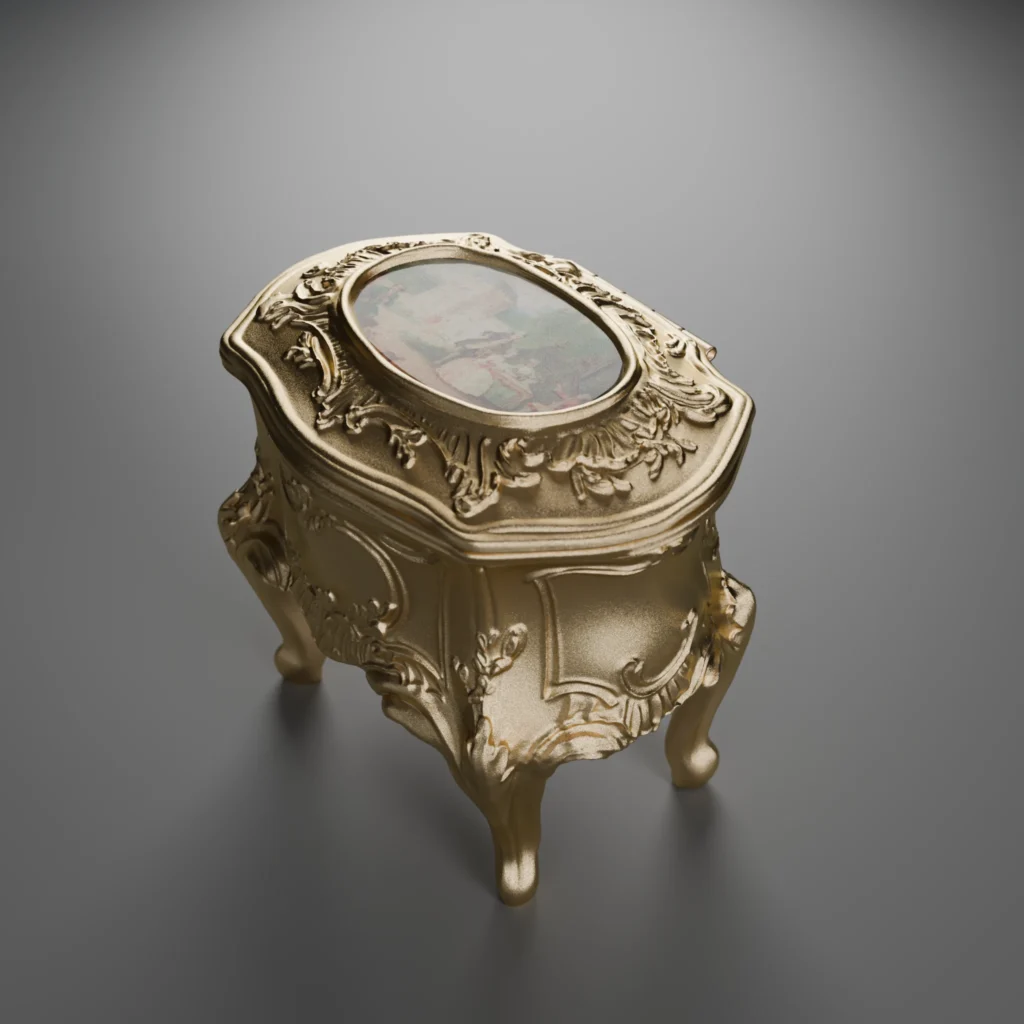
Because we have the digital and reworked version of the piece, we can create a digitally restored version of it: with the feet, the shine, and everything. It has the added advantage of being completely harmless to the piece. We won’t even be touching it more than we already did. That entails correcting the deformation of the body, adding the missing feet, recreating the interior padding and the outside texture. We have enough information about the artefact to propose plausible hypothesis.
Let’s face it, this piece is not a particularly representative one. Either stylistically or technically, there are thousands like it. Besides, we have no indication of any context for this particular one (who owned it, why, how it was used etc.). Therefore, it has no real heritage value.
We can take an up-cycling perspective and, among other things:
- Create 3D printed new feet and put them on, securing them with stronger adhesives.
- Remove the printed scene before the hooks definitely give way and replace it with another one or fill the gap.
- Colourize the piece: either galvanized it anew, paint or patinate it.
- Take the laser and alien idea and run with it.
- Etc.
I ultimately have to answer the crucial questions: do I need another box, and where will I put it ? The feline in me says one can never have enough boxes. The opposite OCD personality is silently wording its strong opposition. Maybe I can gift it ?
In any case, we need an accurate, cleaned 3D model of the artefact. As is, it can’t be exploited for most of the actions listed above.
How to do it: a reconstitution process
Retopologizing the scan
First thing first, in order to have a foundation to work on, we need a clean base. That means turning the photogrammetry model that is 1.450.000 triangles in a tangled mess of a mesh. This is also a way to separate the lid from the body of the piece.
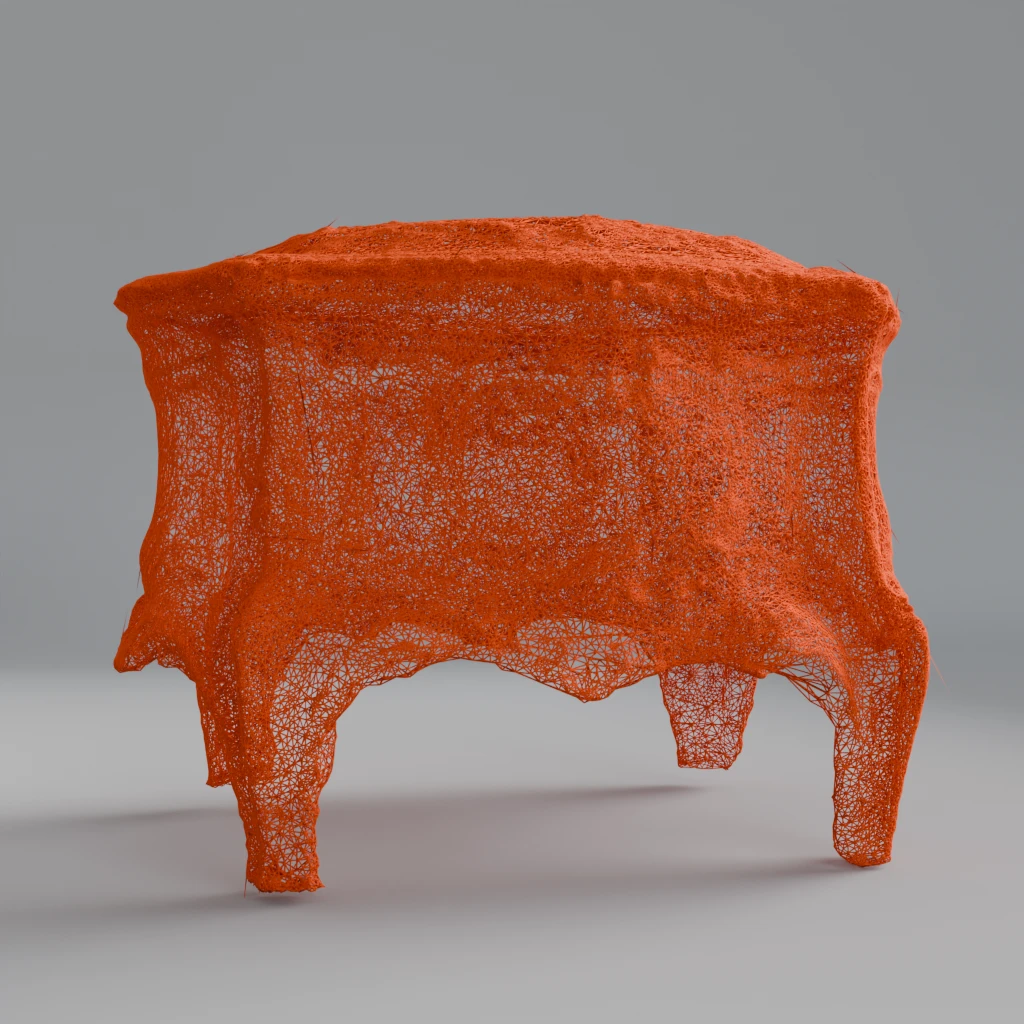
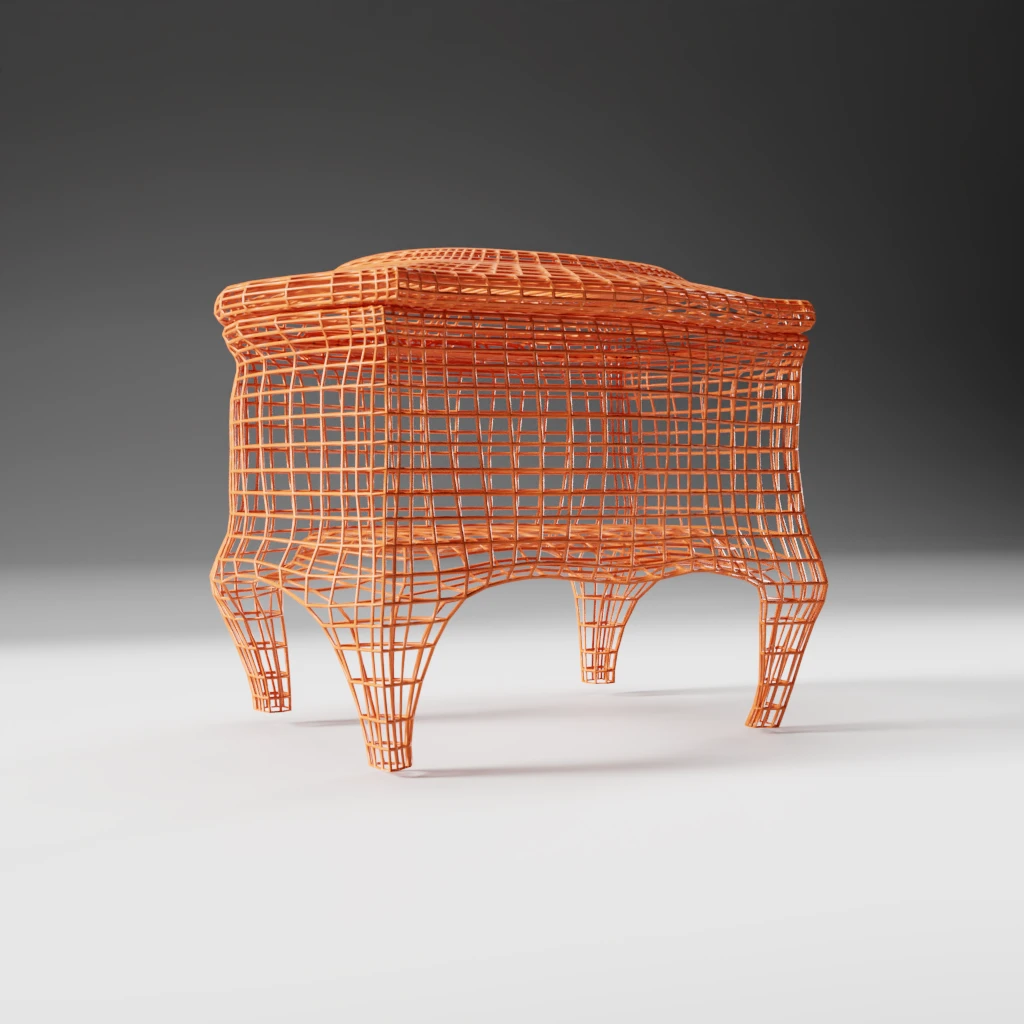
You may have noticed that I deliberately chose not to insist on creating the decor parts. First, the photogrammetric model is not precise enough for it on most occurrences. Then, I will allow me to keep the model’s base data very light and add everything else as maps eventually. As we are aiming for both digital viewer and 3D printing capacities for the final model, it makes sense to keep all options open and controlled as best we can !
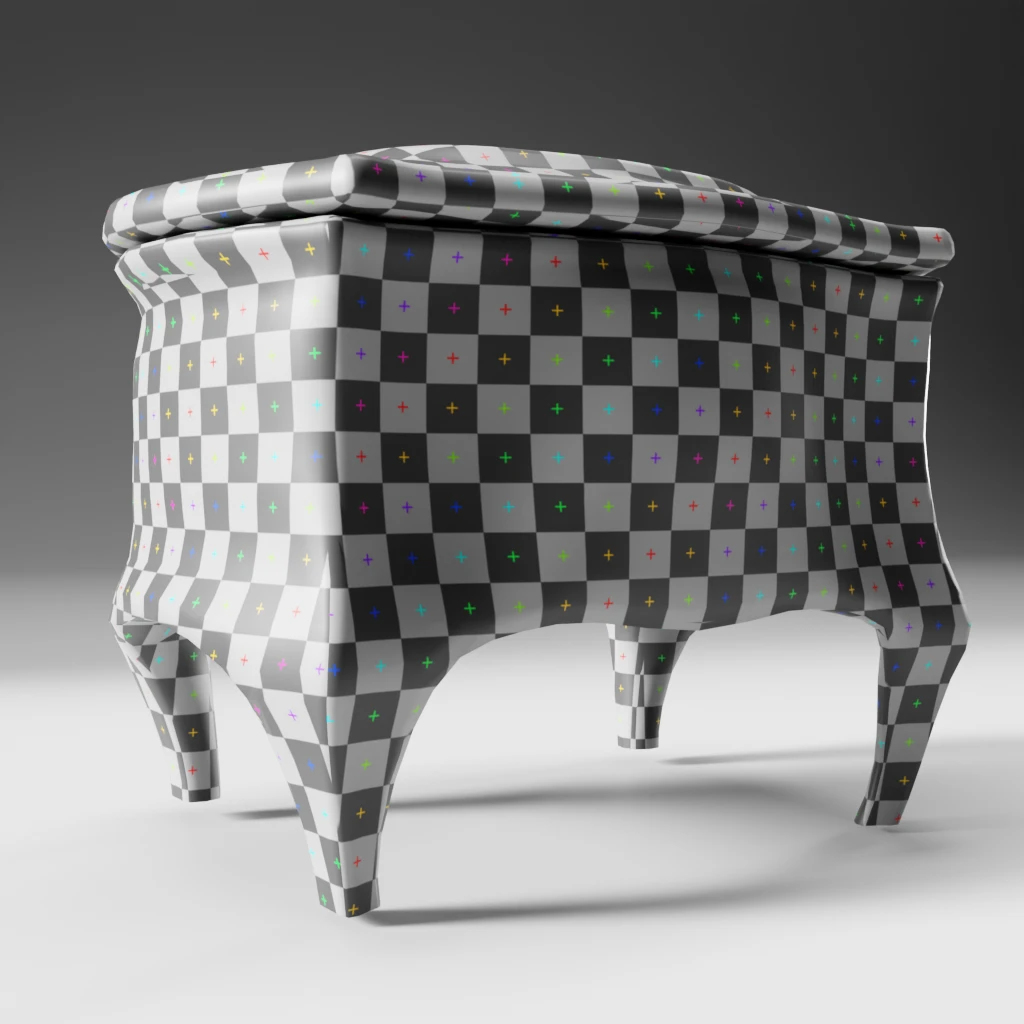
It also a good time to create a clean UV slicing to support our the tasks.
The case of the missing feet
We need to address one obvious issue before moving on.
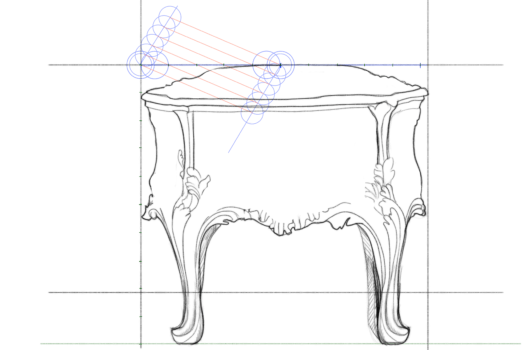
We know the feet are missing. But we also have a rough estimate of their height thanks to the catalogs. A little algebra later, we can have a rough estimate of the missing shape.
Sculpting the decor
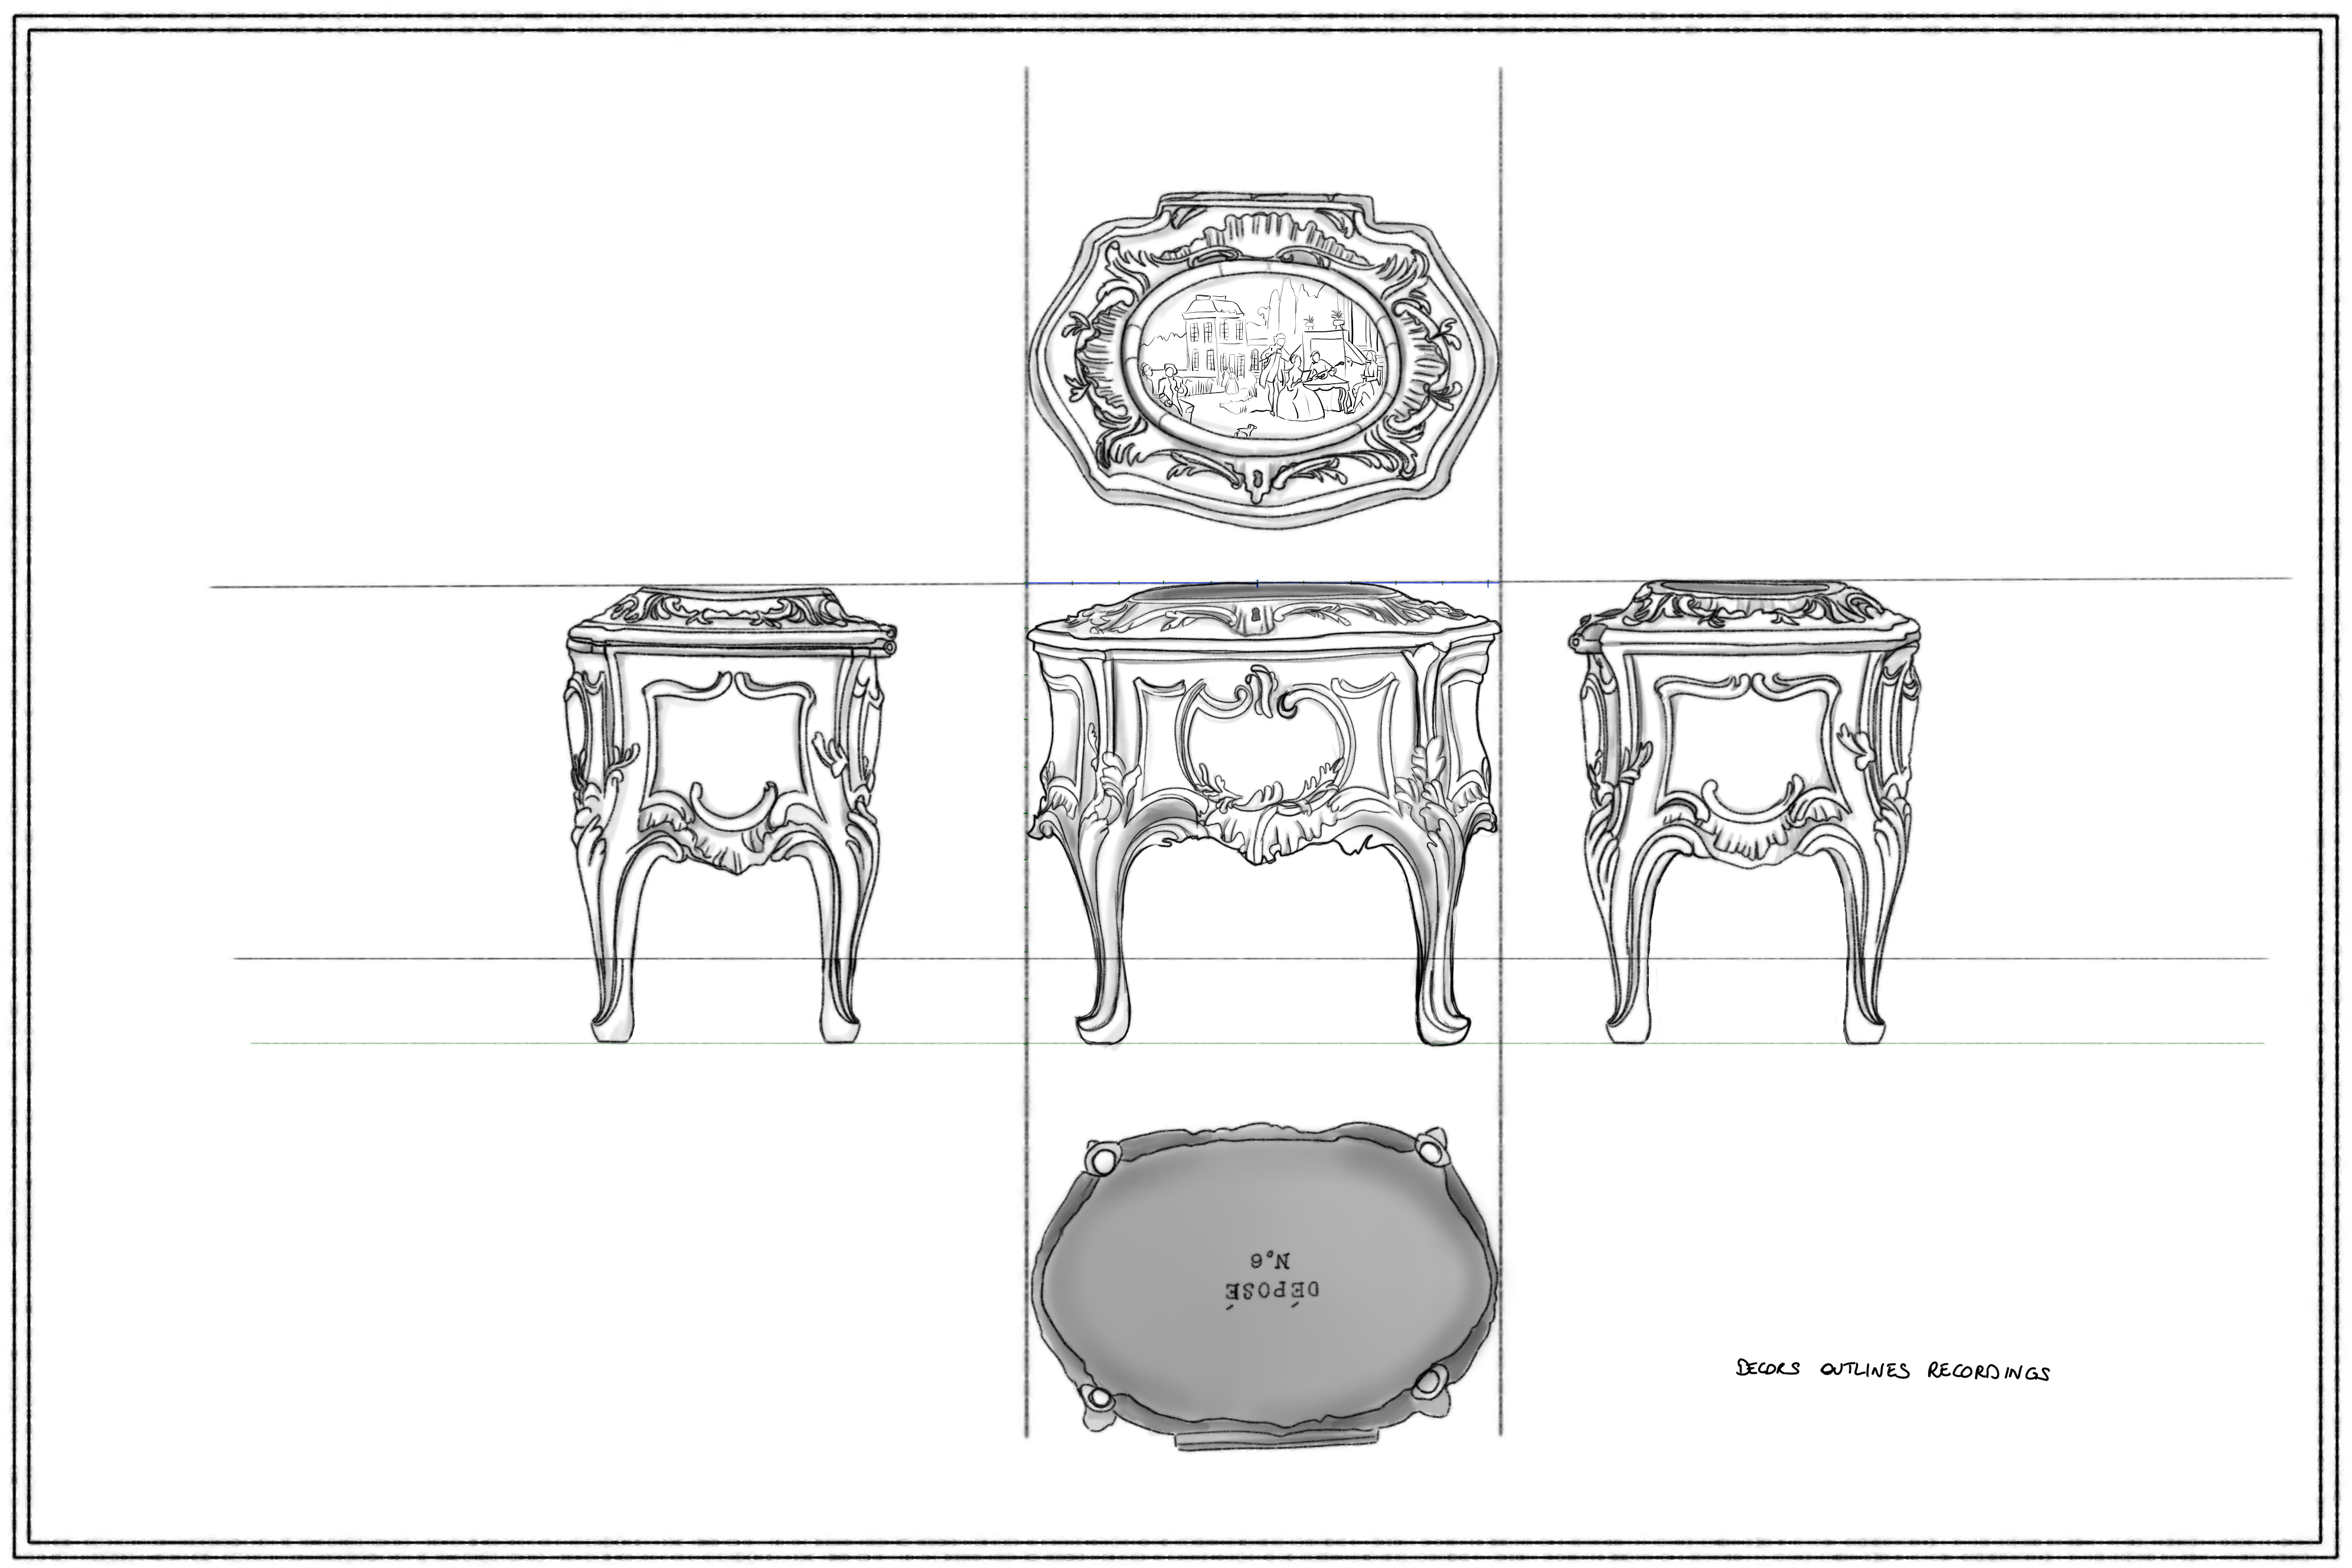
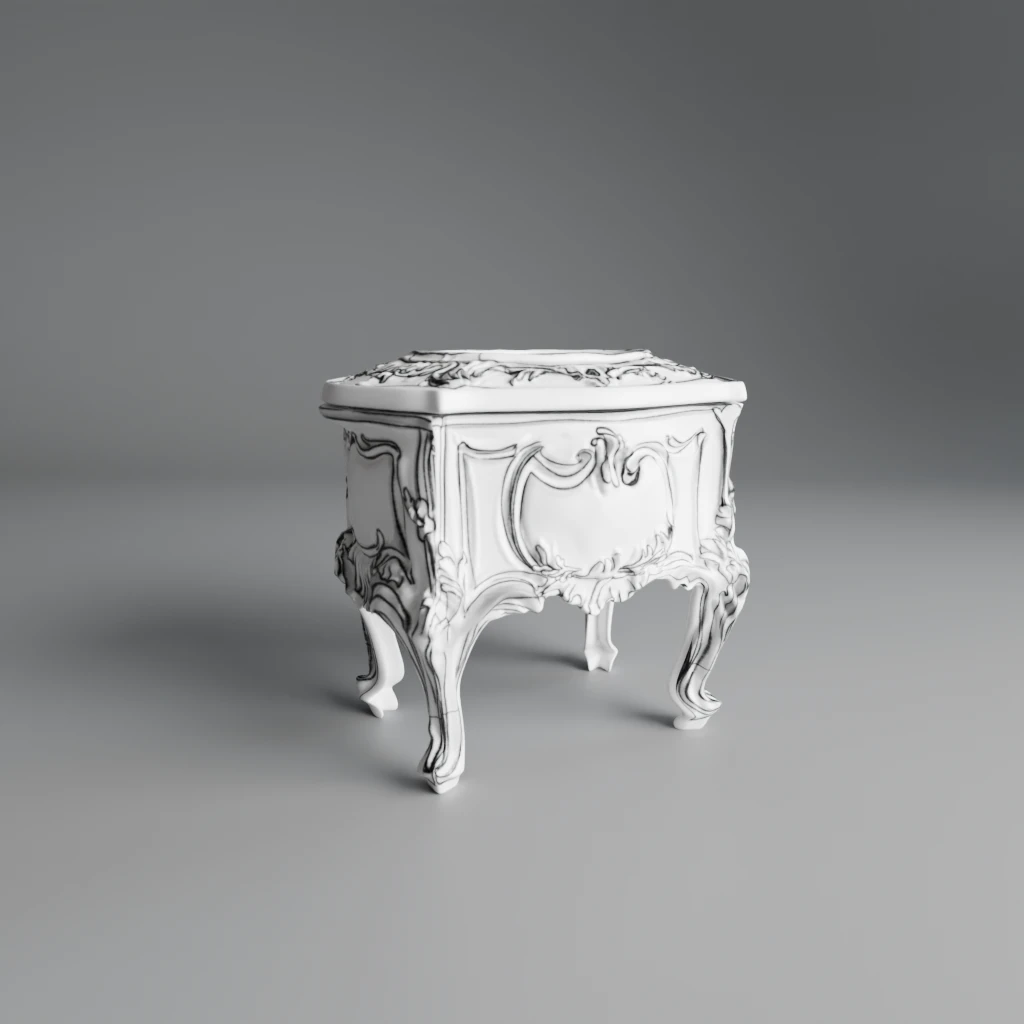
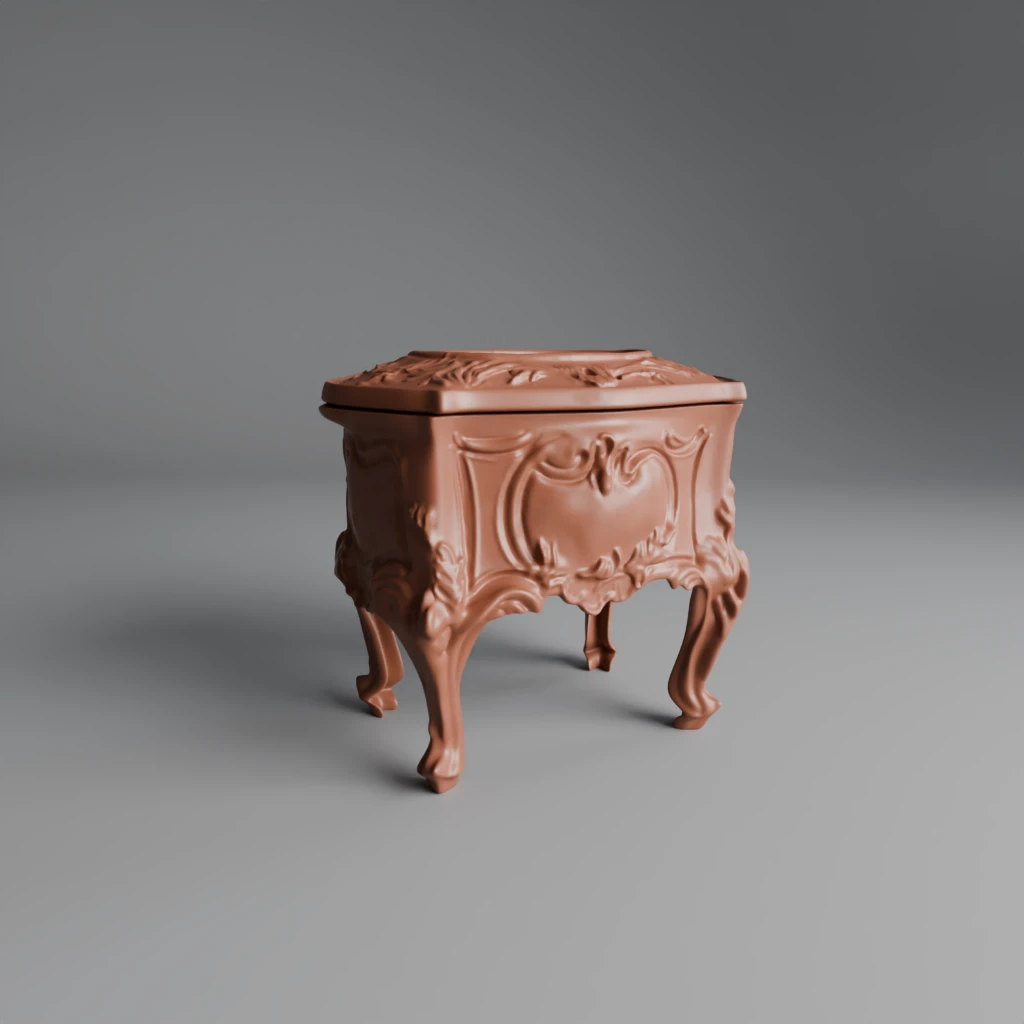
In order to try and render the decor accurately, we need to… make sense of the mess. The ornamentation is complex; to survive we need to understand the lines and volumes. Baroque is not a straightforward path !
A grey survey is useful to quickly block out the shapes using another set of UV to project it on the retopologized model while preserving the original ones. That way, I can make sure the decor is where it should be. As with most complex models, the idea is to create a normal map of it. Once done, the model can either be used digitally with a low technical cost or exported as a 3D printable version, with high poly count.
Texture the shape
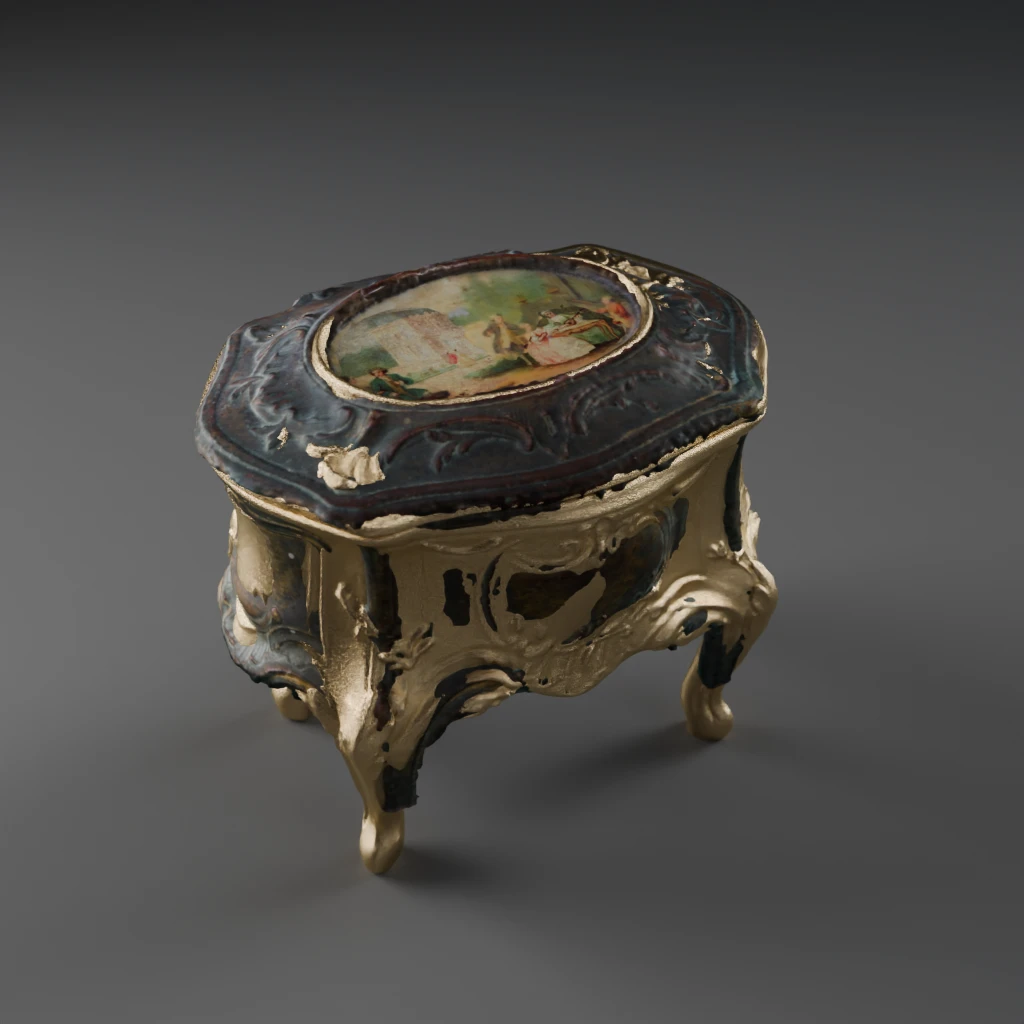
To produce a digital “restored” hypothesis of this artefact, we have to consider two materials: the “regule” (cf supra) and the medallion choromolitography. This last one we can extract and enhance from the photographic material we have.
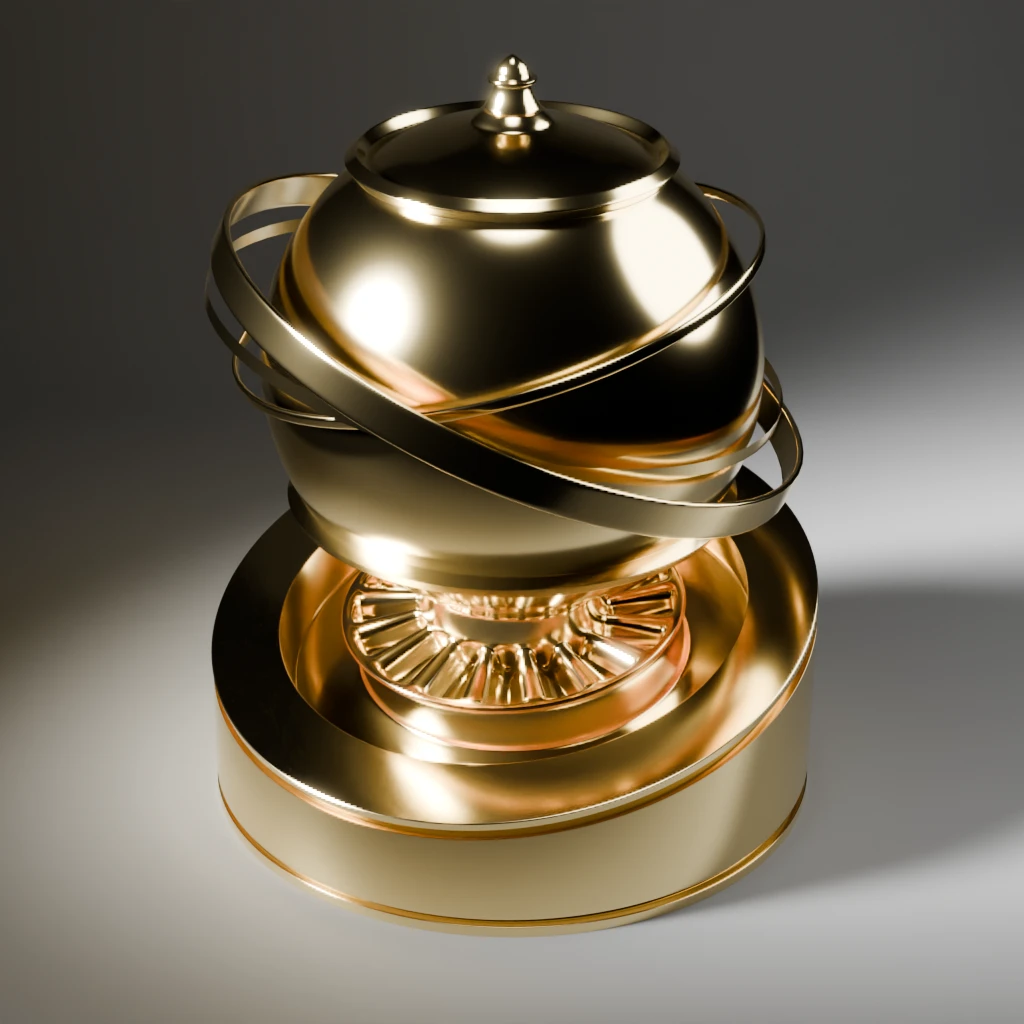
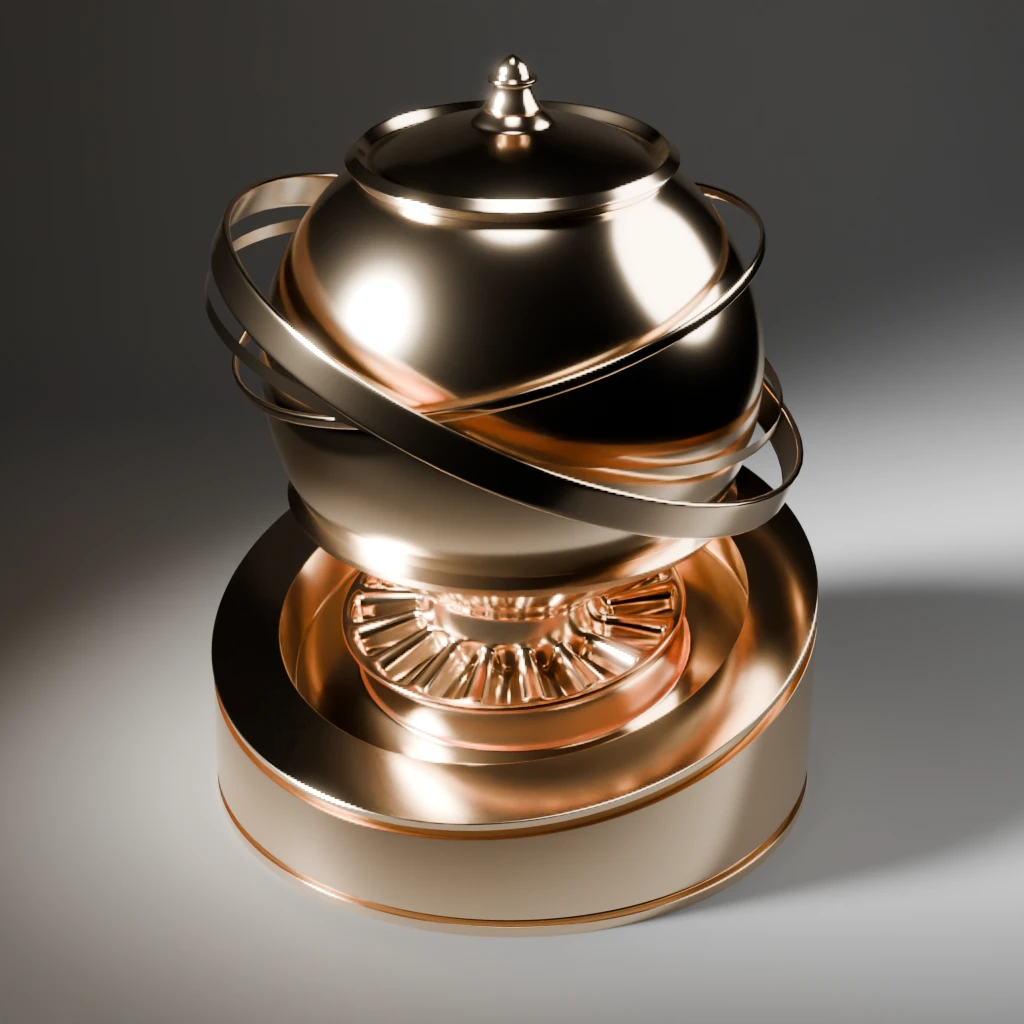
The first one is a little more complex, as stated in the historic contextualization above. Ultimately, we have to emulate a gold look painted over reddish copper itself deposited on top of a grainy sand cast model. It has to have the colour of yellow gold (as was the taste at the time) and the shine of copper (less shiny than gold). There is no real way to know what technique was used and how transparent the top mixture was. My guess is it was not fully opaque, but I may be wrong.
So we need to make a few tests.
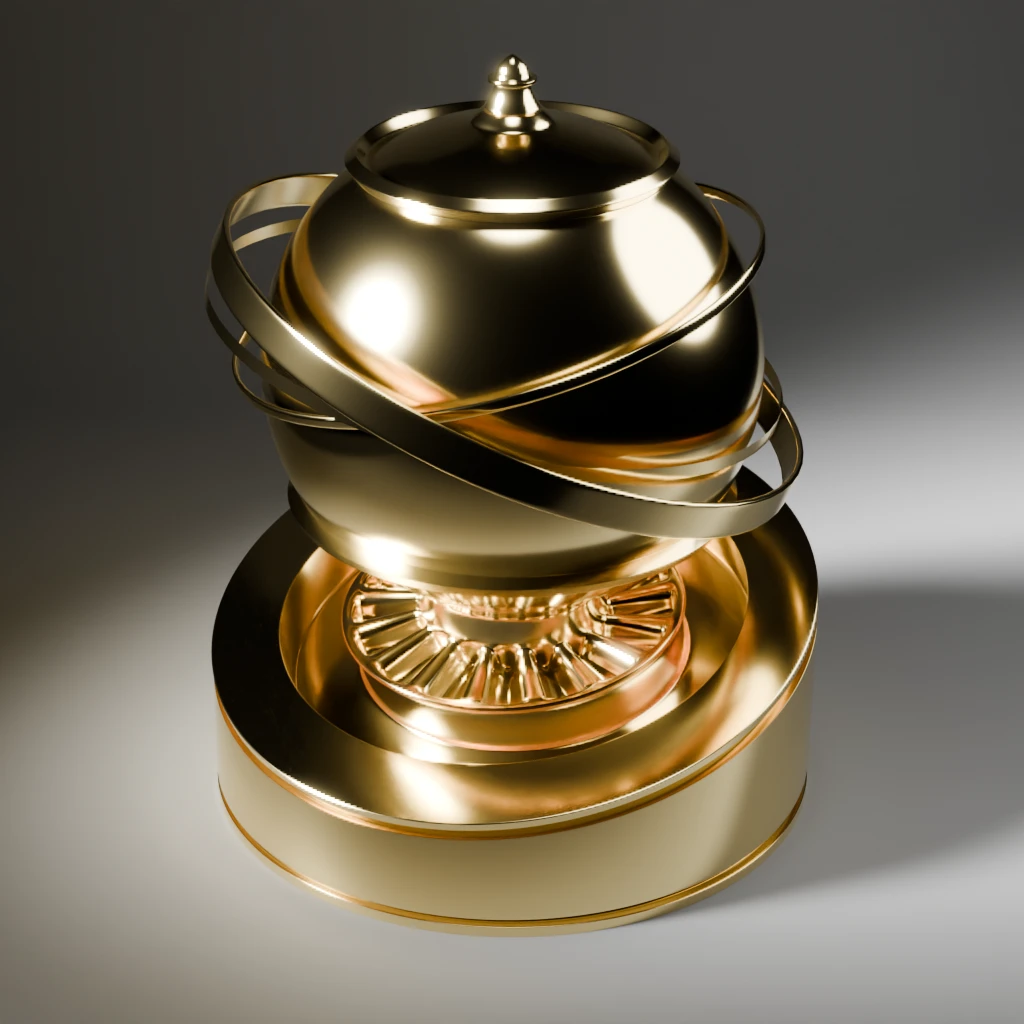
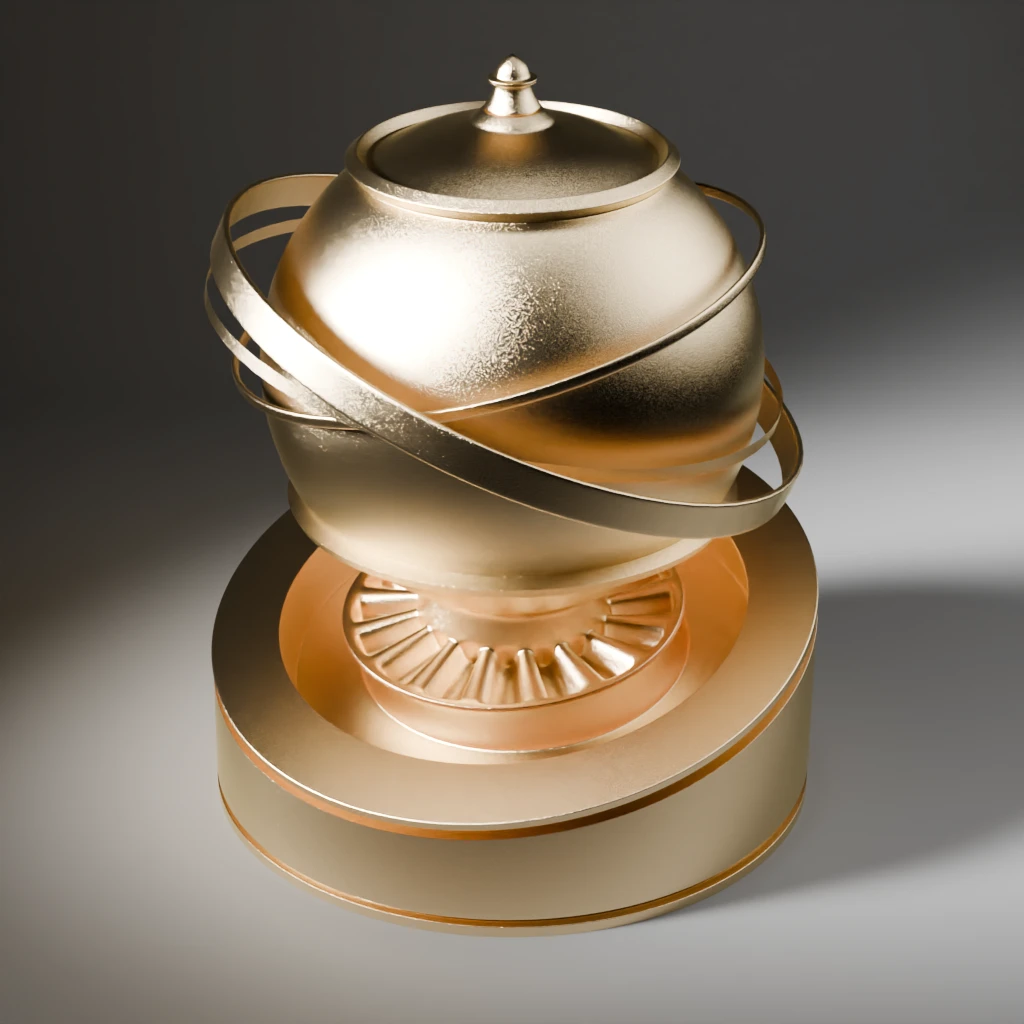
We have a base, we can easily tweak on the piece itself. In the end, it needs to look “good”, in our case that also means plausible !
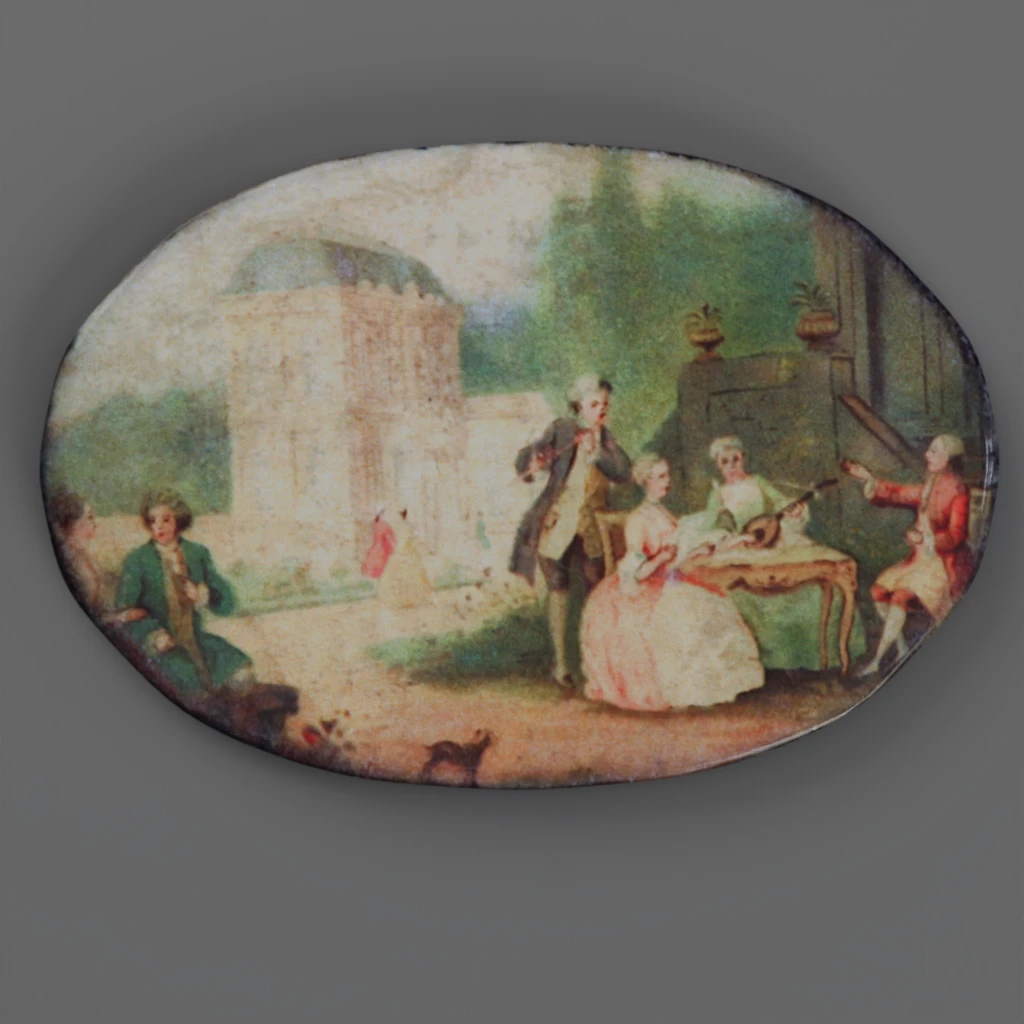
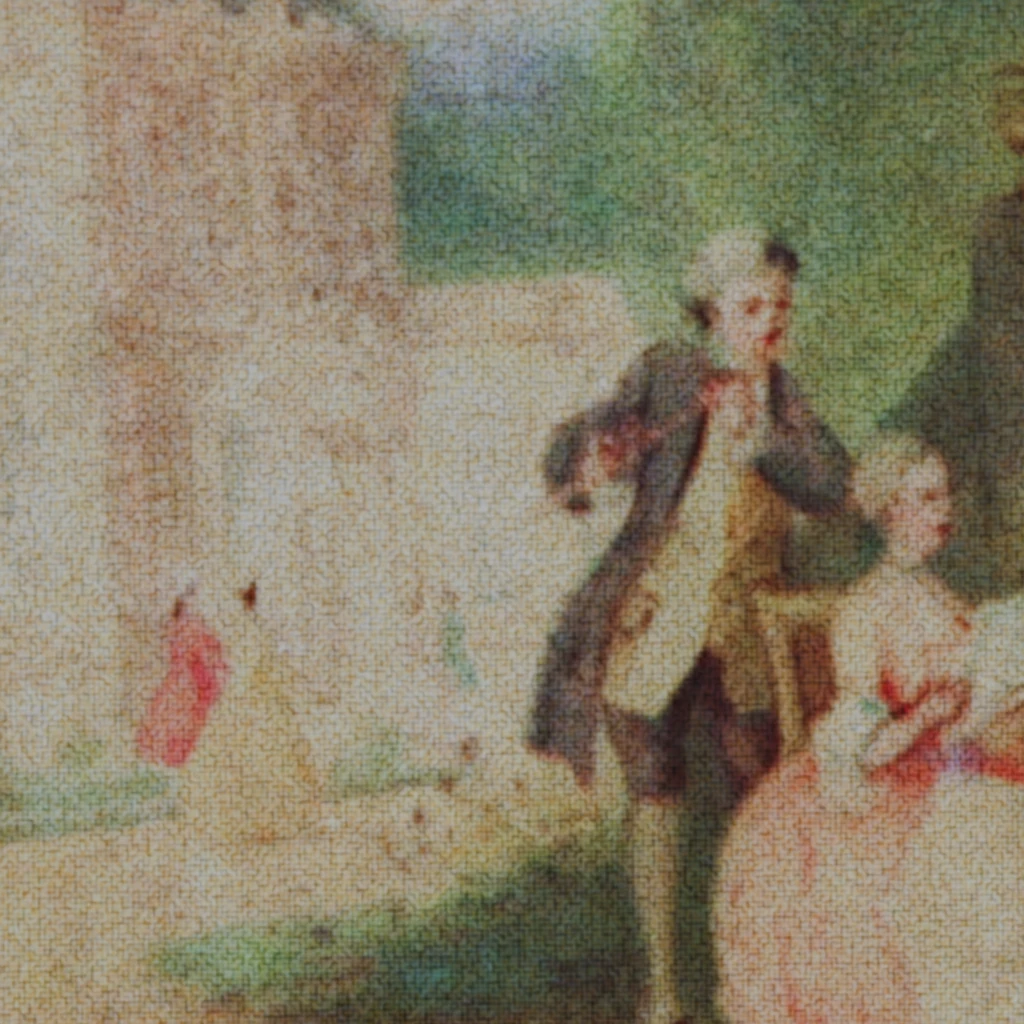
The chromolithographic process on zinc as is most likely the case here, involves repeated passes over the surface with the different colours. Up-close it leaves characteristic small dots. Despite the comprehensive photographic documentation, the camera algorithm and the optic limitation of the lens do not allow seeing them as distinctly as would the naked eye. But a digital version would allow for important close-ups. Therefore, once we have digitally cleaned the surface of the picture, we can use this information to create a more accurate material.
Cleaning the surface firstly involves getting rid of the various specks and dots from exterior sources. Then we need to tweak the colour chart: as with most images, there is a yellowing of the surface varnishes and overcoats. Then we can try to sensibly enhance the colours, to give them just a little more presence.
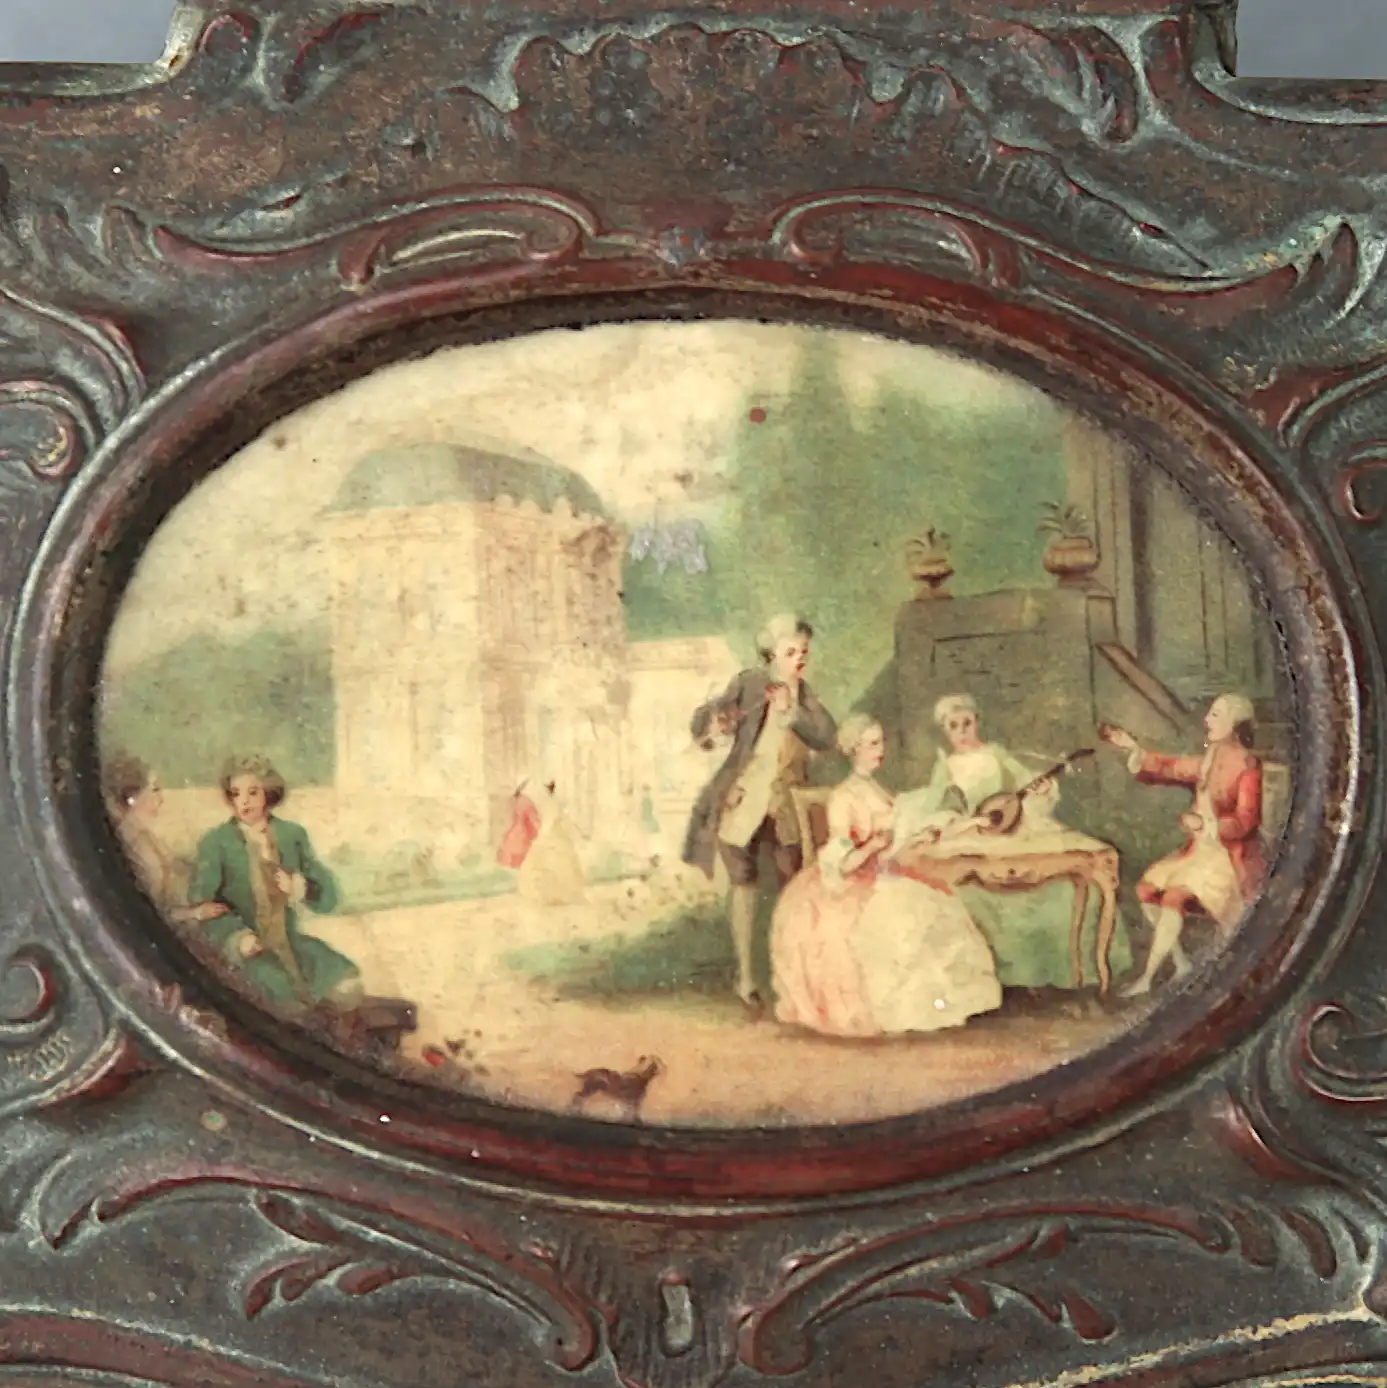
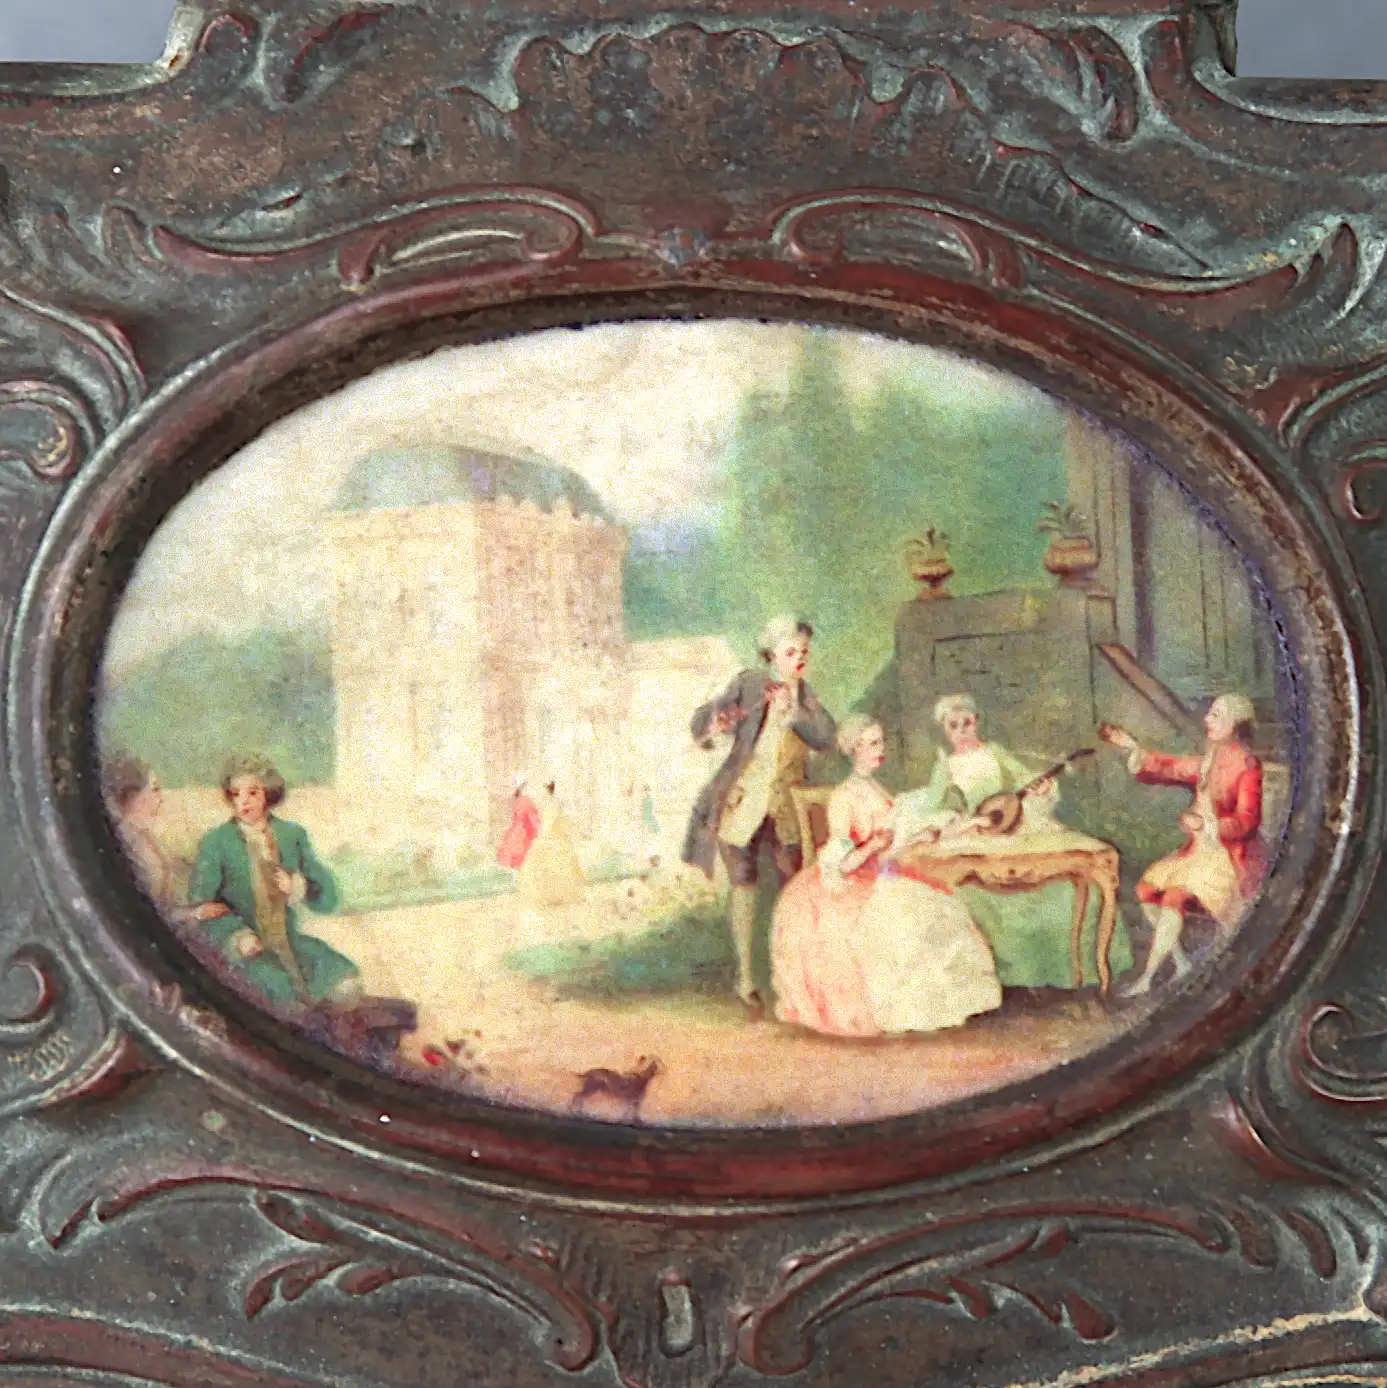
Using the newly created image base, we can try to emulate the chromolithographic relief effect. After a few tests, the best way I found was deceptively simple yet effective: I am using the distance output of a Voronoi node as a mask.
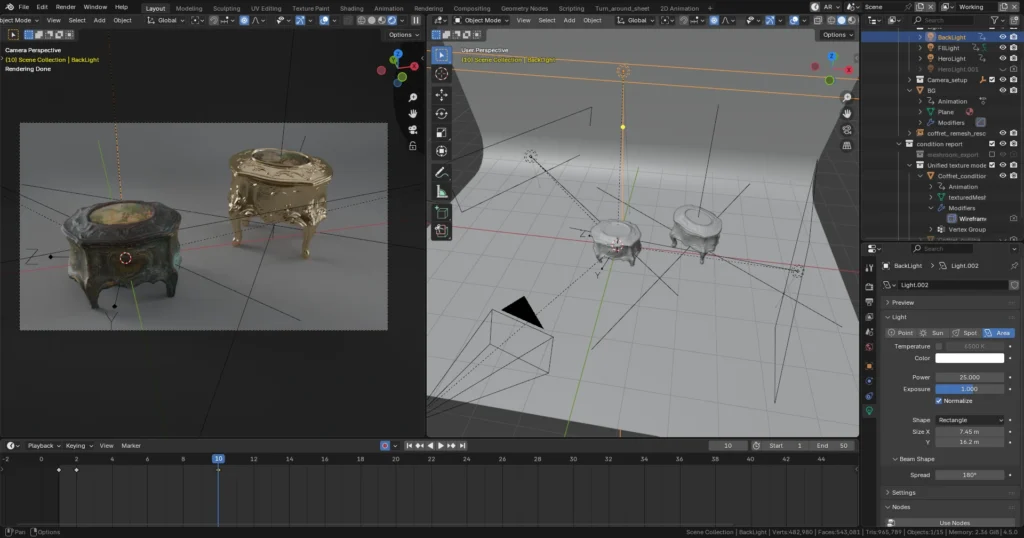
Shine a little light: stills renders using blender
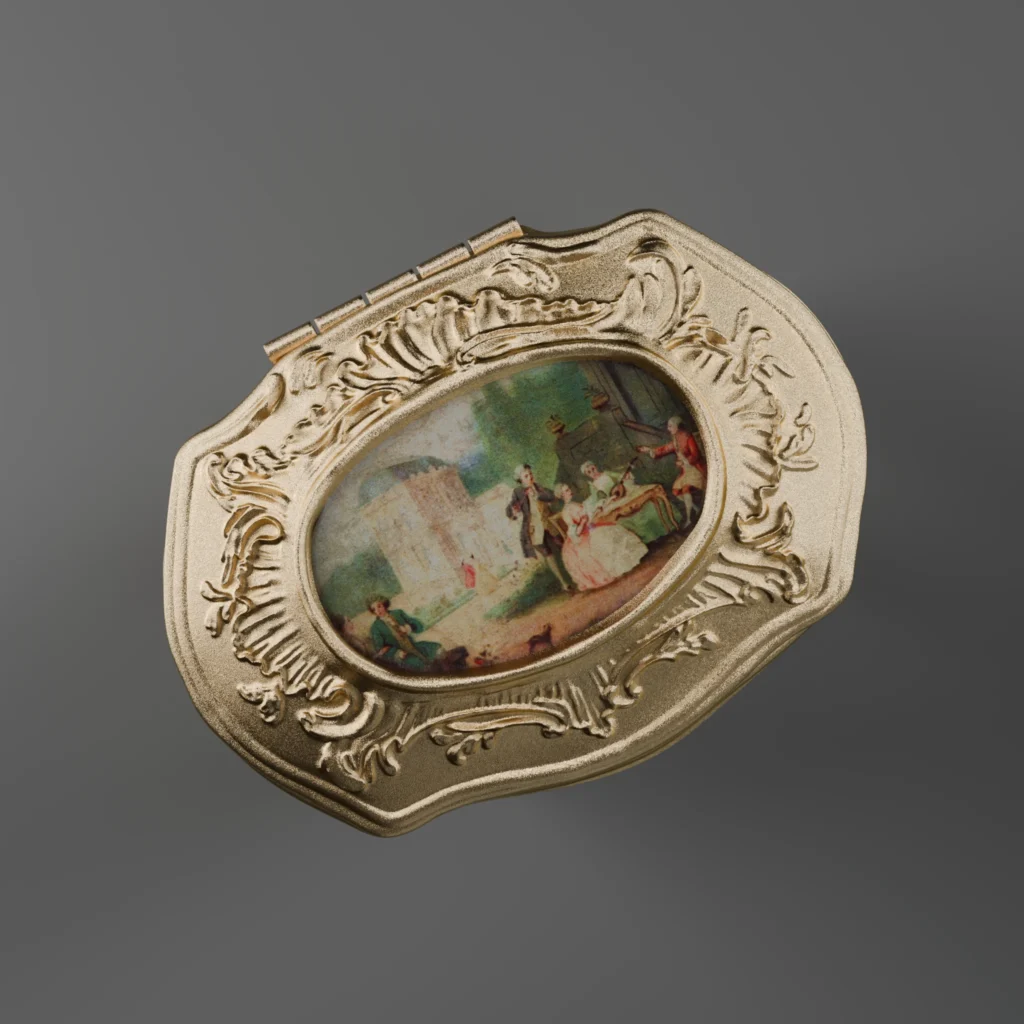
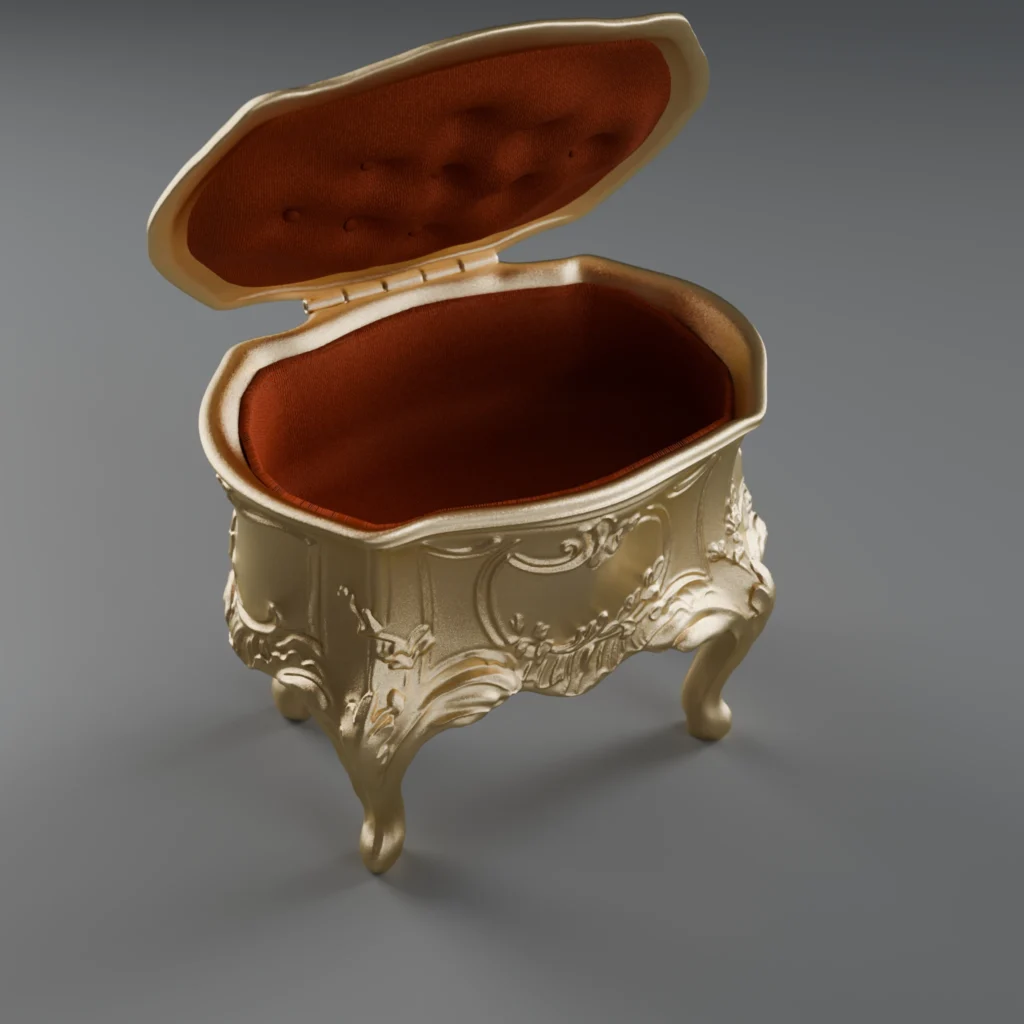
3D view
Disclaimer : technical limitation to material render in web app can let artifacts show, particularly in zoomed views.
See the full screen view (this will open a new tab in your browser).
Studio talk
As the reconstructed hypothesis model is now, it can both be used digitally or 3D printed. The legs can be severed and used to prop up the original piece. I fully intend to do it and gave the little guy a new life at some point. As this is a whole other can of worms, I will have to pause on that project for now. As soon as I am able, I -of course- will take you for the ride.
Contact
If any of you, dear reader, want to further the conversation, you can do so on Mastodon or Pixelfed.
Credits
Unless otherwise mentioned, all images credit to LGS.
Iconography
“Jouets, étrennes, étrennes 1914 Louvre”, december 1913, Grands Magasins du Louvre, ill. by Tellier R., Printer Desfossés-Néogravure, available online
Bibliography
Scott David A., “Copper and bronze in art : corrosion, colorants, conservation”, 2002, Getty Conservation Institute, available online
Scott, Podany, Considine, “Ancient & Historic Metals: Conservation and Scientific Research”, 1995, Getty Conservation Institute, available online