

Pin cushion archaeology
The following texts and images are the results of a training exercise to go from the pictures or the description of an artifact to the creation of a 3D digital double, sometimes restored version of it. If you wish to know more about the process, every explanations are in A journey into learning a (3D!) restoration process workflow article.
In this project, we will attempt to recreate an important historical though not so known artefact. The exercise this time is to try to obtain a pattern from this reconstruction work using all the help 3D and digital media can offer the sewing archaeologist !
Yes, yes, It is also because I am in need of a pincushion. Nothing gets past you, eh ?
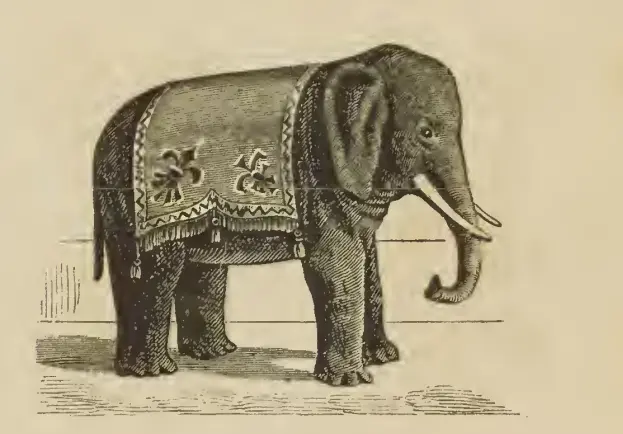
Title: Engraving of a toy elephant, in The Delineator magazine, Butterick and Co, O’Loughlin, Robert S. , p 91 (293 in volumes)
Datation: December 1878
Provenance: United States
Dimensions: unknown
Media: Ink on paper
Description and Historical context
Margarete Steiff and the toy elephant
This is where the idea for this project comes from. Like many kids, I had a soft spot for stuffed toys, and I was in awe of people actually making them.
As most people, I had no real idea of when these objects came about. I assumed they more or less have been there for as long as there was time and materials enough to make them. As far as toys are concerned, I was right. As far as stuffed toys are concerned, their development coincides with the turn of the XXth century.
One notable figurehead of this movement is the infamous teddy bear. In that regard, I like Margarete Steiff’s story. In a nutshell, the seamstress decided to sew a little elephant from a pattern she saw in a magazine and offered it to some of her clients. What was intended as a toy was often also used as a pincushion. Seeing her clients were liking this item, she refined the model and produced other animal inspired ones. This created one of the most known and sought after stuffed toy production companies, still operating today.
I was intrigued by the original elephant and tried to find the articles/pattern that inspired Margarete Steiff.
A Steiff website that mentions that she “saw a pattern for a small elephant made of fabric” in the 8th of December 1879 issue of “Modernwelt”. A press release from Steiff USA adds the following elements: “In the December 8th, 1879 magazine of Modenwelt (Fashion World) Margarete saw the sewing pattern for a little animal, “Elephant of Cloth. To be used as a toy”, that would unwittingly account for the big changes in her career. As expressed in Margarete’s diary, “At this time, I came across a pattern for a toy elephant. Felt was the ideal material for this toy, and the filling would be of the finest lambswool. Now, I could make these (the elephants) as gifts for the children in the family, and I tried out the pattern in various sizes…”
It’s the Wikipedia page on Margarete Steiff that gave me the last clue: “In 1879, the American magazine Delineator published a pattern for a cloth mouse, rabbit and elephant, other animal patterns followed and the German magazine Modenwelt reproduced these patterns…”
Teddy bears and beyond : Magazines, the best way to sell patterns and fabric !
Delineator is a magazine created in 1873 and edited by the Butterick Publishing company, specialized in sewing patterns. The company is now gone, and its brands exploited by other conglomerates.
This magazines, among others, are the ancestors of all the fashion magazines we know today. Just like for the food industry, the idea is to provide customers with incentives to buy the mother company’s products.
Voilà ! A final thorough internet search for digitized versions of the magazines manages to track down December 1878 issue, where the pattern for a toy circus elephant is discussed on page 91.
I’m not sure if it is, indeed, the actual piece that inspired Margarete Steiff, but it is close to Steiff’s authenticated versions that I was able to find online.
Steiff company produced a small number of re-edited pincushions elephant for their 50th anniversary. I also stumbled upon this one on the same auctioneer website with a model, but that bears similitude to the re-edited ones and the pattern as it is described.
Have we found one of the ancestors of all stuffed-toys ? I choose to believe we did.
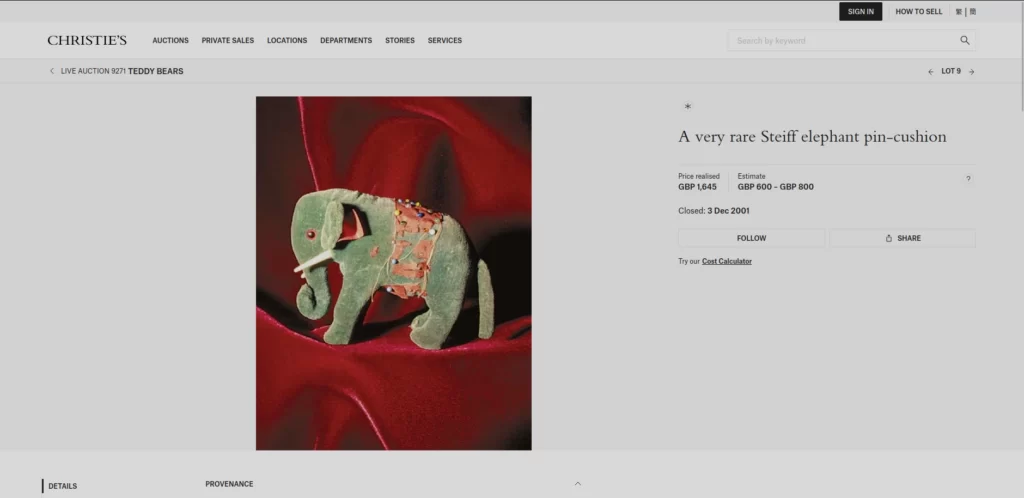
Now, can we create a digital version of it ? While we’re at it, let’s also aim for a physical version of it by creating a sewing pattern. I still need a pincushion !
Visible condition report: attempting to recreate a pattern
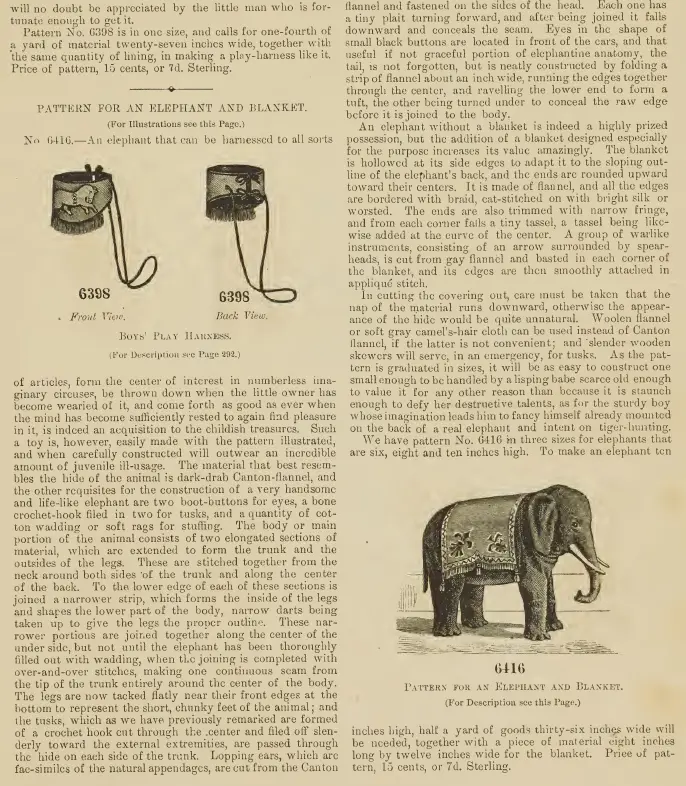
This dear page 91 is giving us a description of the toy and of the pattern it uses. This is going to be our starting point.
Transcription:
“FOR AN ELEPHANT AND BLANKET
No 6416 An elephant that can be harnessed to all sorts […] of articles, form the centre of interest in numberless imaginary circuses, be thrown down when the little owner has become wearied of it and come forth as good as ever when the mind has become sufficiently rested to again find pleasure in it, is indeed an acquisition to the childish treasures. Such a toy is, however, easily made with the pattern illustrated, and when carefully constructed will outwear an incredible amount of juvenile ill-usage.
The body or main portion of the animal consists of two elongated sections of material, which are extended to form the trunk and the outsides of the legs. These are stitched together from the neck around both sides of the trunk and along the centre of the back.
To the lower edge of each of these sections is joined a narrower strip, which forms the inside of the legs and shapes the lower part of the body, narrow darts being taken up to give the legs the proper outline. These narrower portions are joined together along the centre of the under side, but not until the elephant has been thoroughly filled out with wadding, when the joining is completed with the tip of the trunk entirely around the centre of the body.
The material that best resembles the hide of the animal is dark-drab Canton-flannel, and
the other requisites for the construction of a very handsome and life-like elephant are two boot-buttons for eyes, a bone crochet-hook filed in two for tusks and a quantity of cotton
wadding or soft rags for stuffing.
The legs are now tacked flatly near their front edges at the bottom to represent the short, chunky feet of the animal; and the tusks, which as we have previously remarked are formed of crochet hook cut through the centre and filed off slenderly toward the external extremities, are passed through the hide on each side of the trunk.
Lopping ears, which are fac-similes of the natural appendages, are cut from the Canton flannel and fastened on the sides of the head. Each one has: a tiny plait turning forward, and after being joined it falls downward and conceals the seam.
Eyes in the shape of small black buttons are located in front of the ears, and that useful if not graceful portion of elephantine anatomy, the tail, is not forgotten, but is neatly constructed by folding a step of flannel about an inch wide, running the edges together through the centre, and ravelling the lower end to form a tuft, the other being turned under to conceal the raw edge before it is joined to the body.
An elephant without a blanket is indeed a highly prized possession, but the addition of a blanket designed especially for the purpose increases its value amazingly. The blanket
is hollowed at its side edges to adapt it to the sloping outline of the elephant’s back, and the ends are rounded upward toward their centres. It is made of flannel, and all the edges
are bordered with braid, cat-stitched [a type of crochet stitch] on with bright silk or worsted [serge-like fabric]. The ends are also trimmed with narrow fringe, and from each corner falls a tiny tassel, a tassel being like-wise added at the curve of the centre. A group of warlike instruments, consisting of an arrow surrounded by spearheads, is cut from gay flannel and basted in each corner of the blanket, and its edges are then smoothly attached in appliqué stitch.
In cutting the covering out, care must be taken that the nap of the material runs downward, otherwise the appearance of the hide would be quite unnatural. Woollen flannel
or soft gray camel’s-hair cloth can be used instead of Canton flannel, if the latter is not convenient; and slender wooden skewers will serve, in an emergency, for tusks. As the pattern is graduated in sizes, it will be as easy to construct one small enough to be handled by a lisping babe scarce old enough to value it for any other reason than because it is staunch enough to defy her destructive talents, as for the sturdy boy whose imagination leads him to fancy himself already mounted or the back of a real elephant and intent on tiger-hunting.
We have pattern No.6416 in three sizes for elephants that are six, eight, and ten inches high. To make an elephant ten […] inches high, half a yard of goods thirty-six inches wide will be needed, together with a piece of material eight inches long by twelve inches wide for the blanket. Price of pattern, 15 cents, or 7d, Sterling. ”
It seems we have our work cut out for us !
Creating a 3D model of the piece.
Disclaimer : this is an exercise, shown for documentation purposes only
What to do ?
Though we have an idea of how the elephant should look like, the idea is to create a pattern to be able to sew it. It’s as if we were walking in Margarete Steiff’s “footsteps”, but because it is an interpretation our stitches will inevitably differ. Also, she could actually sew.
Thankfully, we have the description of the pattern: maybe we can extrapolate from there. And by “we”, I mean that I’ll need the help of a specialist. Reading a sewing pattern always leaves me puzzled and wondering how much I really know about the world we live in !
Let’s start wit a very brief refreshing course on an Asian elephant silhouette, Elephas maximus . I chose the species because the visual references seem to show somehow smallish ears than on the African one, Loxodonta africanus. The two species actually have different silhouettes so it isn’t that far fetched ! Yes, two different genuses for a deceptively similarly looking animal !
From there, we can try to produce a convincing turn side views rough sketches:
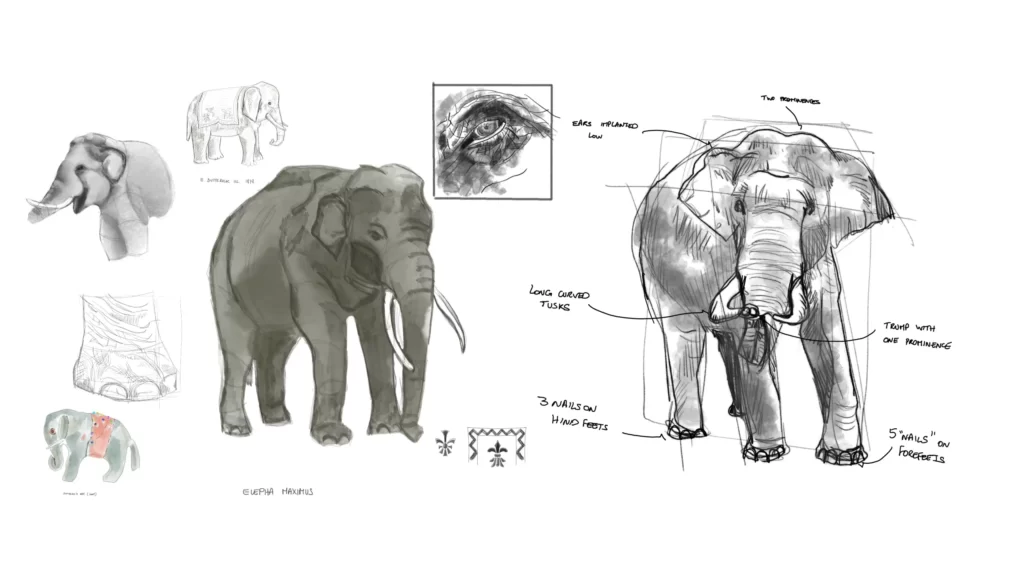
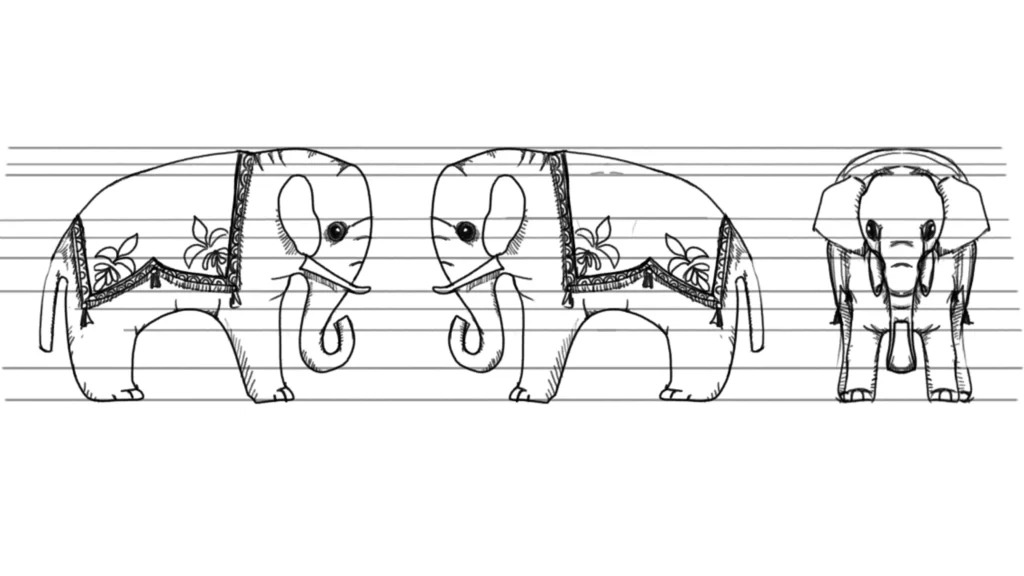
So. We have a direction, we need a plan of action in order to create our very own Elephas plushimus re-baptized Elephantus plushimus because I decided this species was of Greek descent. Also, it confuses zoologists, and that’s always fun.
Cut and sew, UV and pattern
The best way to make sure we’ll end up with a usable pattern is probably to start toward this goal from the start. As I’ve already mentioned, I am not gifted in the textile arts. My plan is to start with the shape I created as the reference and then ask for the help of a real textile artist for validation. As far as I can tell, the text puts forward 5 parts: the body (duh!), the ears, the tusks, the trunk and the tail. The eyes are separate elements we’ll see about later.
In order to keep testing the pattern and accommodating the model accordingly, I’m using the blender Seams to Sewing pattern add-on. It is of tremendous help. It uses the UV map layout, that is a projection of a 3D model’s surface to a 2D image , to create a sewing pattern as I go about creatng the different pieces.
The process is as follows:
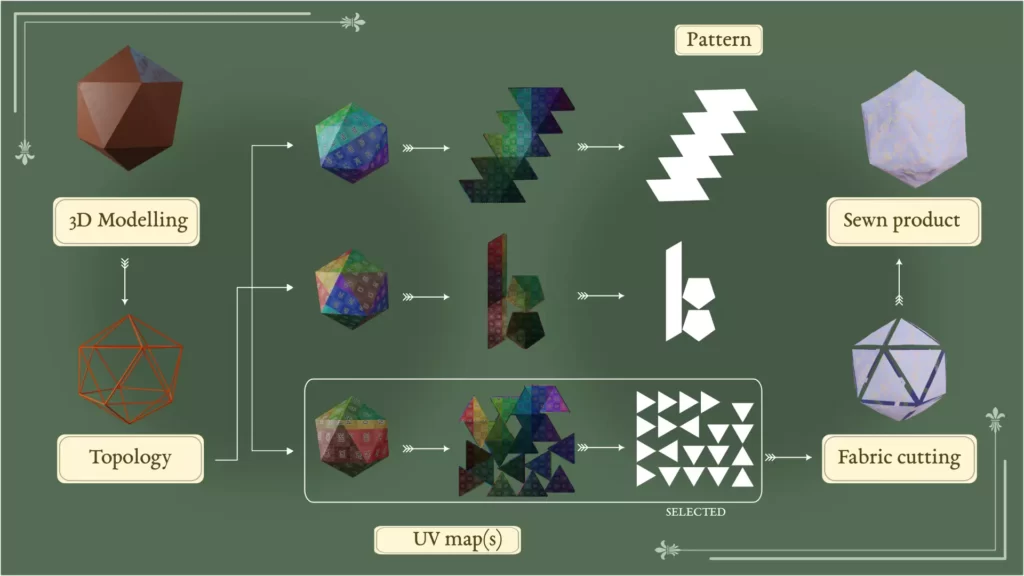
How to do it: a 3D creation process
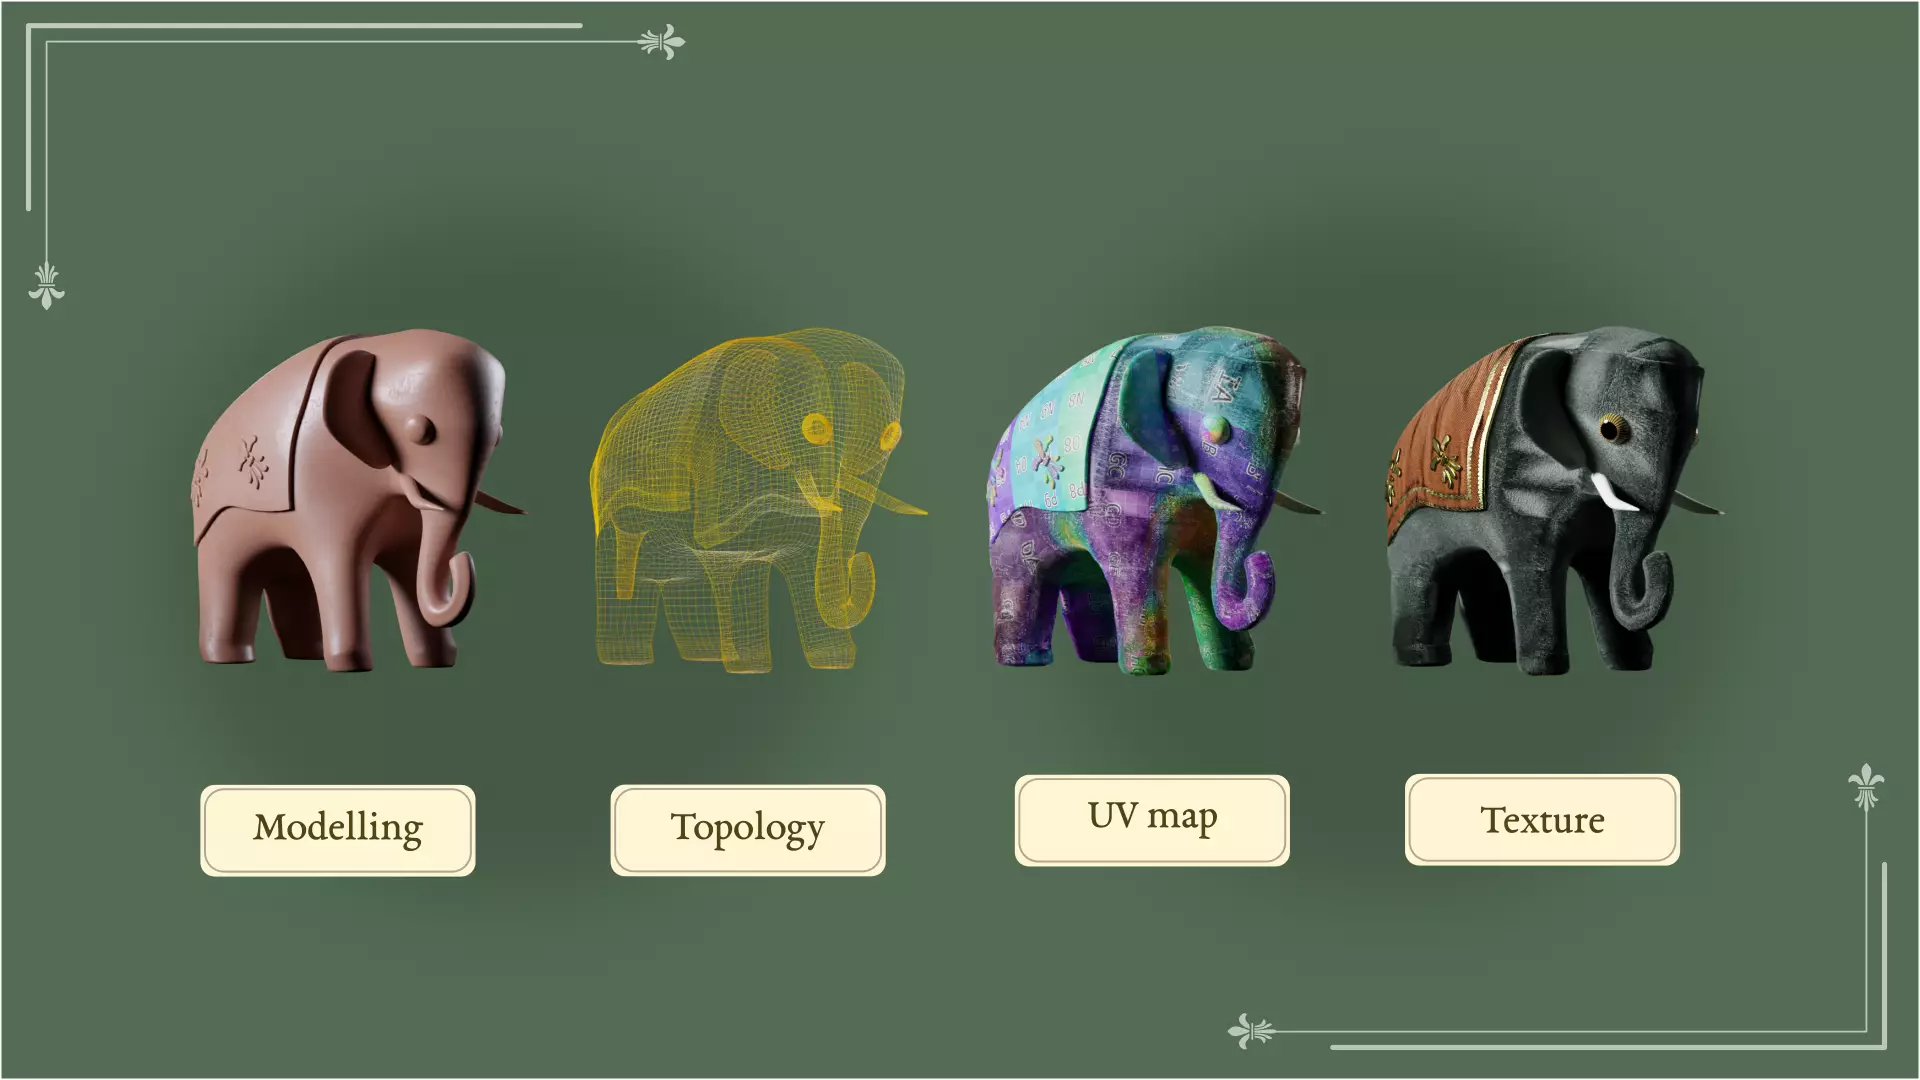
Model the shape
First, we need to tackle the body, then the added elements.
A pachydermal task
Modelling the body shape is not the real issue.
The add-on uses the UV map to create the sewing pattern. Keeping the topology clean so that the UVs are in agreement with the pattern description is the real Gordian knot here.
That basically means that unless I want to retopologize iteratively in the dark and further my descent into madness, I need to create the UV map at the same time. It’s somehow already a part of the 3D workflow: retopologizing means also thinking about the UV slicing that comes after. In this particular project, this is particularly paramount.
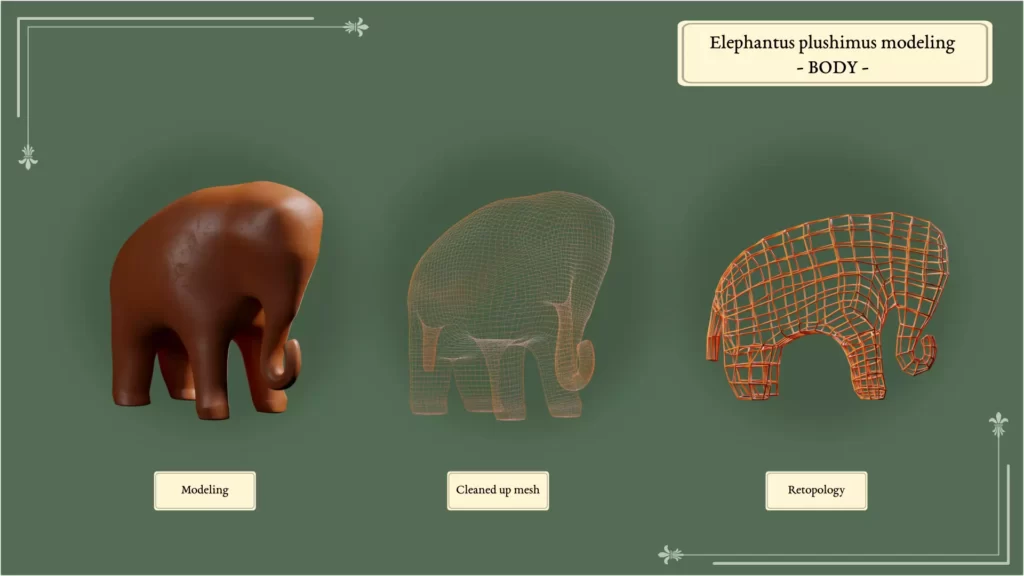
The poster shows the shape “fresh from the sculpt”. There is not that much details because there doesn’t need to be.
Retopologizing allows for the model’s mesh to be simplified while retaining its overall volumes. The shape is the same but the number of polygons is drastically lowered. I could probably have gone away with keeping a high vertices count. As this is an iterative process of trials and errors, chances are that would have been impractical. This is the starting step for further modifications while at the same time creating the sewing pattern. We will focus on the body first: the other elements are easily patterned.
This is where a back and forth with the textile specialist is important to respect both the historical description and to allow for the creation of a sensible and efficient pattern to obtain a physical sewn version of the artefact.
First iteration
This first retopology allows for the creation of a first UV map that the add-on will use to generate a sewing pattern.
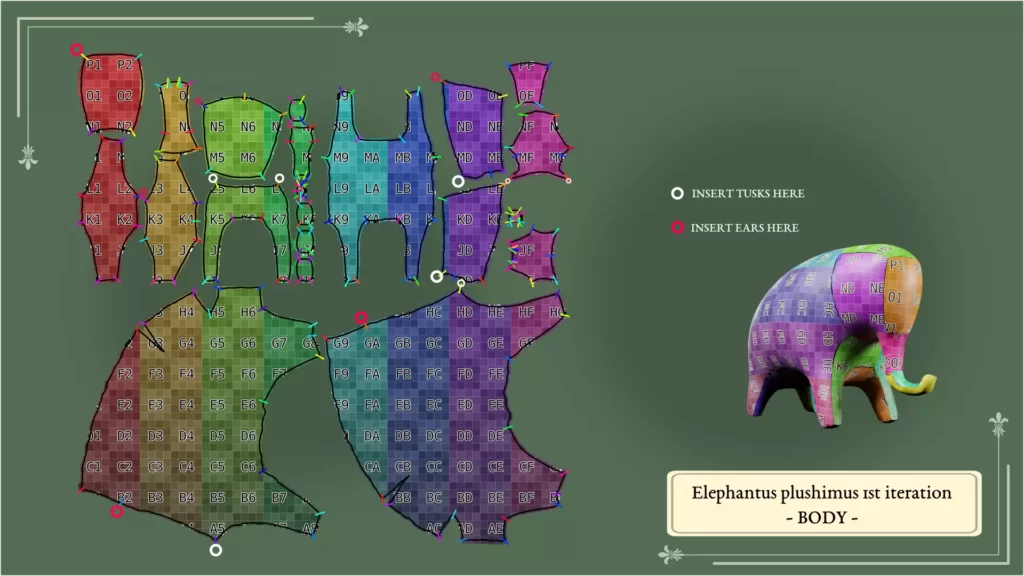
I do understand that the process can be a little puzzling at first. If I put it back on the shape, you can better see the correlation.
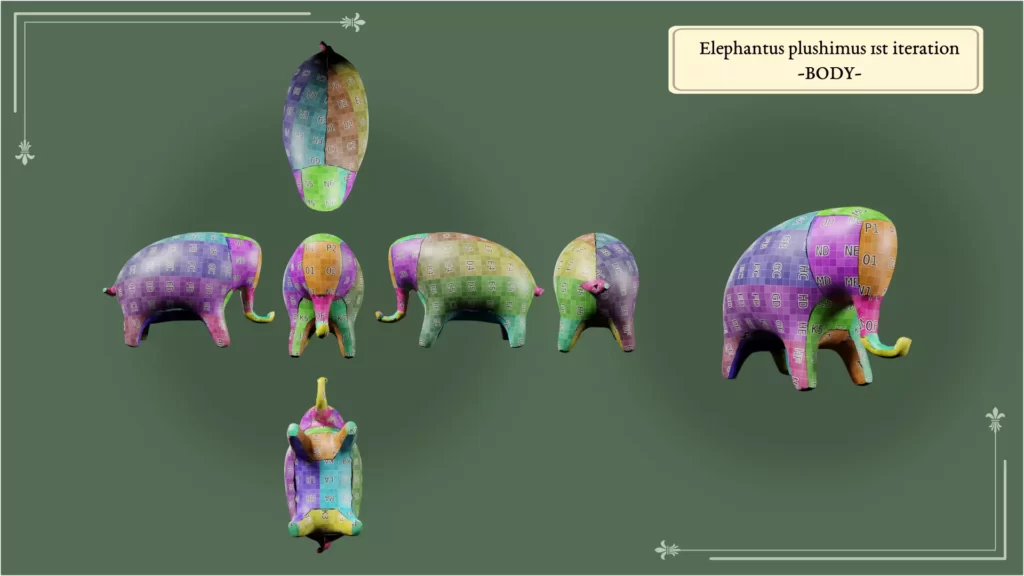
This is good, but there are a few issues: the tail and trunk are not fully satisfying. I think ultimately the tail may be a separate piece.
Second iteration
After IRL try-outs and following the precious advice of a seamstress relative of mine, we need to amend this first pattern. The idea is to make fewer pieces and allow for an easier sewing “experience”. In my opinion, that means “less bleeding” but I’ve been told my practice can’t be used as a reference. Rude !
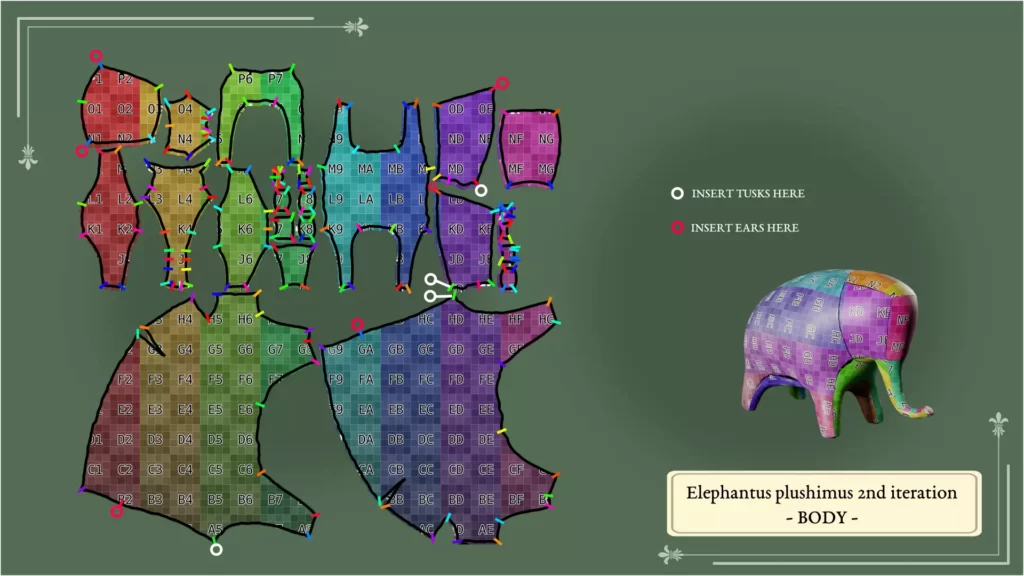
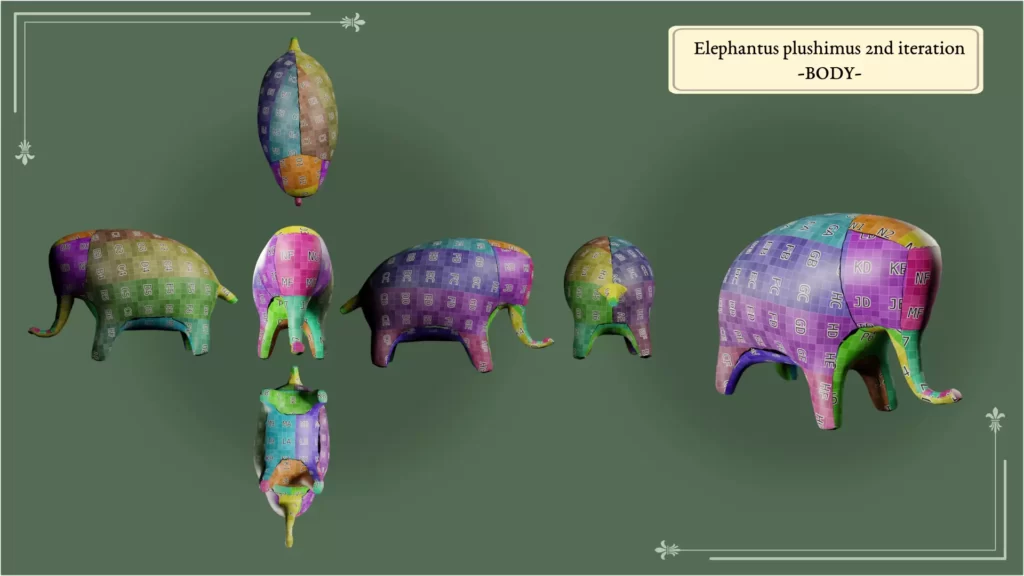
The tail and trunk are more defined. But the number of pieces is still too high. The trunk is the culprit: in order to have the “S” shape shown in the model, it needs to be heavily truncated to allow the patterning plug-in to work. This is a known limitation. The fact of the matter is that the trunk can be shaped later, during the sewing process.
So, in the next iteration, we can probably keep it simple and straight. Same will go for the tail: after careful review of the references, it can definitely be a separate piece. I’d like it to be something else than a piece of string though.
The textile specialist(s) also put forward the size issue. Too tiny pieces will be a nightmare to deal with. That goes for the end of the trunk but also the feet. That last part might require a slight modification of the model to thicken its legs under the belly. Fewer pieces also mean less textile involved and therefore less sewing cabbage. So on the next iteration, we need to acknowledge that too.
Third iteration
To sum-up, in this iteration we need to:
- Keep the trunk simple
- Separate the tail (to be dealt with later)
- Try to lower the number of pieces.
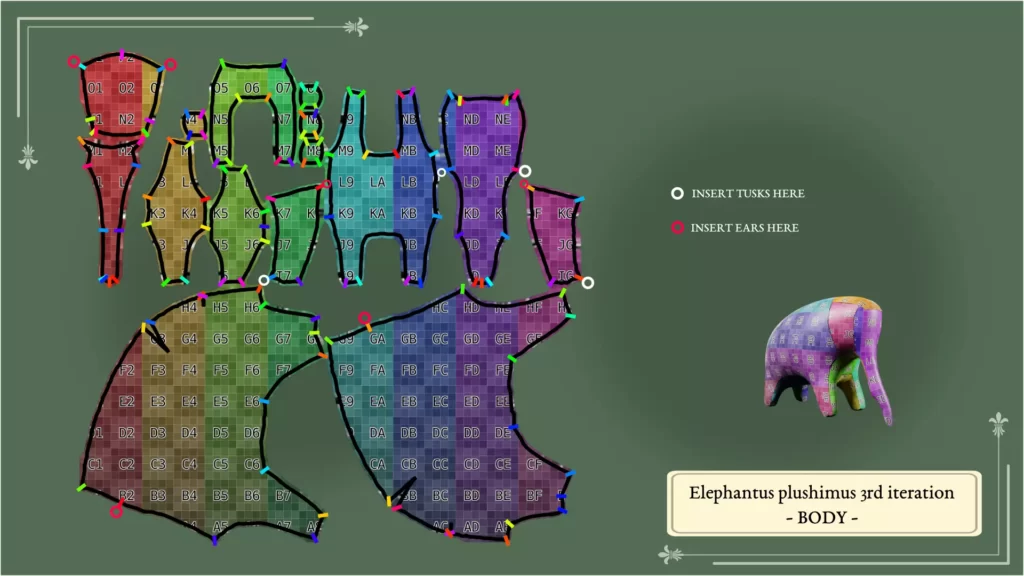
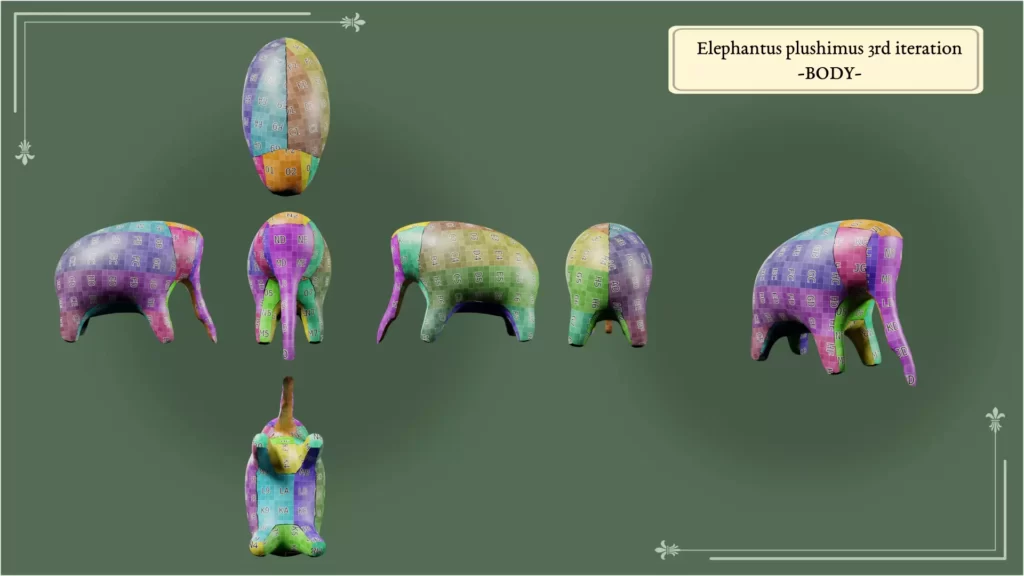
I think we have something that could work. Though it seems the head is constructed differently than the text describe. That way I’m making sure the shape is the one I want.
Maybe ?
A carpet, two tusks, two ears and two eyes
Soulful eyes
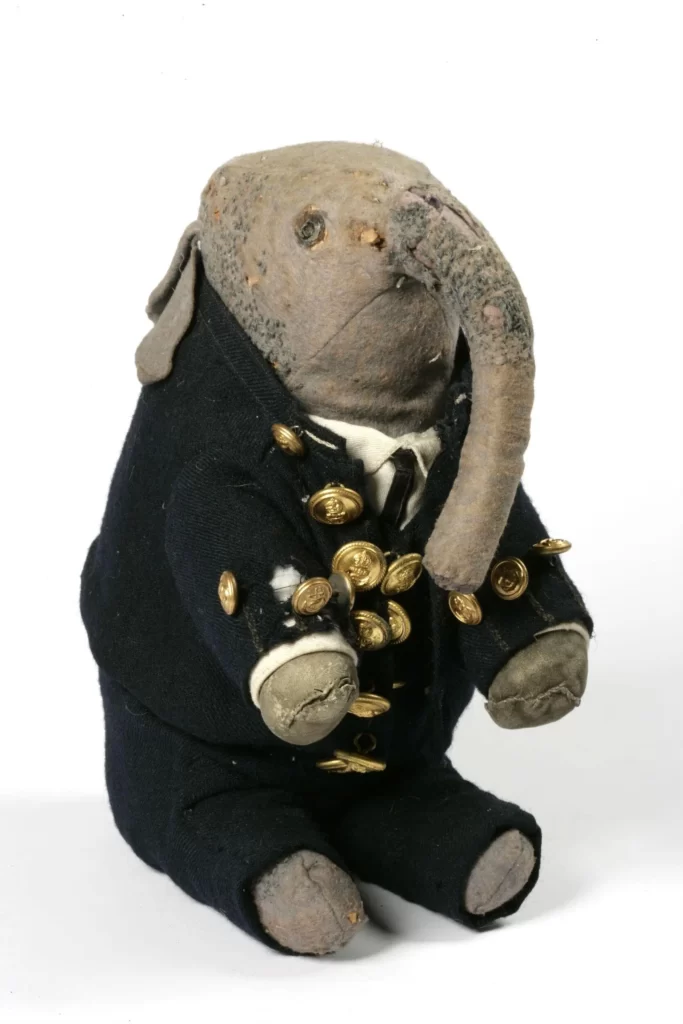
Because I like the eyes of the Christie’s version, though they may be a latter addition, I’m choosing to keep them as is. The historical pattern probably calls for small female boots’ leather buttons (they are smallest yet sturdy to withstand the pressure bipedalism puts on the materials of the shoe).
But after meeting Pumpie the elephant that lives in the British museum, I say all bets are off !
For our purpose, they’re simple modified cylinders in the digital world, and I’m thinking the toy version calls for ready-made ones. On a side note, I’ve discovered rows after rows of semi realistic plastic eyes staring into my soul freak me out. The more you know.
Proud tusks
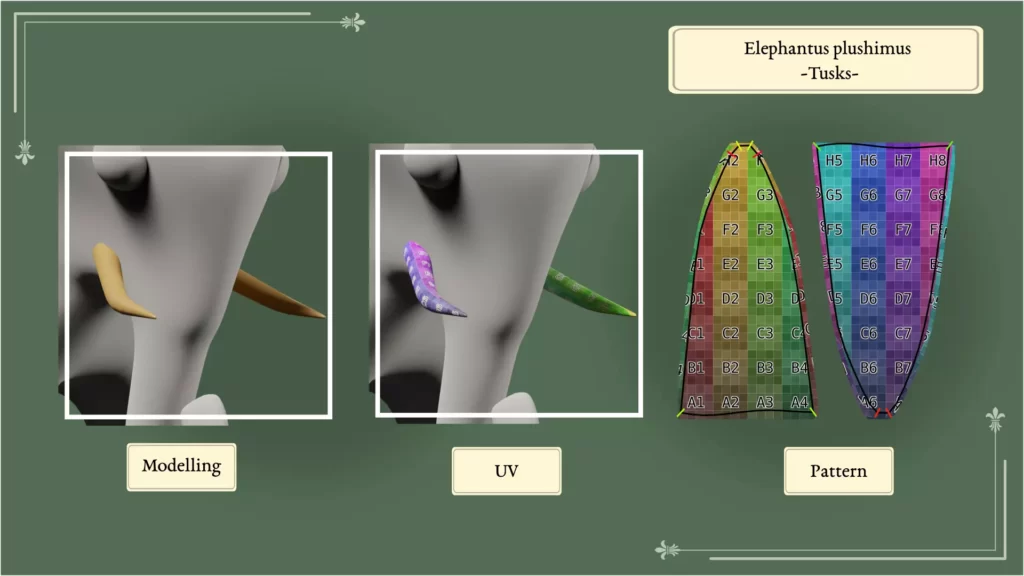
The tusks are almost straightforward. My take on them is that problems will arise when they have to be attached to the sewn body. Their placement on the shape is important and should respect the seams of the body pieces. That way, they can be integrated in the process and not be applied afterwards.
Ears for listening to humans of all sizes
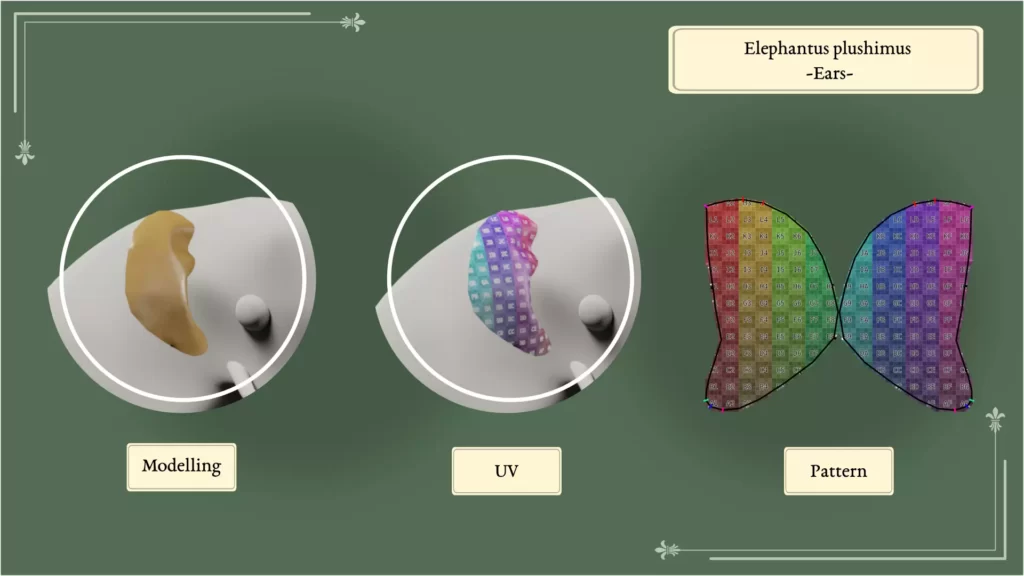
I took a little time to be certain of the optimal shape of the ears. The engraving shows low implanted and relatively small ones.
This is slightly different from what the text is describing. It calls for a plait in the middle of the ear and I modified the shape to accommodate the same result: the top of the ear will fall, hiding the joining seam.
Variations on a tail
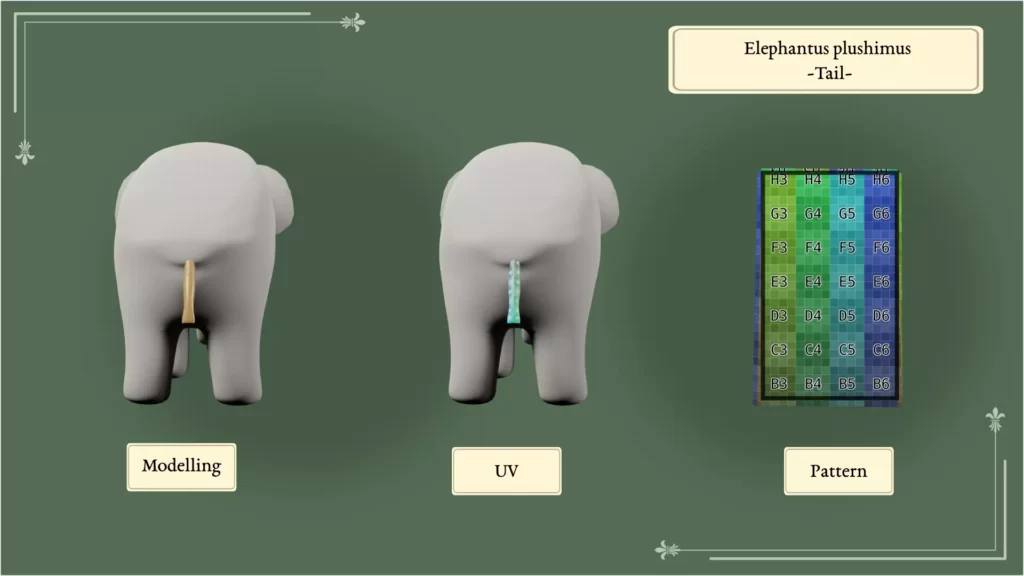
The text suggests a rectangle of fabric to be folded in half and sewn. The loose end is unravelled to create a tuft with a puffy look. I’m being told it could also have been a ribbon or a nice 4 strands braid.
Because I wouldn’t know where to start braiding 4 strands of wool, let’s drop this idea immediately. There are things easier to do in 3D than in the real world, I tell you ! Of course, if you decide to make one for your own elephant: that’s great ! I allow you to tag me on socials and gloat. Just be respectful.
I’ll stick with a simple one made from a folded rectangle. I’m pondering whether the toy version should have a tuft ending.
Blanket extravaganza
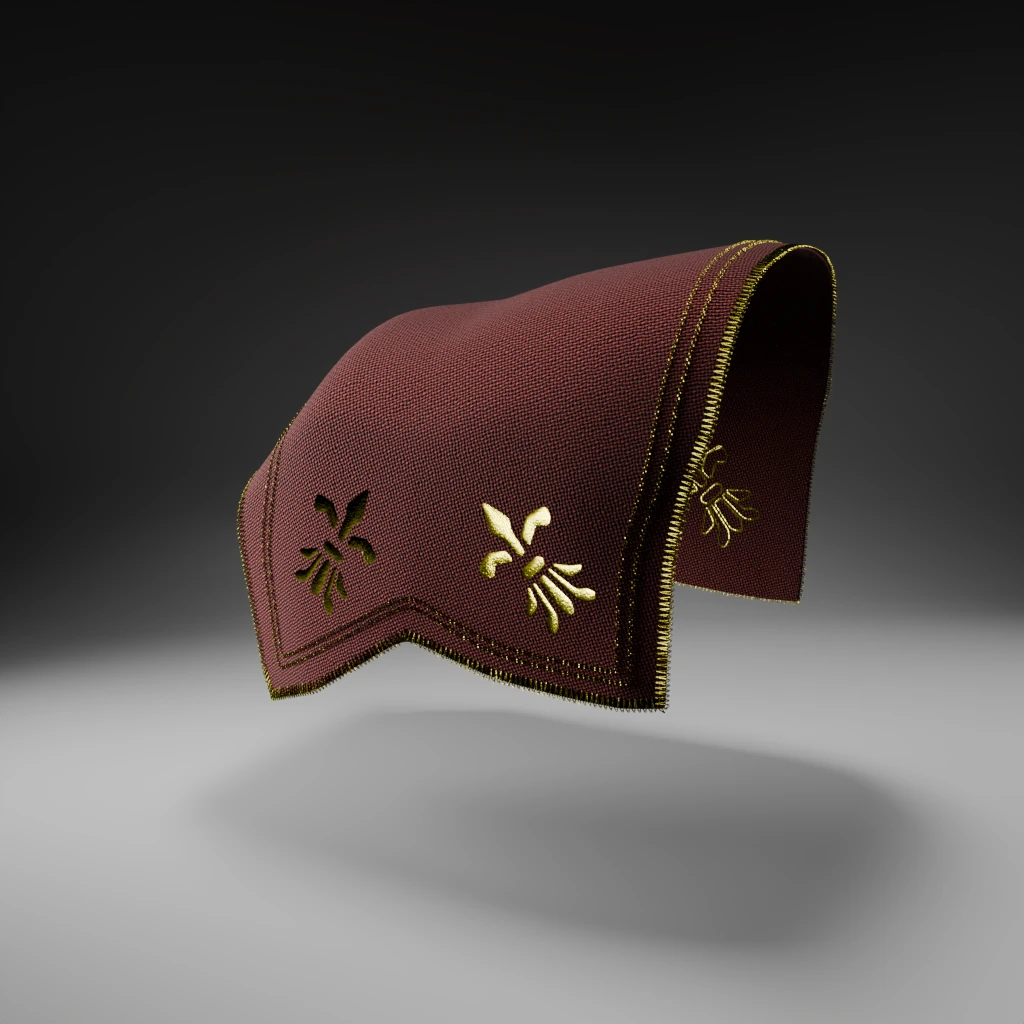
The blanket is described as a simple piece though its decor is put forward.
The reference engraving is showing a reverse accolade sort of shape on the flanks of the animal.
My guess is one can be as creative as one wants here and use whatever is available. You’ll notice the rounded shape of the pattern. This is probably over-engineering it. A regular rectangle will suffice, though it won’t hug the shape as tightly.
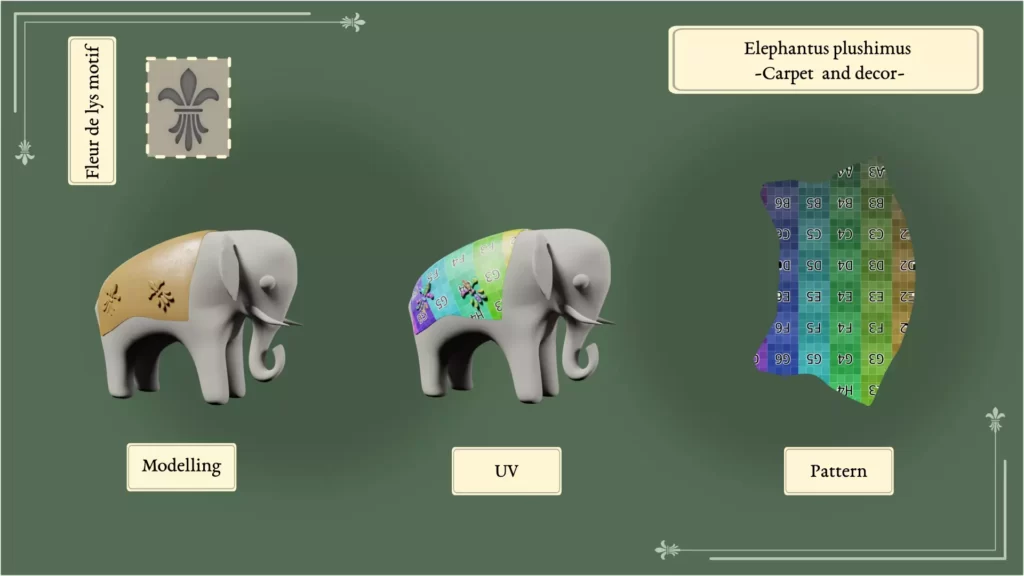
The fleur de lys motif is modelled in the 3D version, but I’m being told it should be embroidered or appliqué in the final toy.
Blend it all together and create the pattern
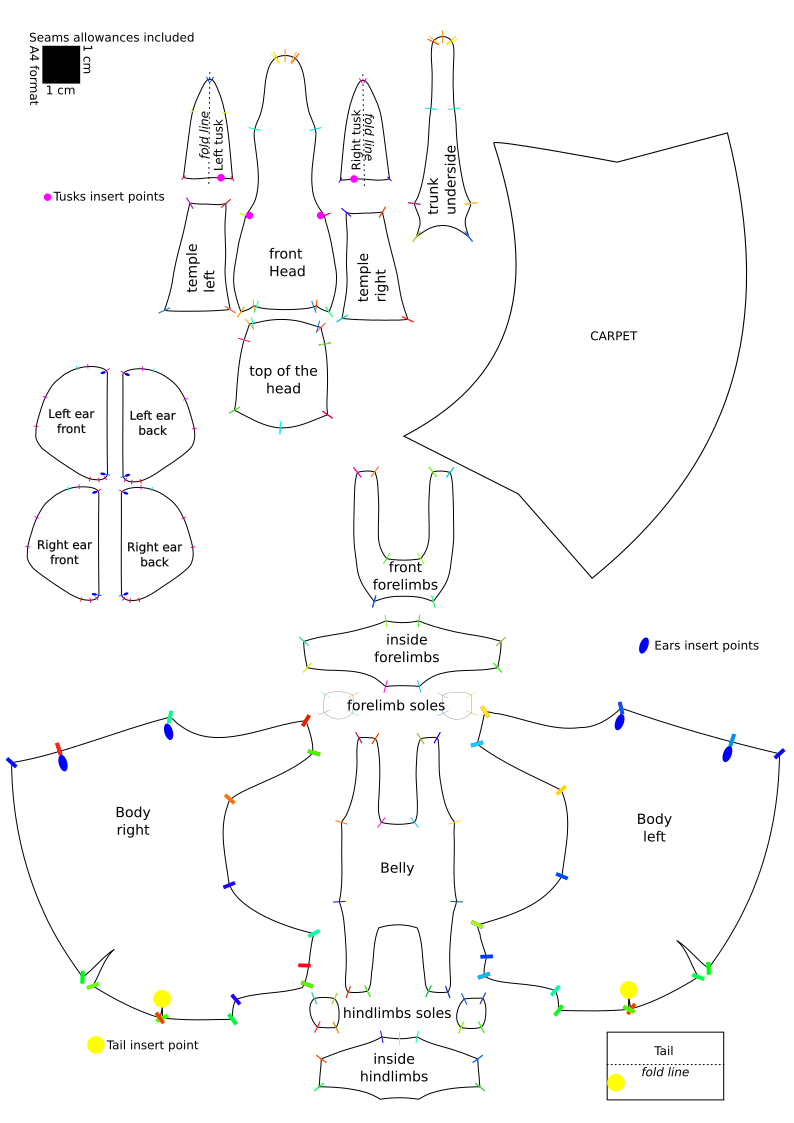
You may have notices that the pattern pieces issued by Blender have ragged borders. This is a result of the generative process, but should be rectified to have smooth and easily cut pieces.
The specialists I contacted have added it is better to add a seam allowance line to all of them. Most seasoned textile persons would rather do it on their own to accommodate the measurement they prefer, but “a layperson will need one”. As this was insistently repeated twice in my general personal direction, I assumed it was not a hint but a requirement.
We also need to indicate the number of each piece we need and make the marks where they must be sewn together clearly visible. As well as mentioning anything worth noting, so the user has all the information at hand.
Texture the shape and don’t forget it’s a toy !
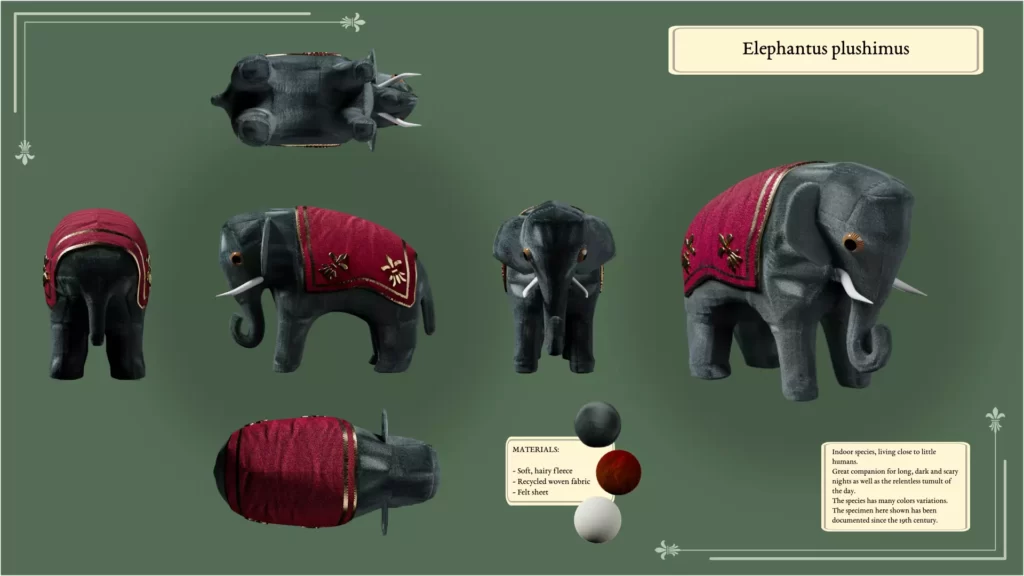
Now that we have a decent base, it’s time to think about the texture we can give it. Hopefully, this can also guide our choice of fabric for later.
The body
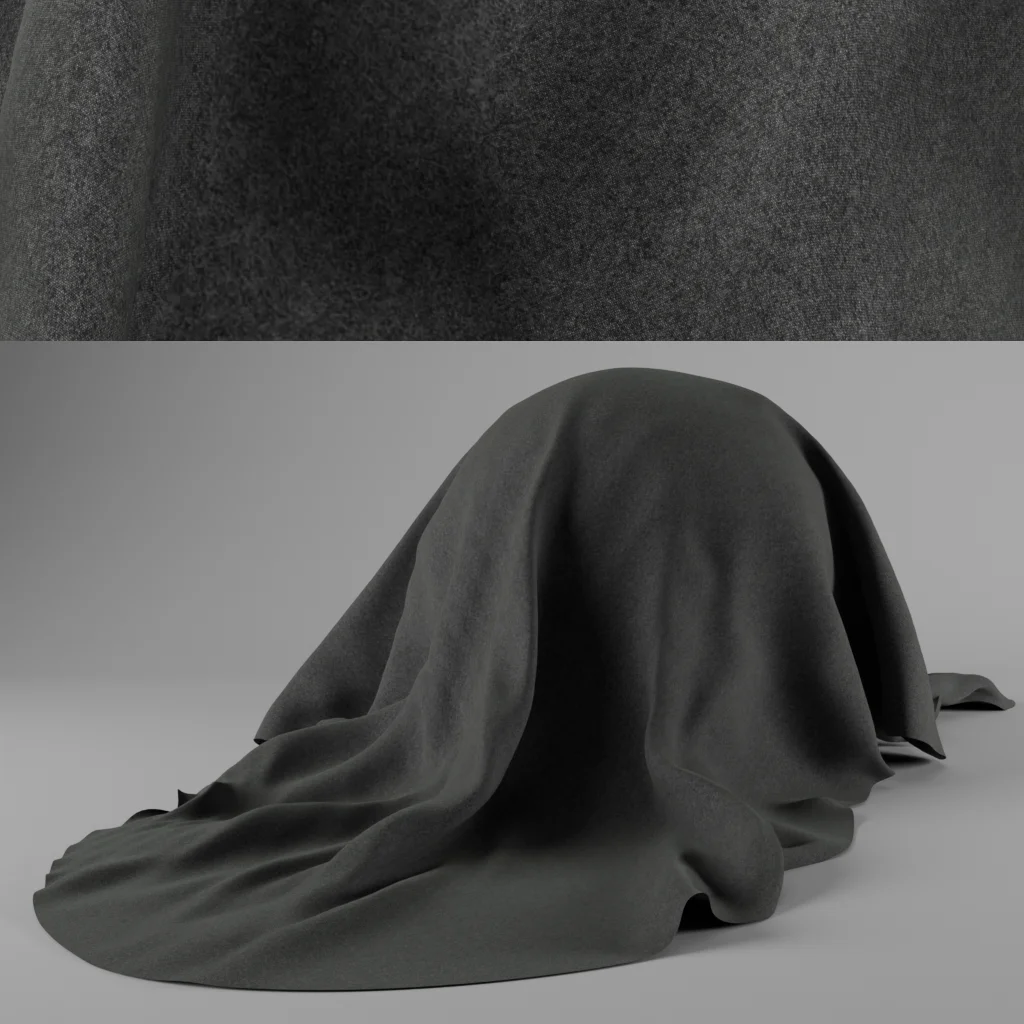
The text gives us indications as to what the elephant can be made of: Canton flannel, Woollen flannel or soft gray camel’s-hair cloth. Those are fine, soft and sturdy fabrics.
As for the colour, I’m voluntarily sticking to the grey of an elephant’s skin. Though, chances are the toy was made from whatever leftover was lying around in the sewing room !
Beside, grey flannel is a timeless classic.
But on a personal note, who doesn’t like plushy fabric ? As the pattern description leaves quite a large leeway, I may choose that option for one the final digital render. Just because I can !
Eyes, tusks and tail
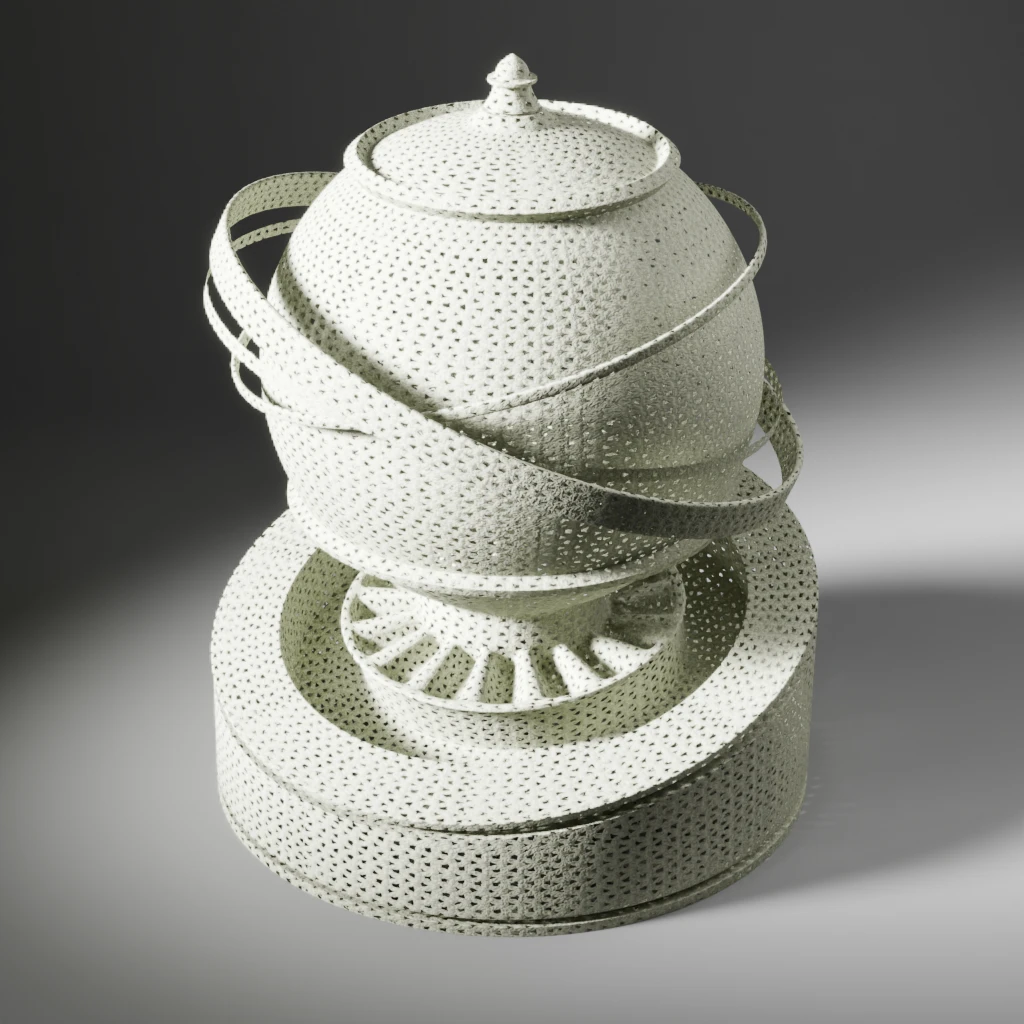
I think I’ll use the same material for both the tail and the tusks, inspired by crochet pieces, as the text suggest.
My idea is to underline the fact that crocheting them would be the work of but a few moments for a craft person. I also think that the idea was to obtain something close to the effect that the amirugumi trend has nowadays. That is a somehow thick and self-supporting, using “simple” chain stitches.
Another option that I may use for the web viewer version can be something like a grey or off-white felt.
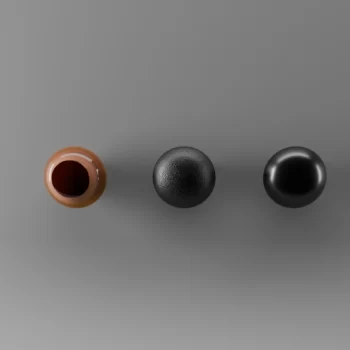
The text only recommends materials for the added elements. Hence, there are two possibilities for the eyes: either boot-button like, so most likely a black leathery or a plastic material, or a realistic-ish glass bead. To my surprise, all are historically accurate. I think I will ultimately choose the one that looks the best.
The blanket
It seems the red color was in the original idea mainly because it is on par with the circus theme the pattern description pushes forward. So I’m choosing this color.
The decor is something else altogether. I’m not convinced by the “war like instruments”. I rather chose to do variations on a fleur-de-lys motifs as shown in the engraving.
Shine a little light: still renders using Cycles
Before we can make glamour shots of our newly created friend, we need to do a little sculpting. Fabric and stuffing work together to give mass and shapes to the fabric skin. Just as it is possible to sculpt the toy shape with needles and thread, we need to make the digital shape more realistic.
That also involves a heavy amount of researches on stuffed animal, a few trips to the nearest shops and online, as well as maybe a few test cuddles But these are sacrifices I am willing to make !
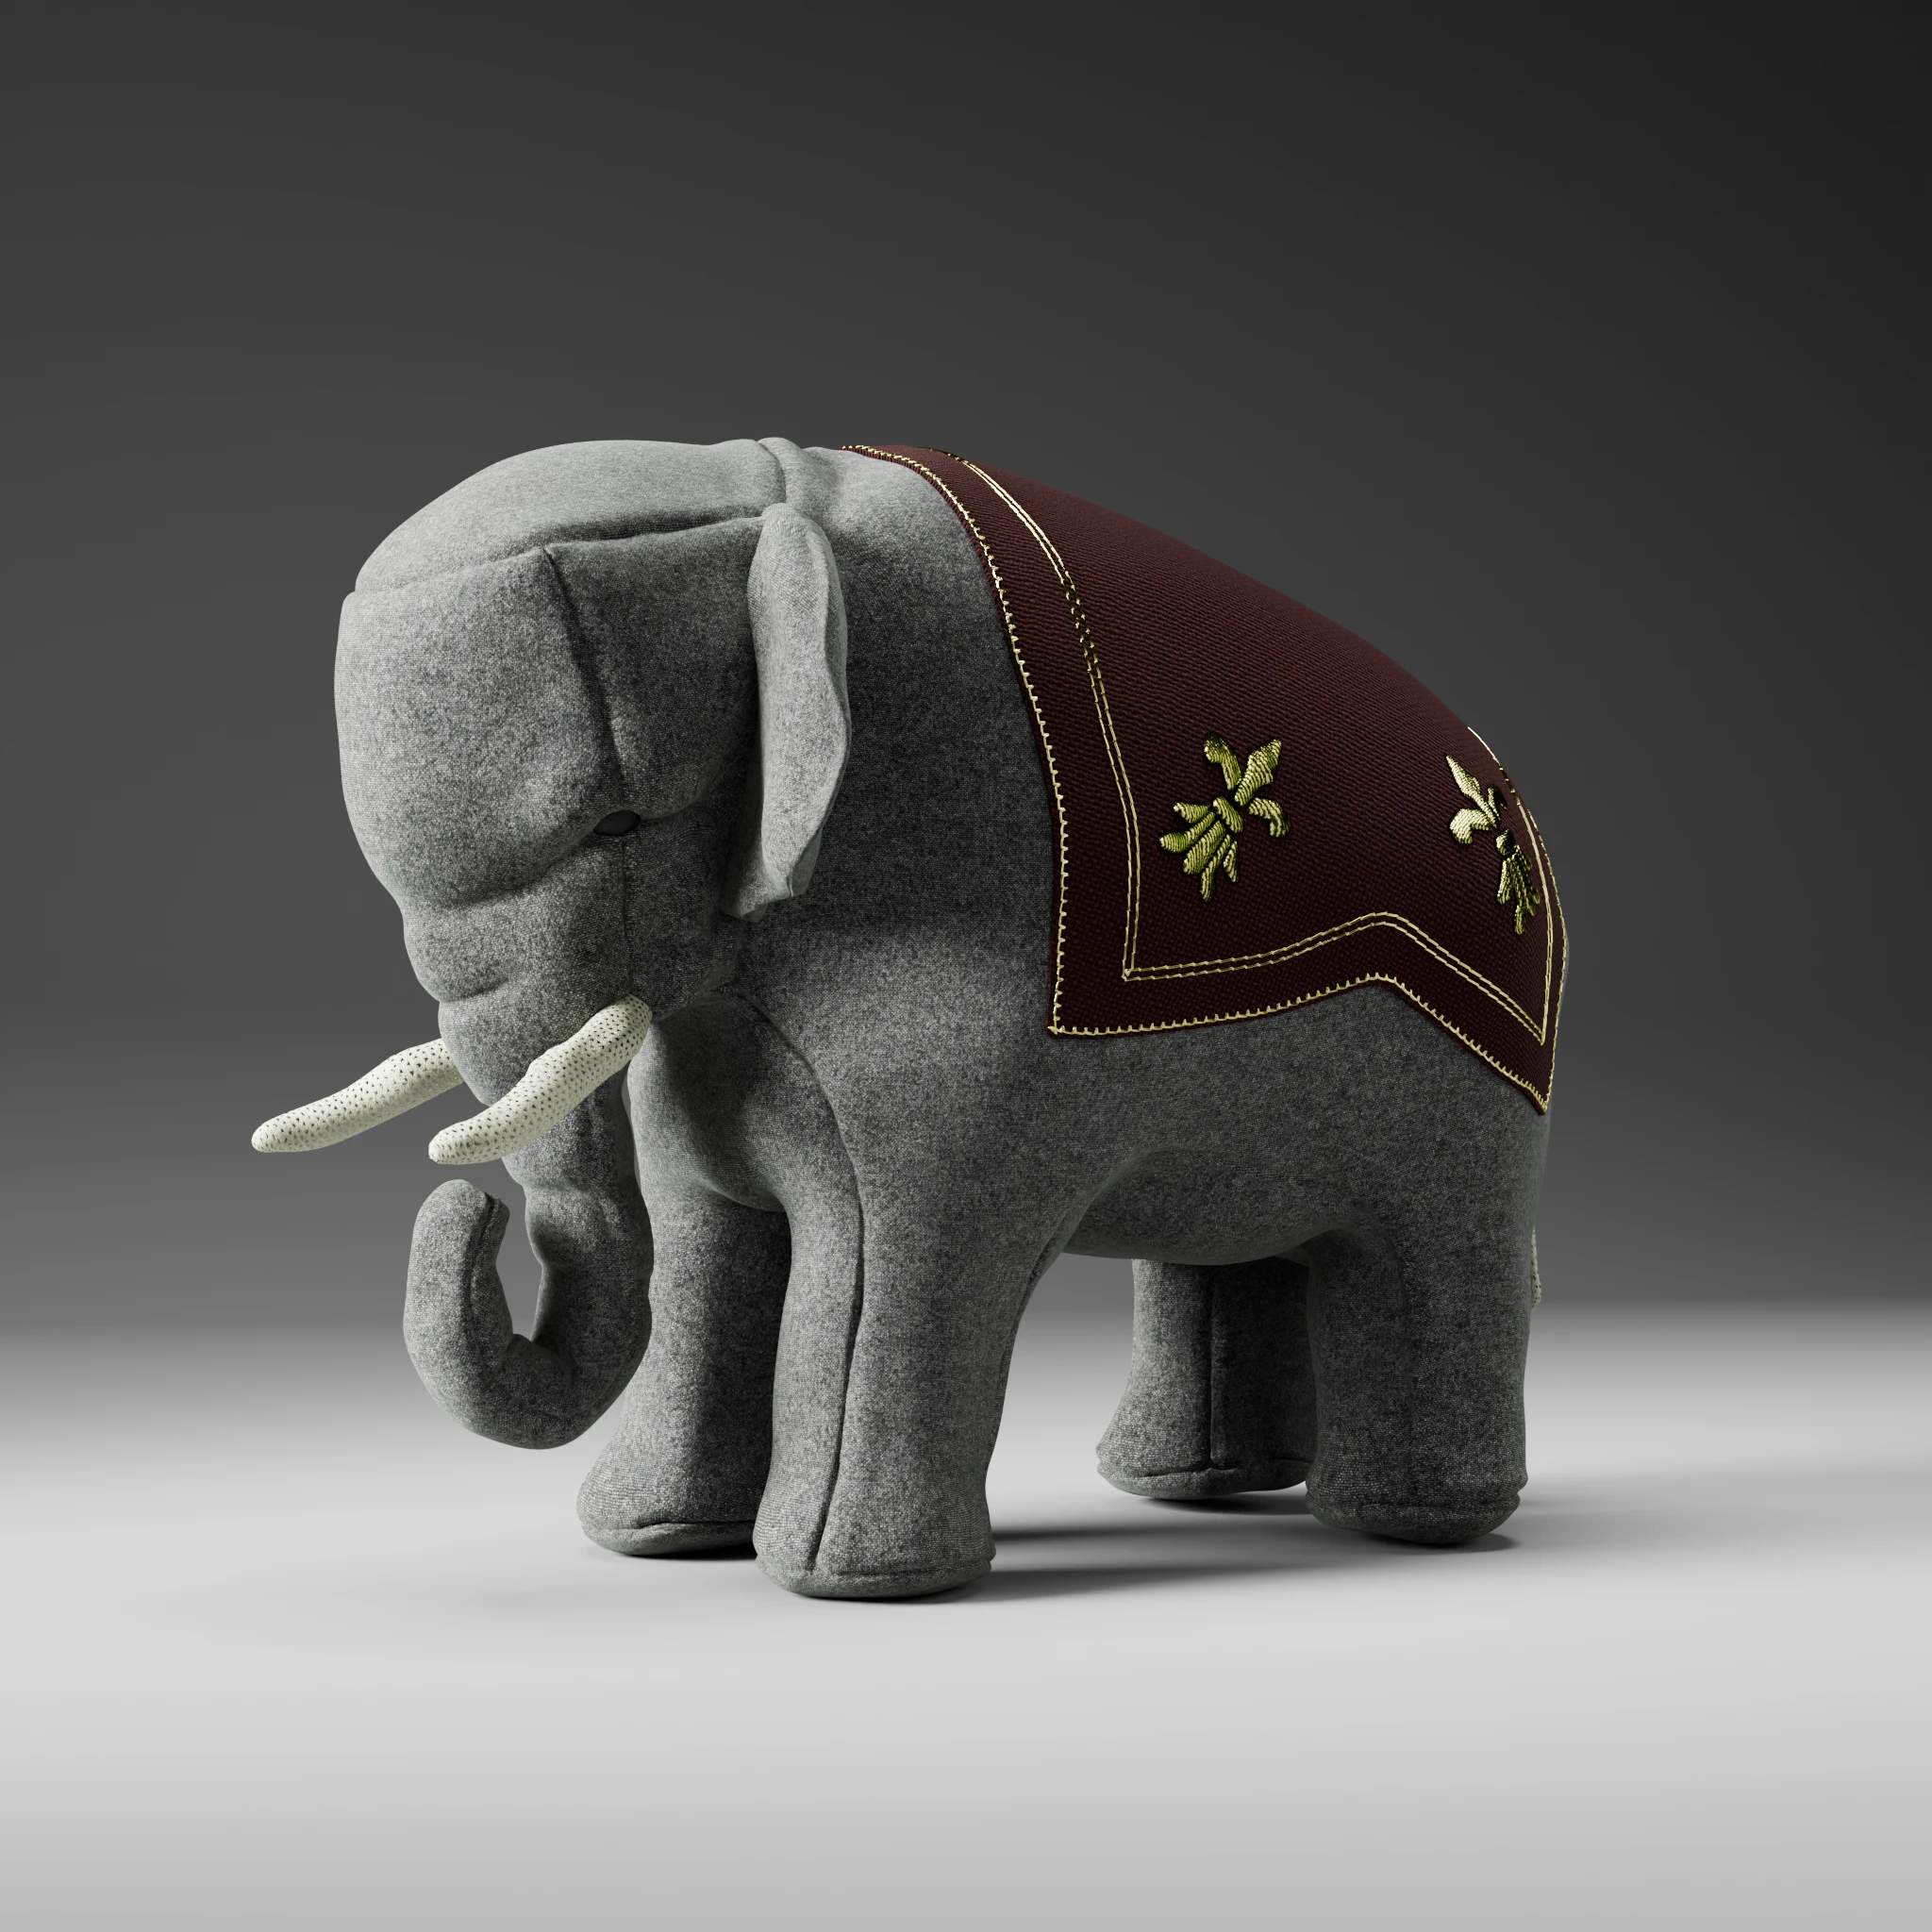
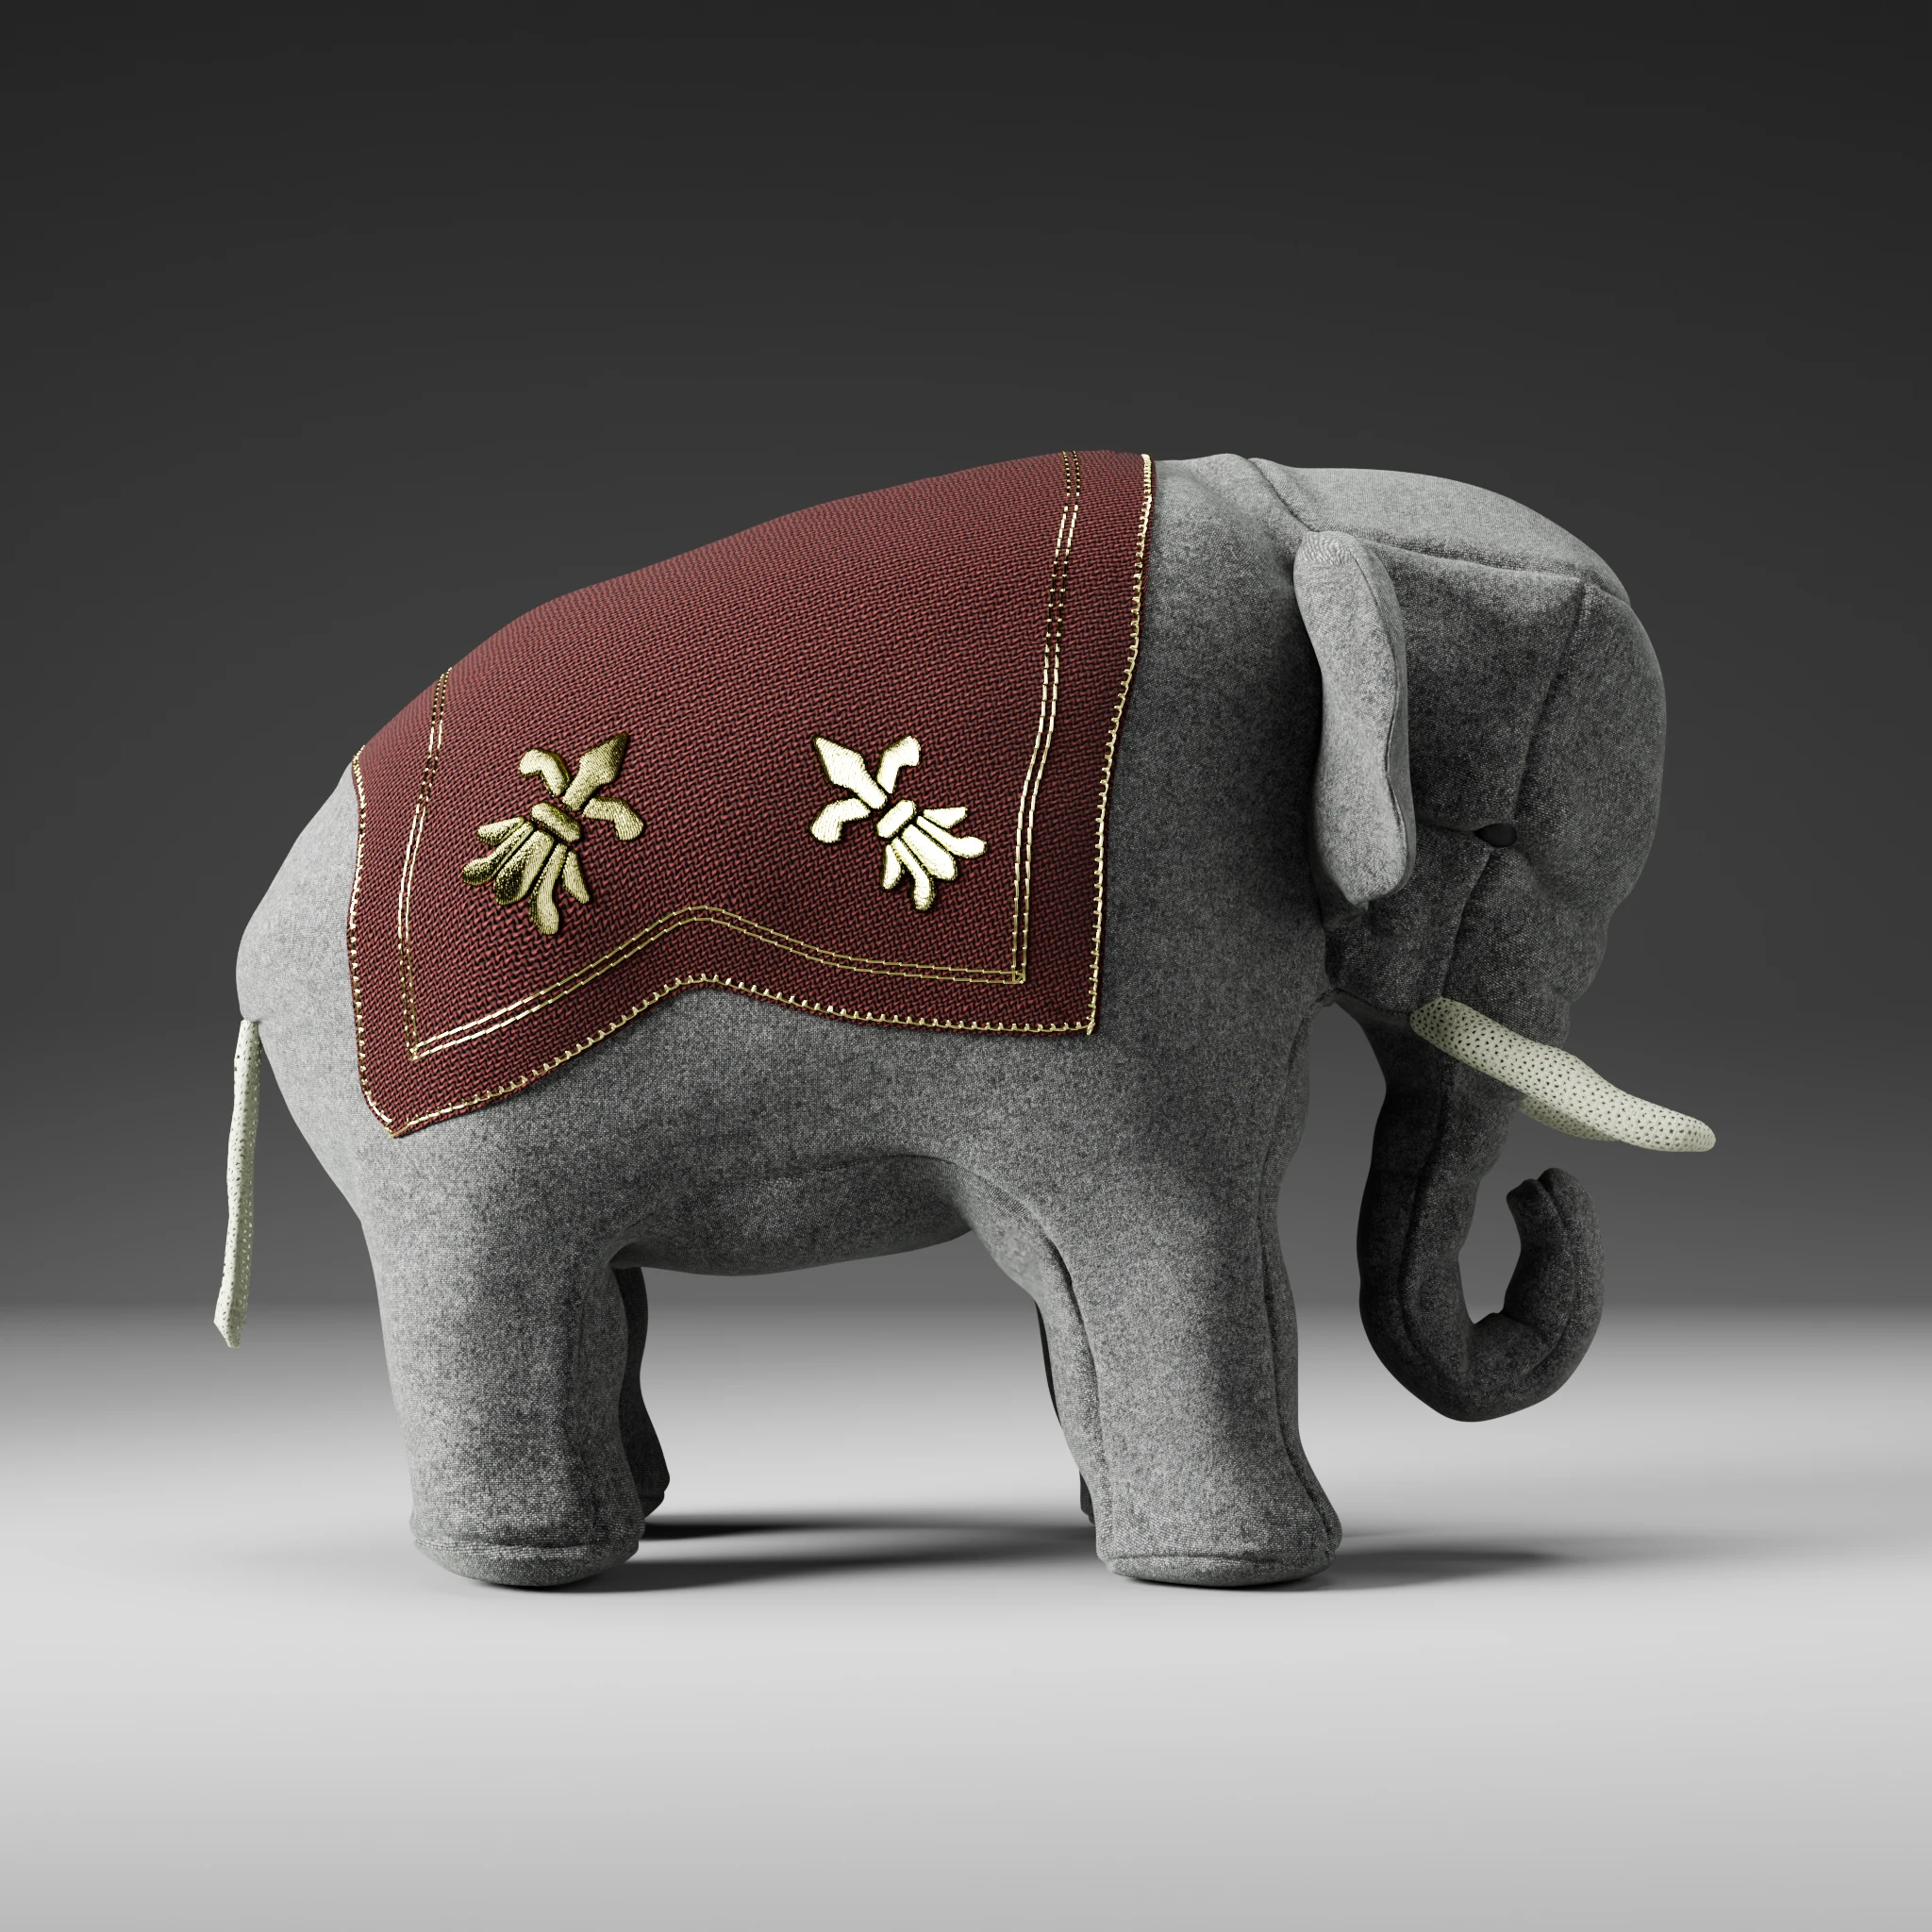
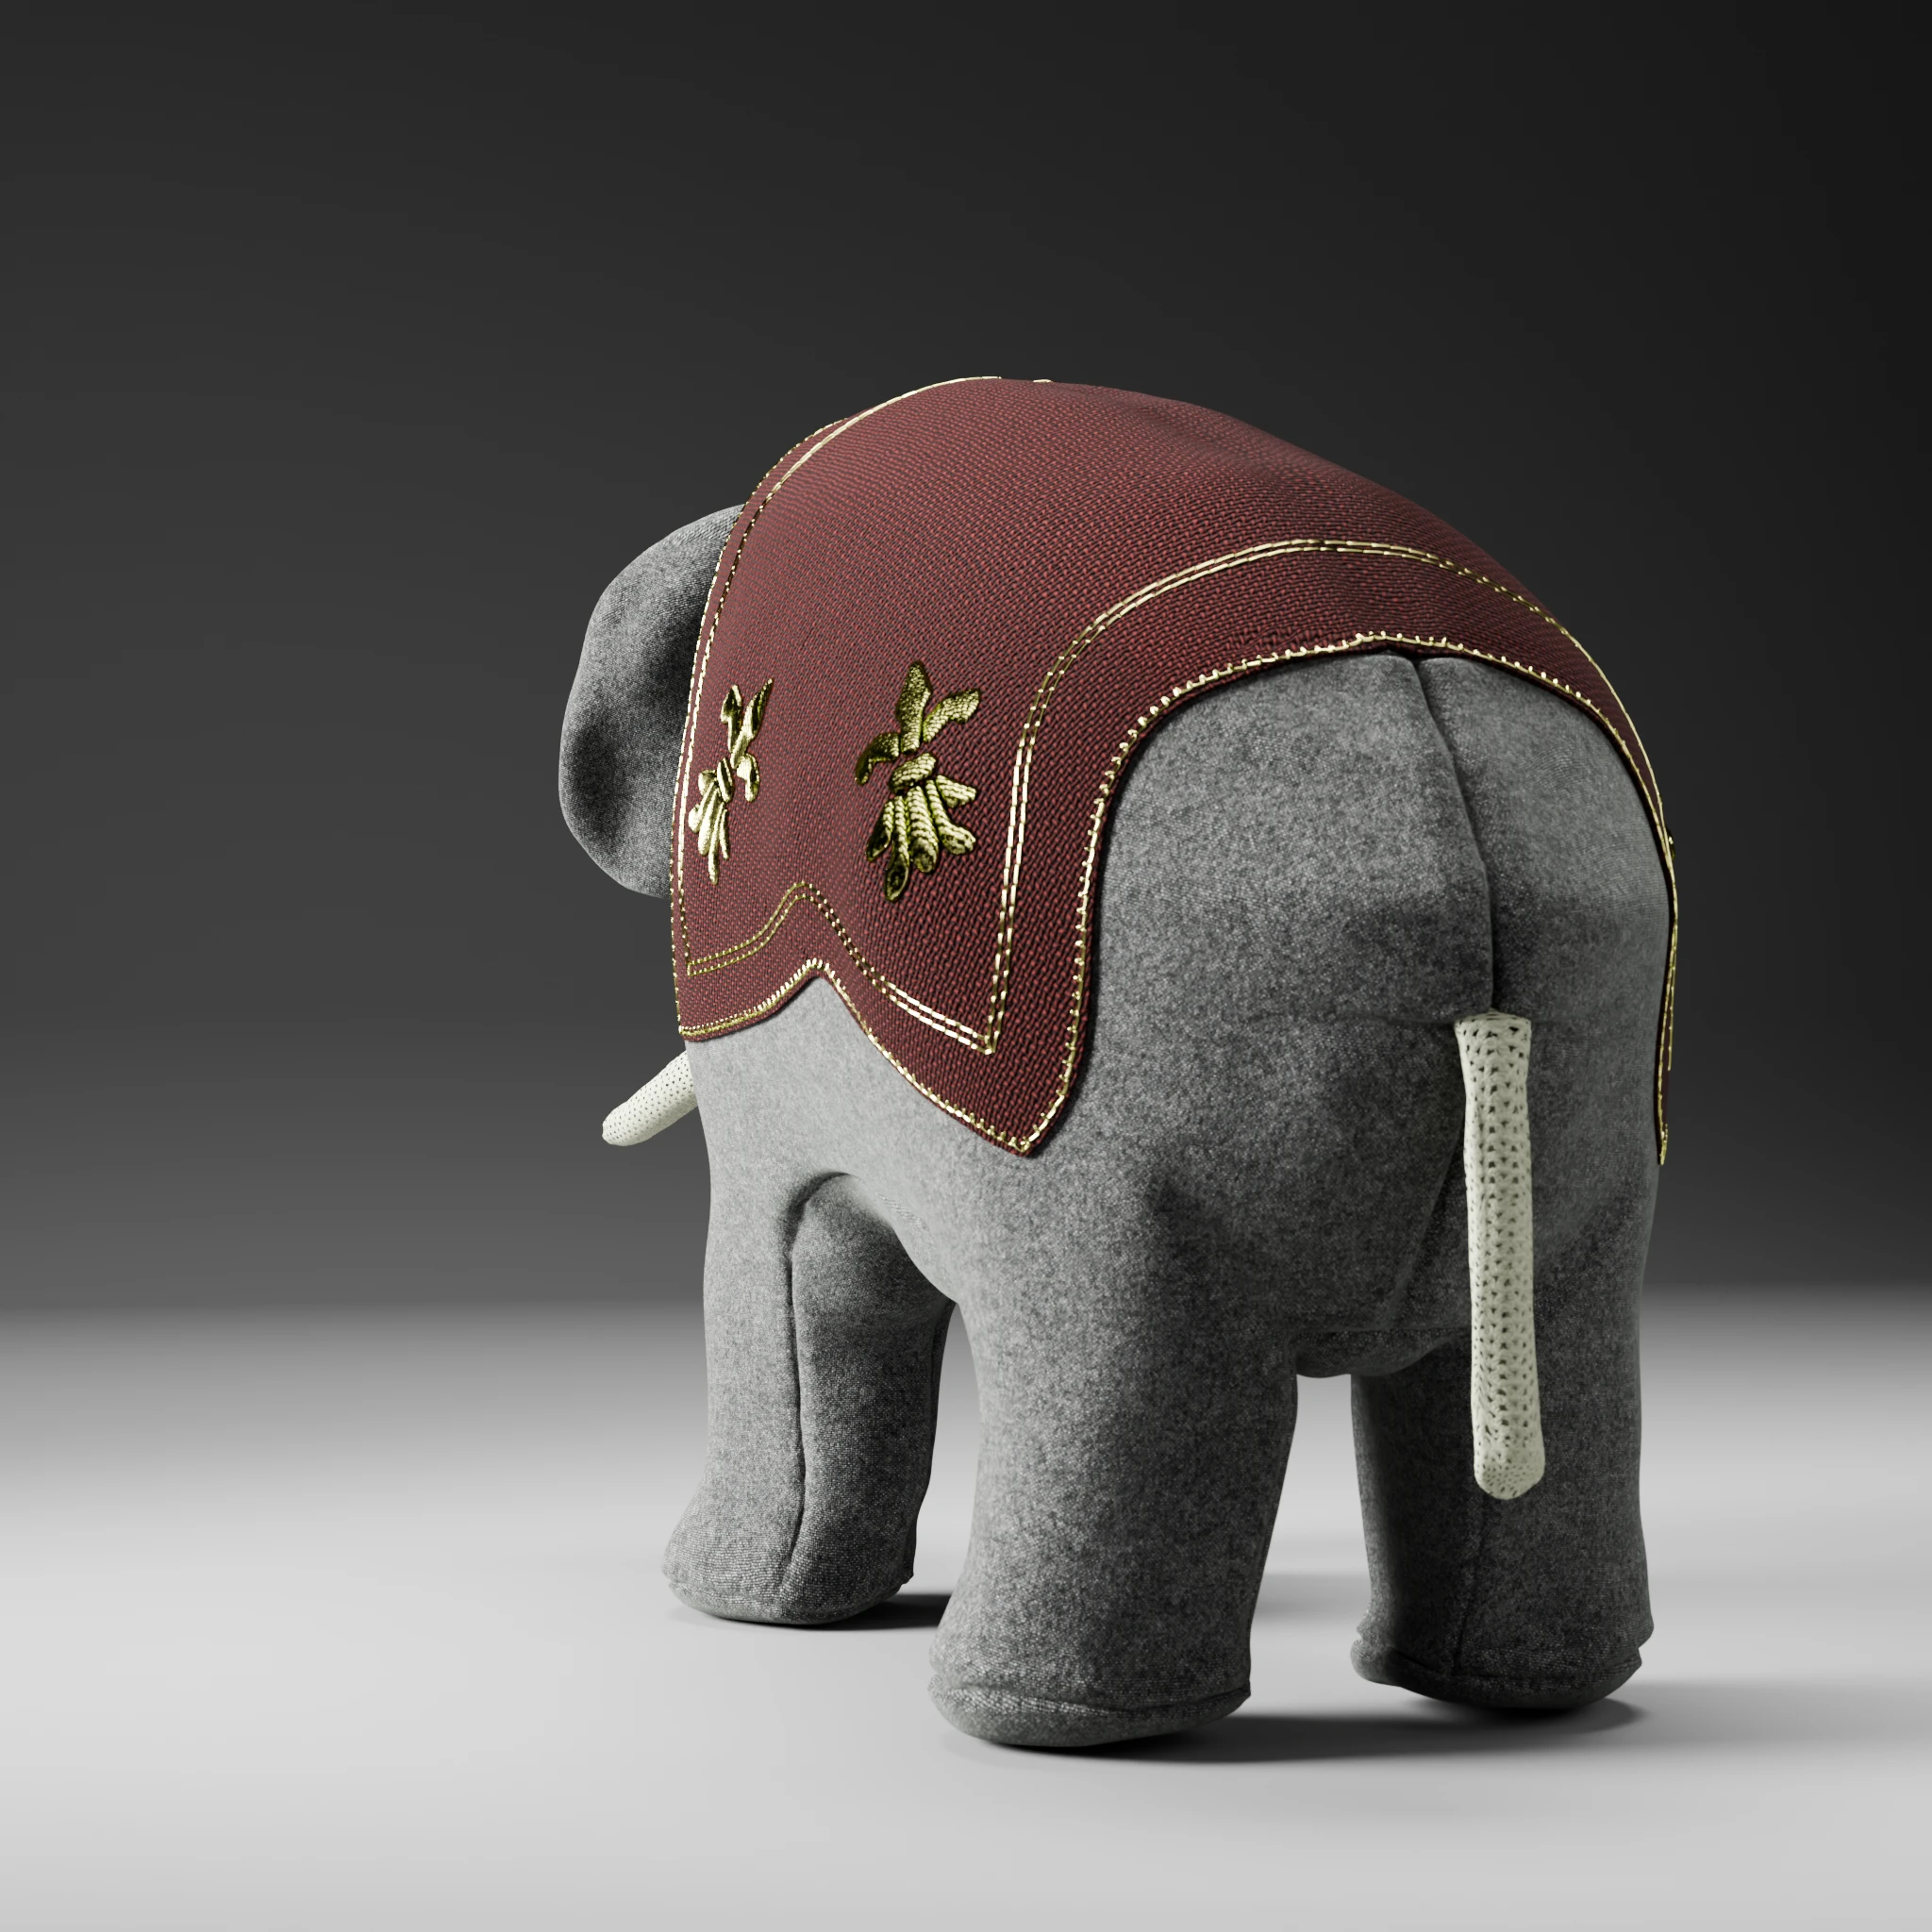
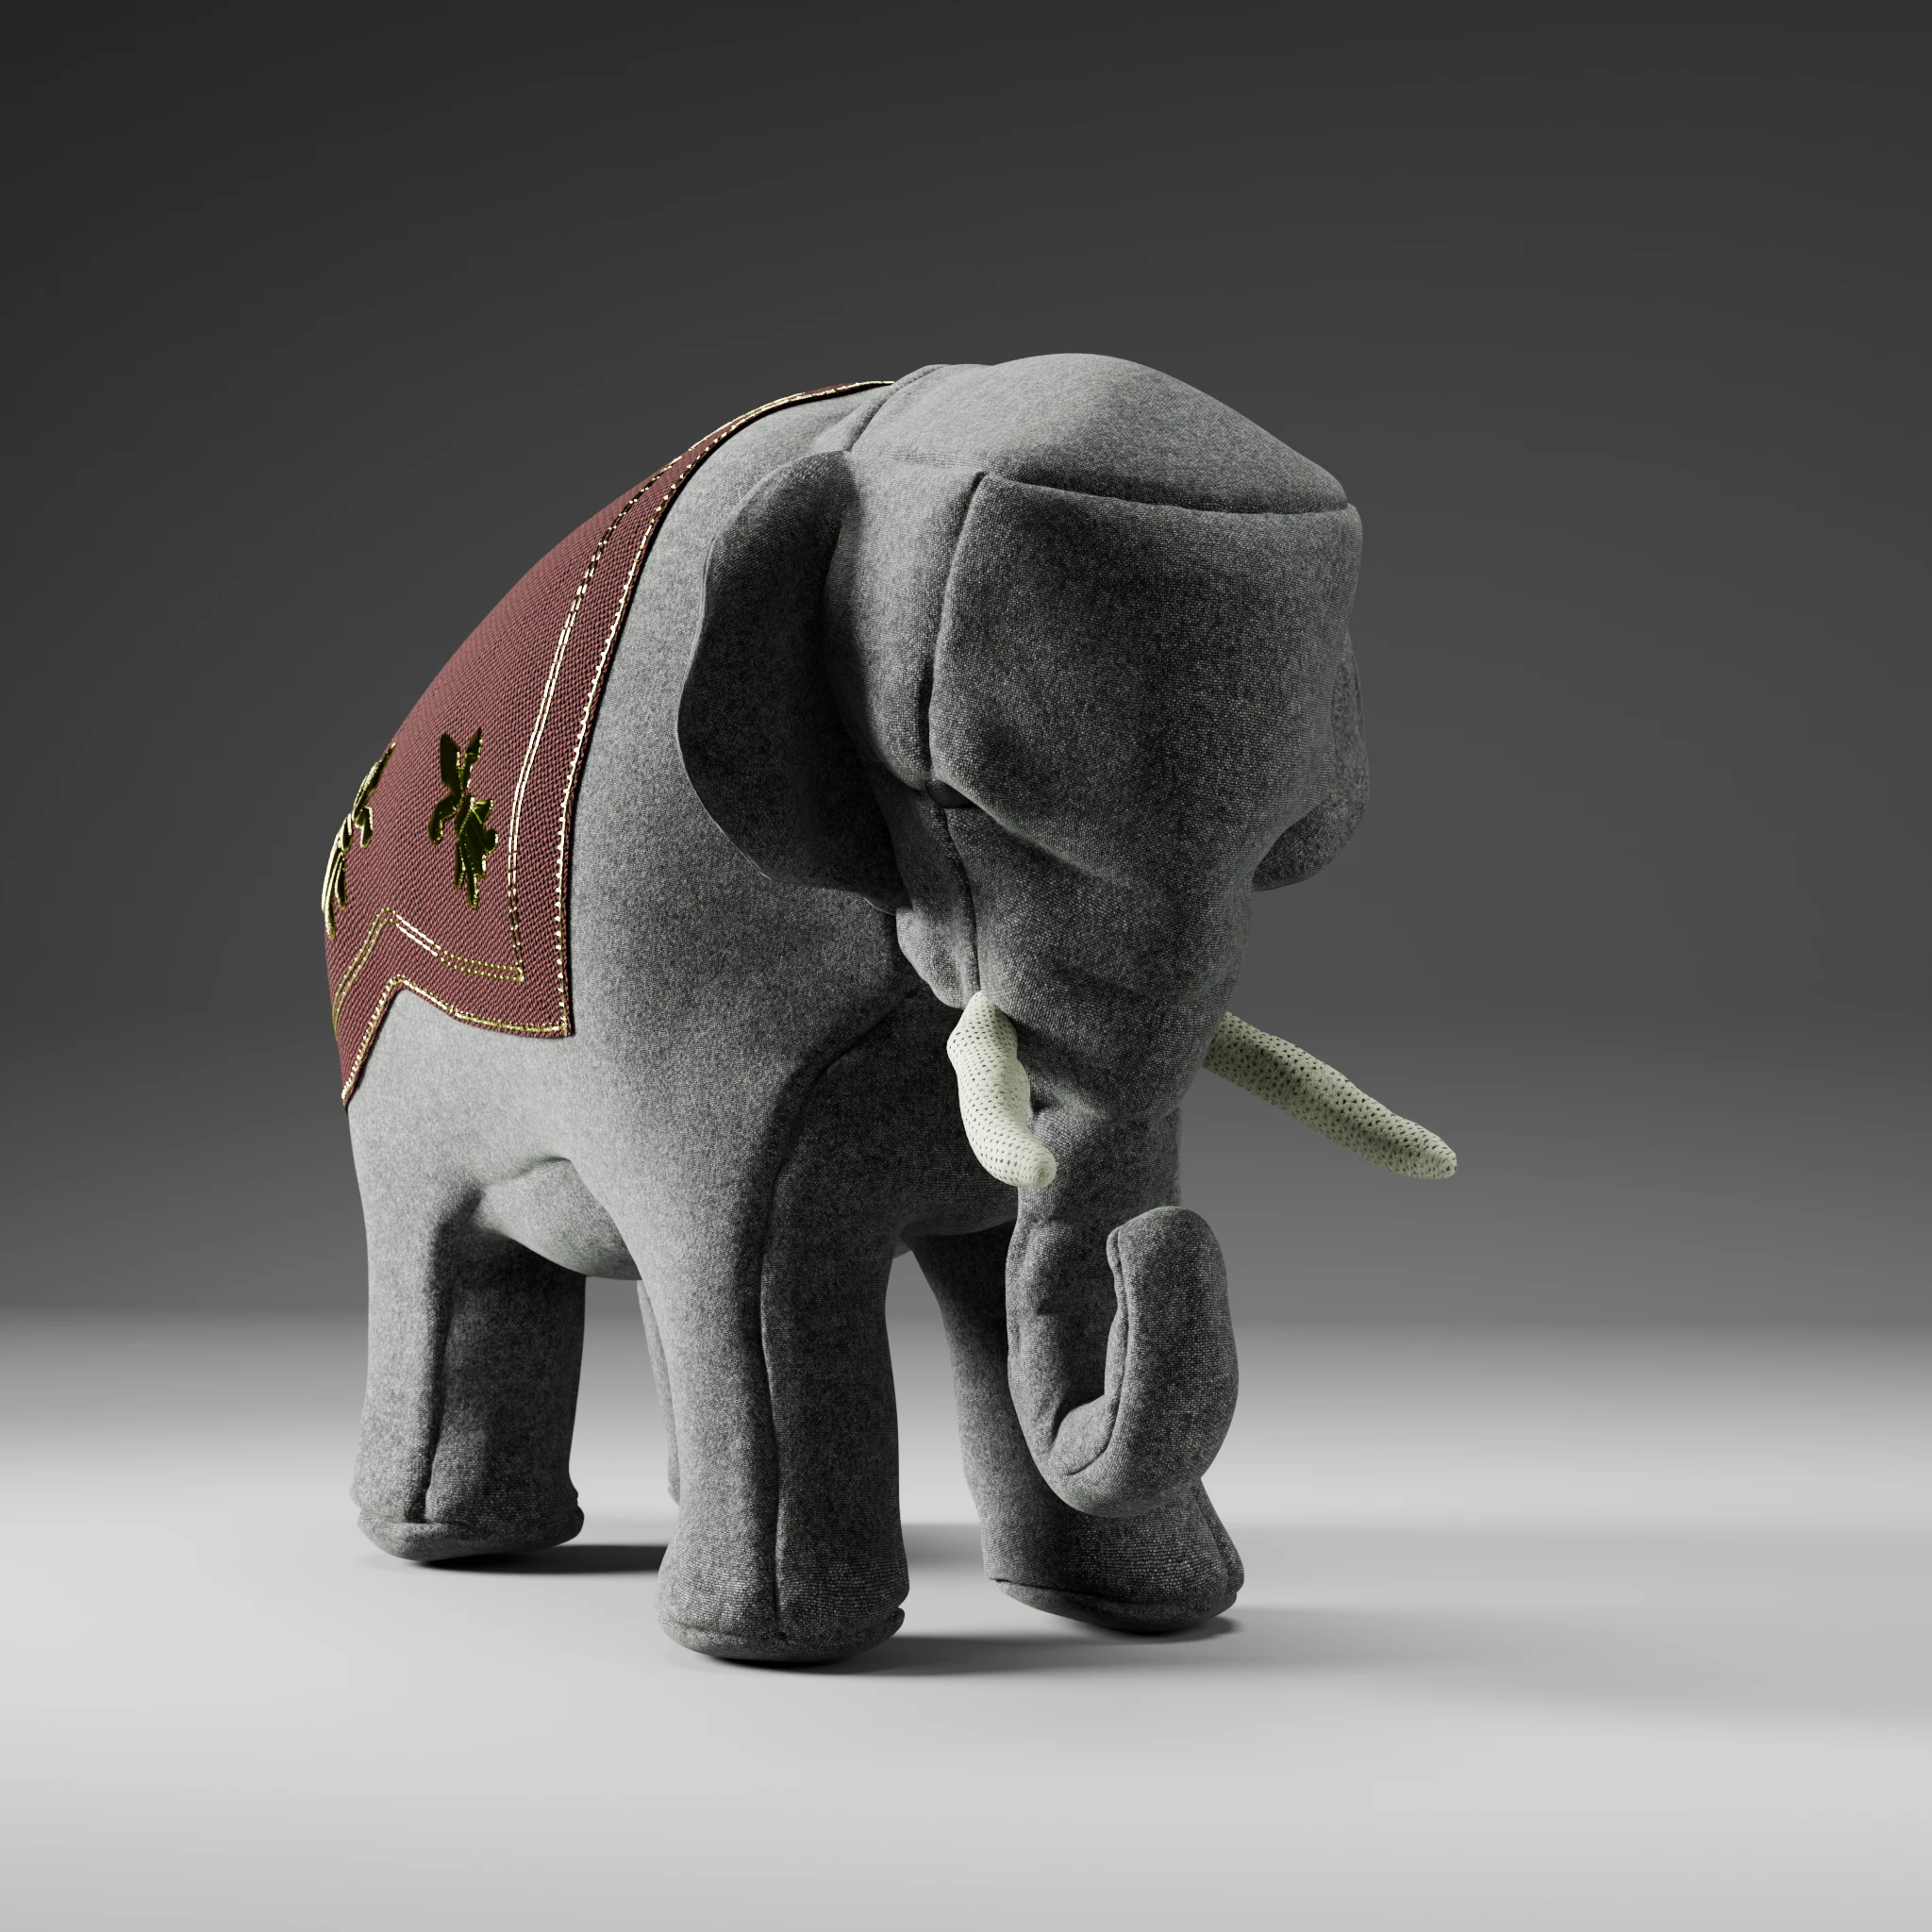
Prefer soft, fur like texture ? It’s just a few tweaks away !
Be very careful: we are now in the presence of rare white specimen, the cuddle strength is strong with that one !
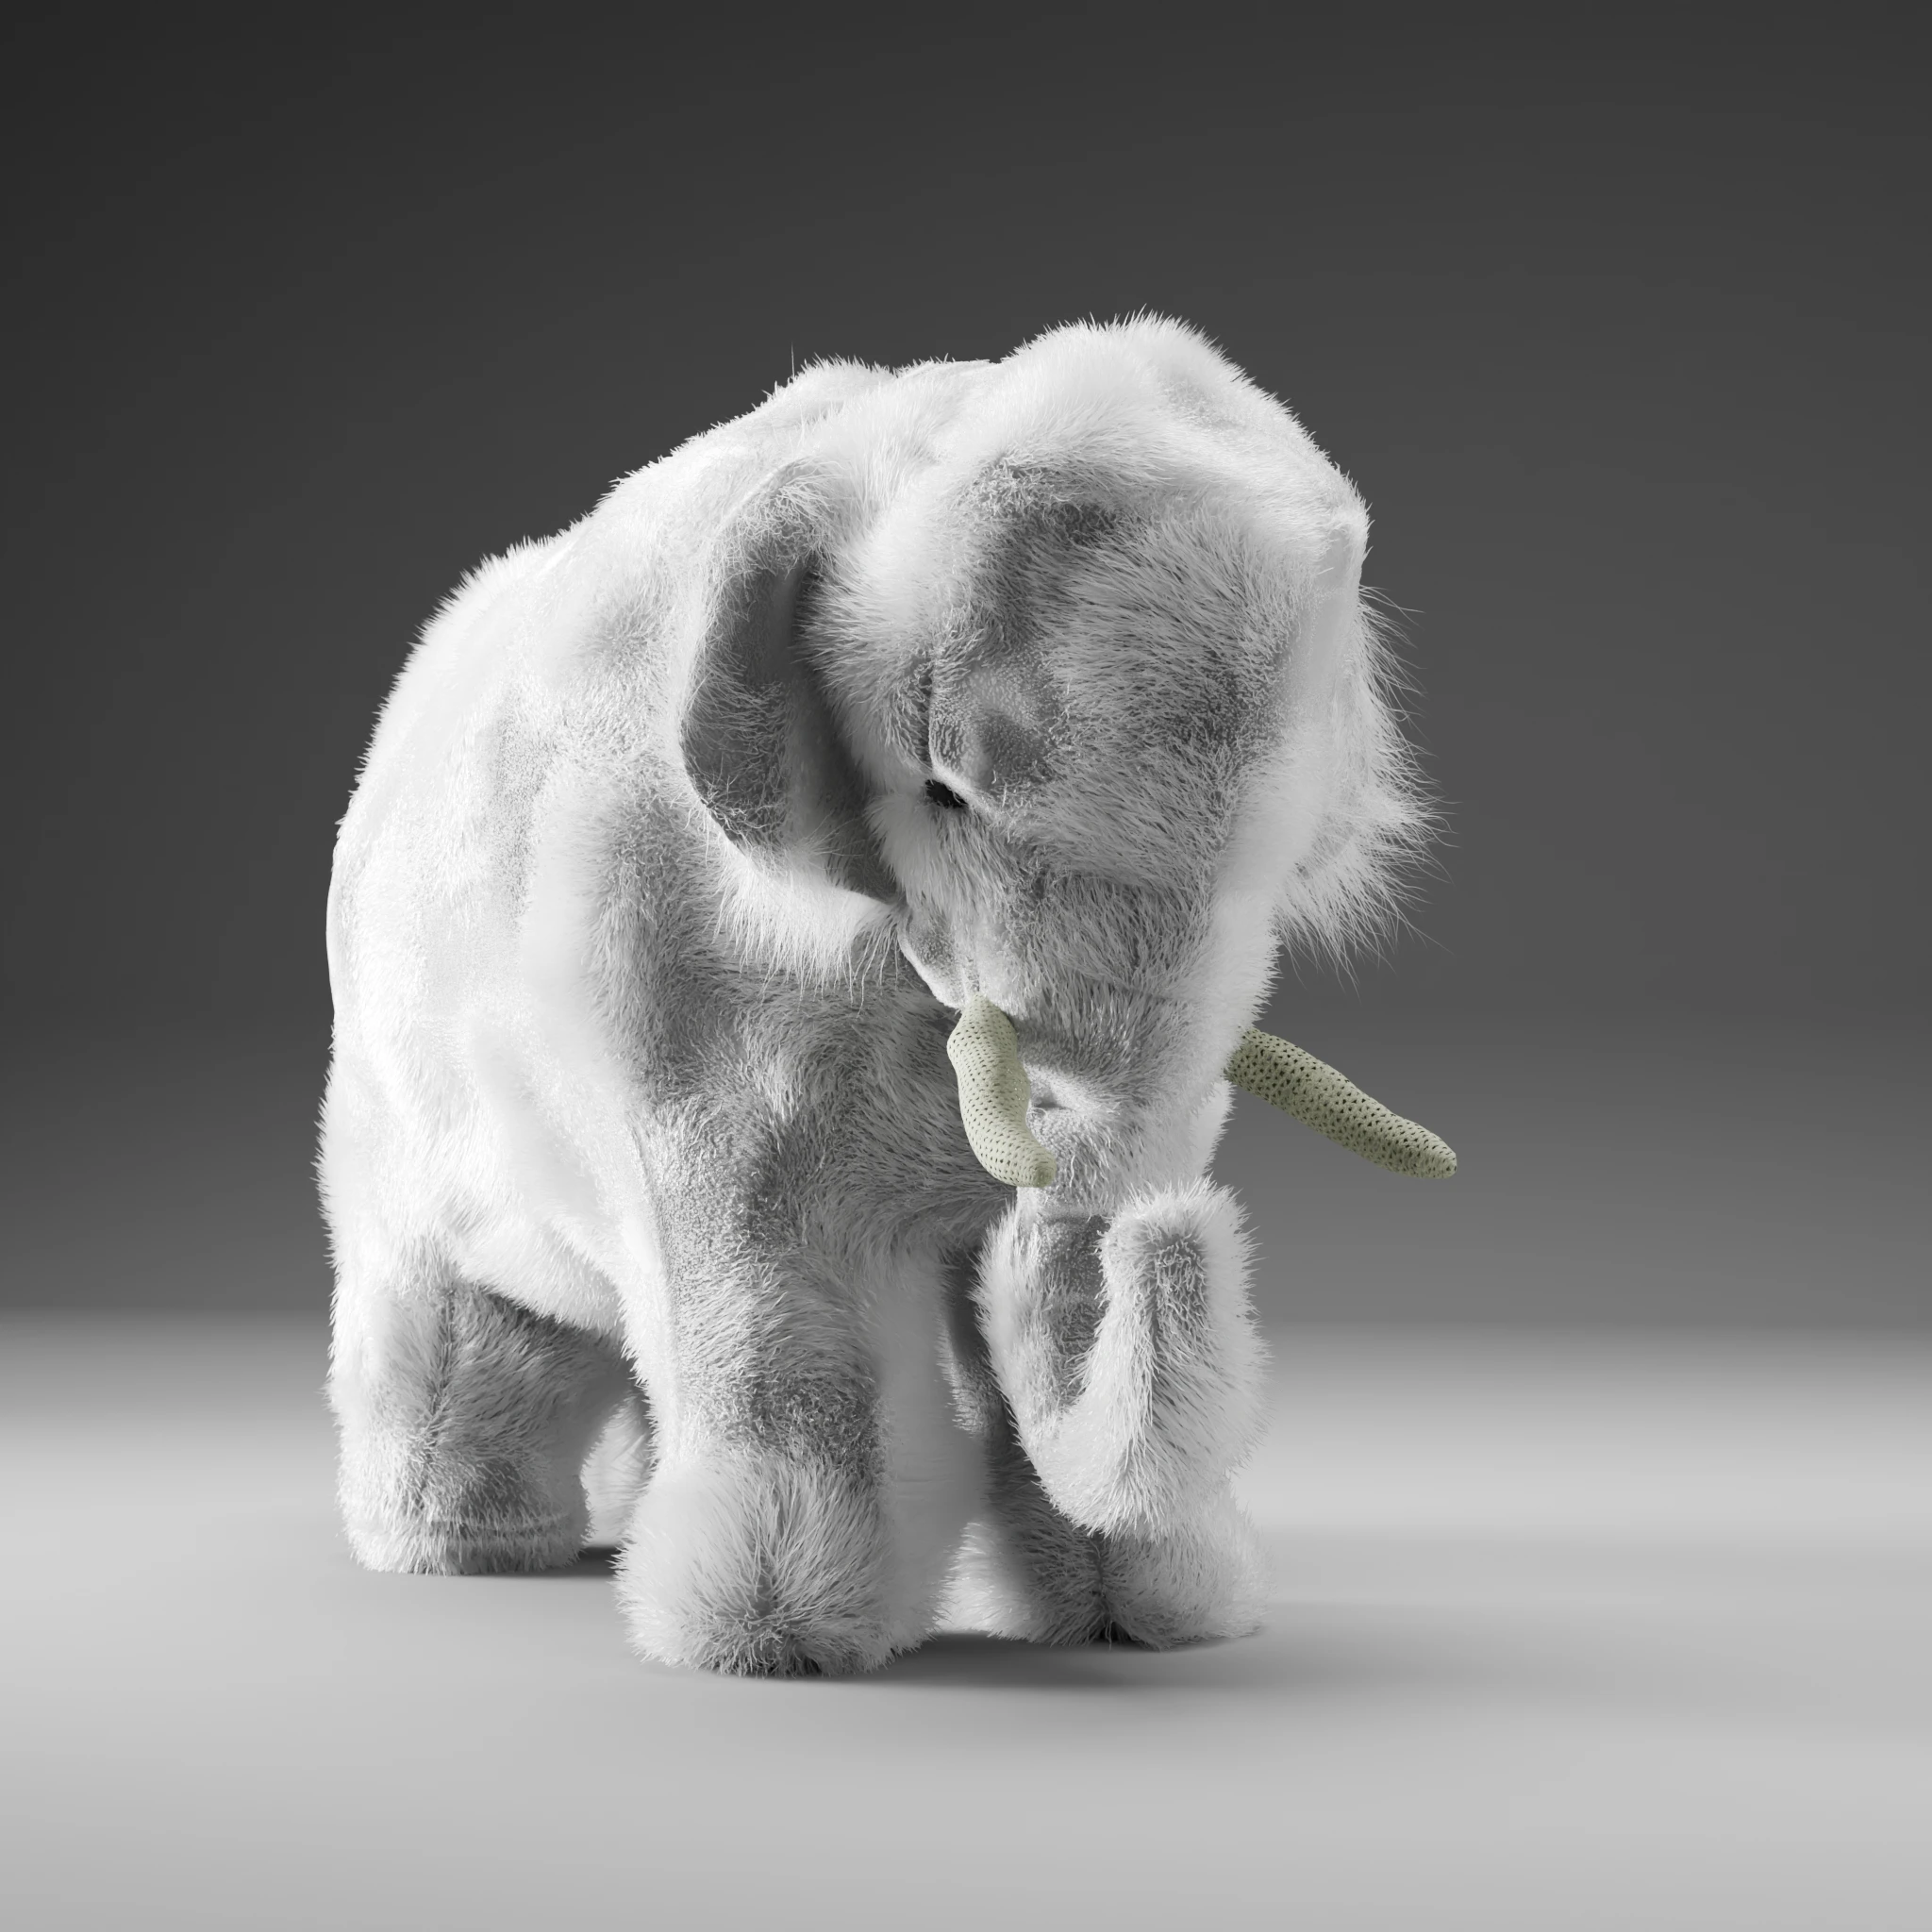
Interactive rendering: now it’s your turn to bleed try !
All hands on code: a hairy problem
Sadly, dear reader, I shall now be the bearer of sad news. Despite all my will, I will not be able to easily render a fluffy and furry version of our elephant on a web friendly version. The technical cost will be too important. I’m almost certain some of you won’t like their phone melting from calculations either.
But, this is where things get very interesting. You may remember we created a sewing pattern for the elephant ? Well, because we did work in a clean and efficient fashion, we can now use our 3D model as a sewing guide ! As in “where-do-what-go-and-how”?! All we need is a little tweak of the diffuse map. And someone is your uncle ! I never could get the gist of that saying.
If you, crafty people out there, are up for a challenge (and need a cuddling buddy and/or a sewing assistant) you can now see the pattern “in action” ! Do remember to take band aids and disinfectant.
Insert nerdic gigglings.
As I am not in any way shape or form qualified to create a whole sewing guide and I already asked way too much of my reference persons, you’ll have to improvise. If any of you, dear crafty reader, is willing to create a full guide, let’s talk !
3D view
Disclaimer : technical limitation to material render in web app can let artefacts and scintillation show, particularly in zoomed views.
You can learn more about the 3D web viewer in this article.
See it full screen in another tab.
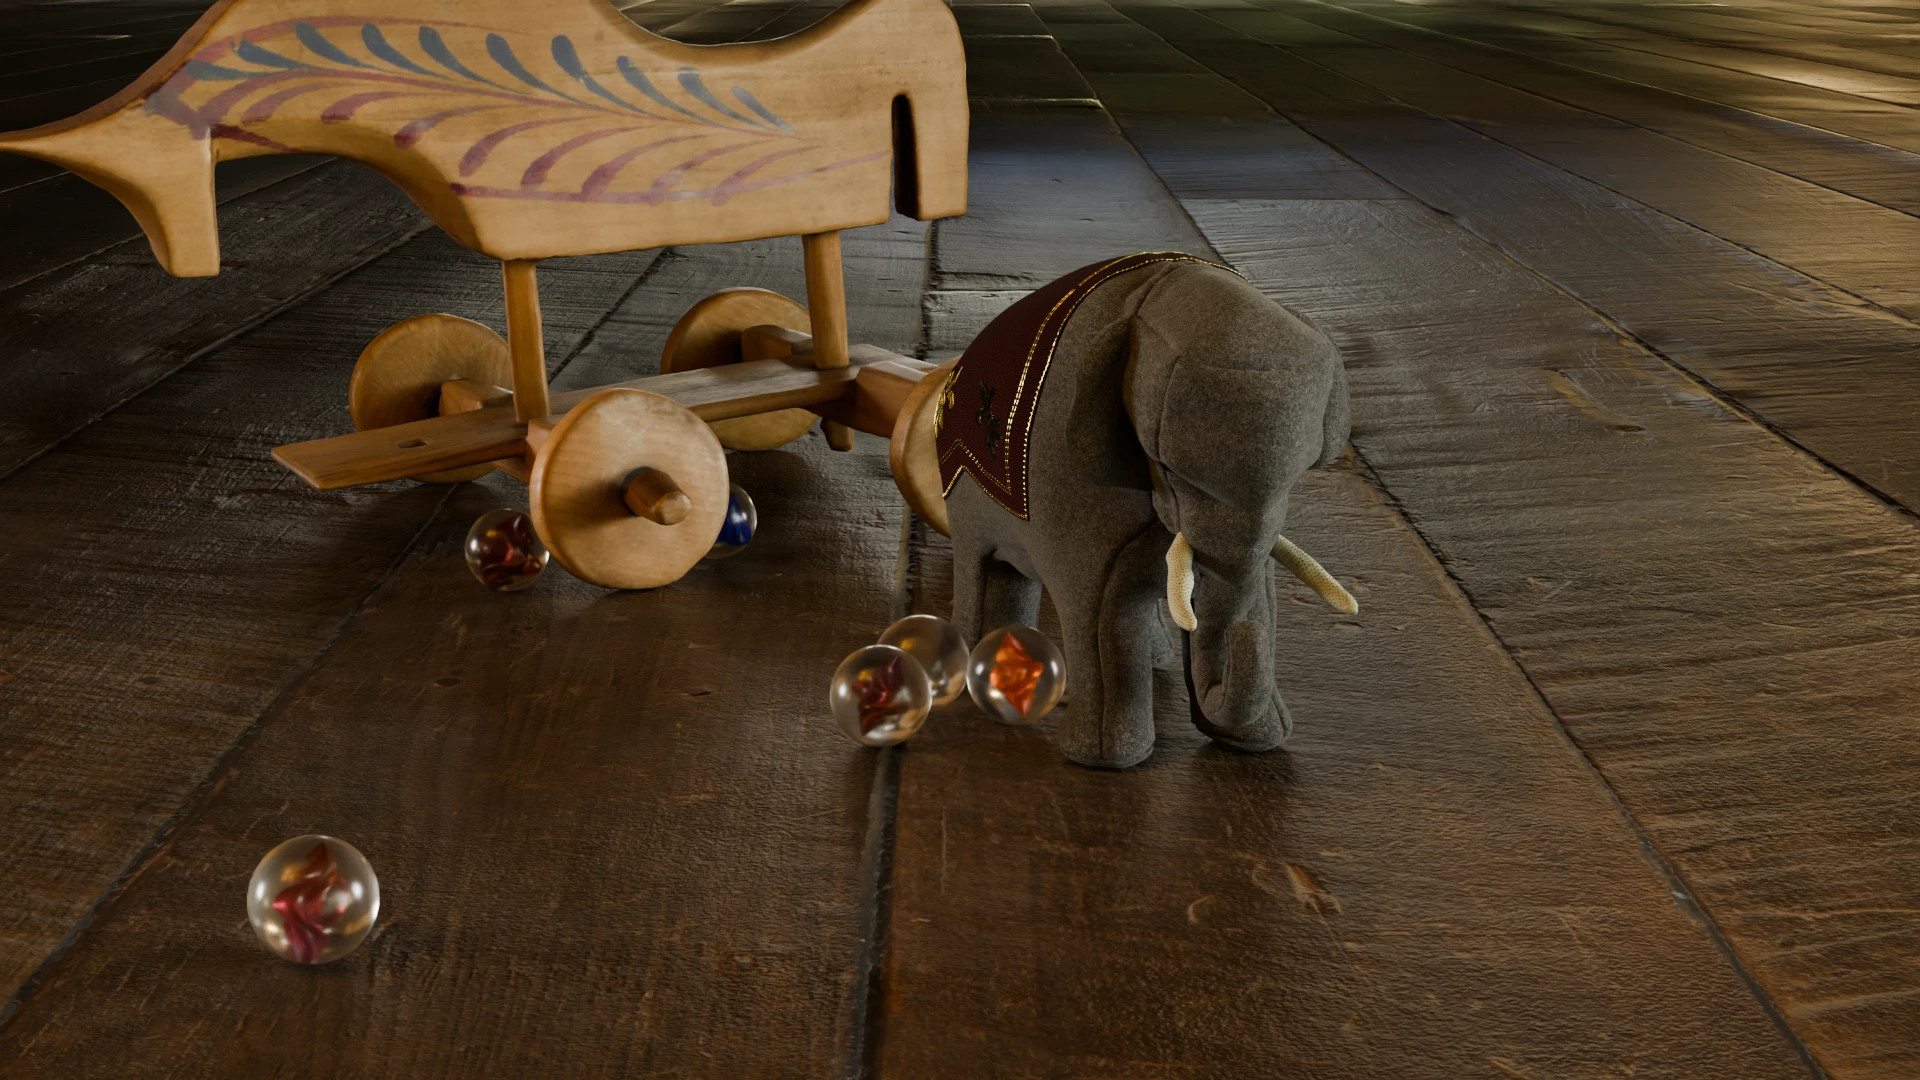
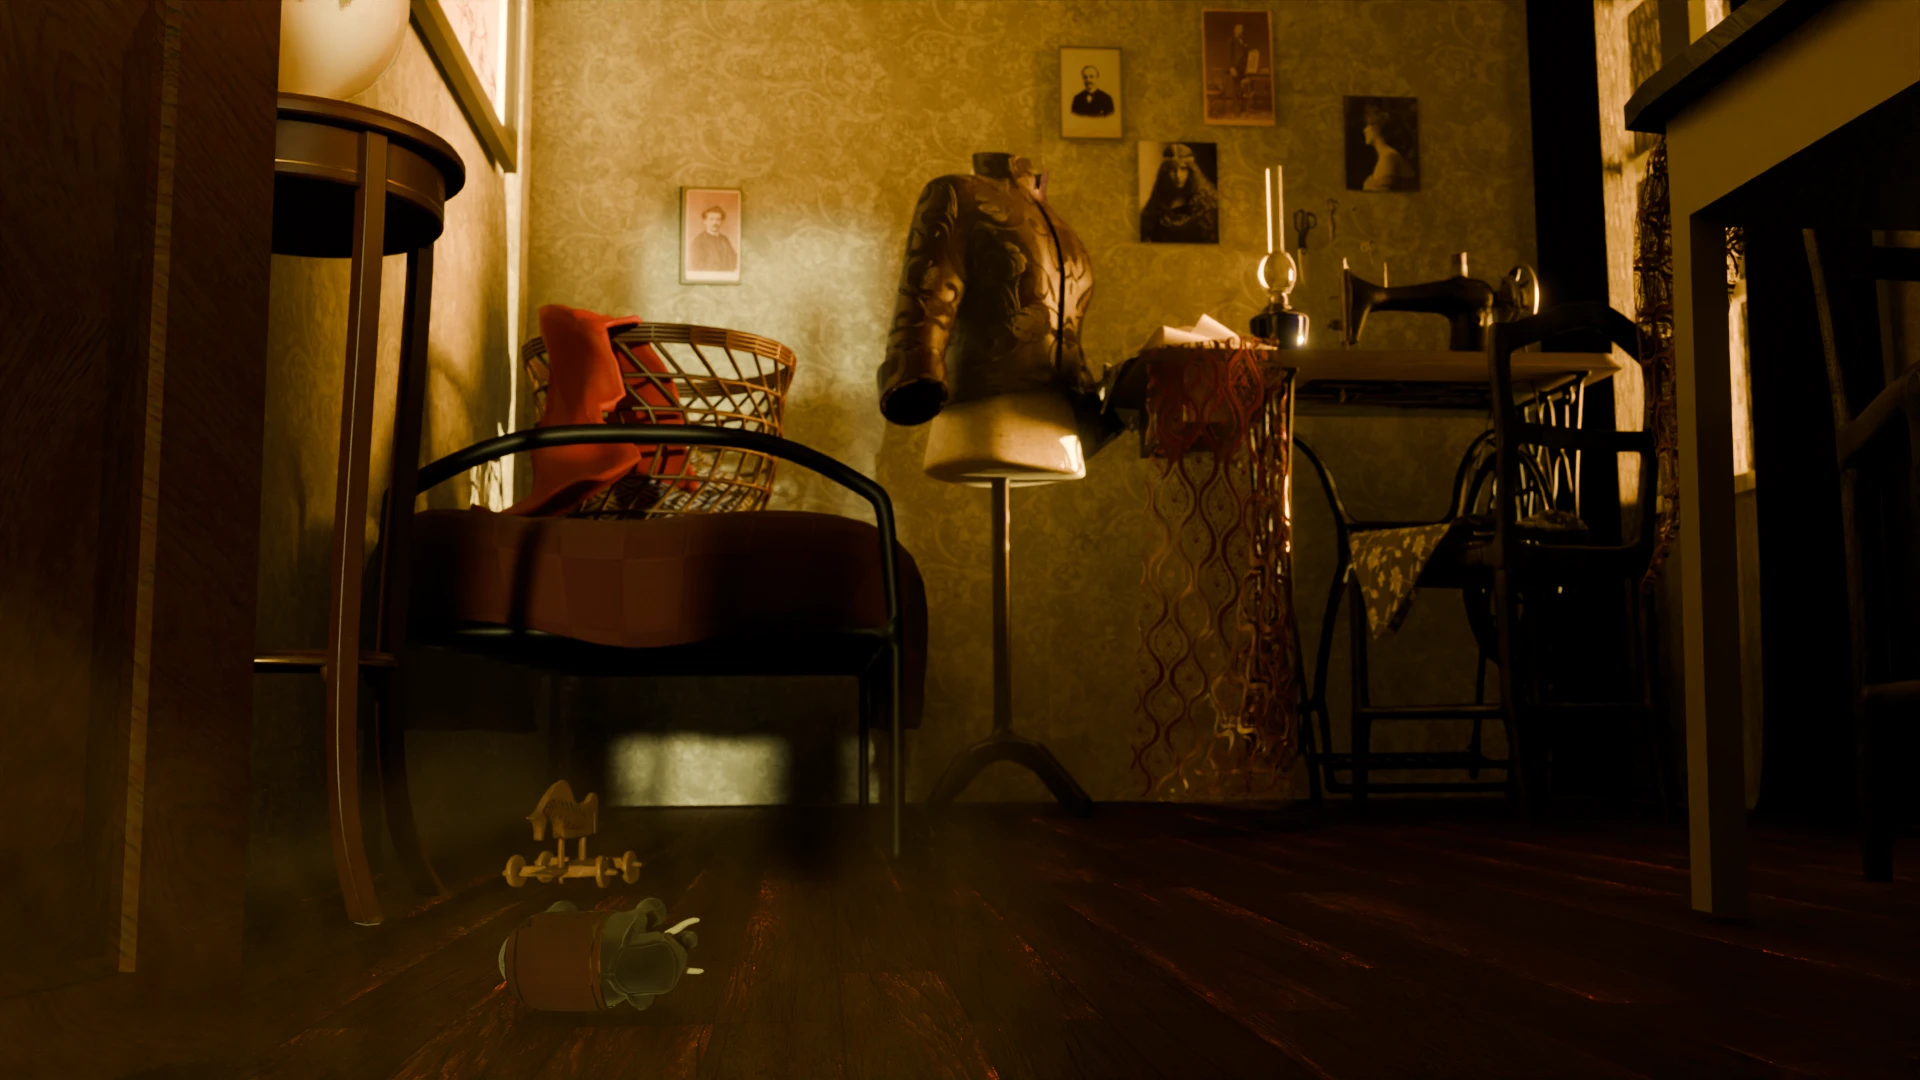
Context: a cousette hideout
As a final game, what about trying to make a context for our cuddly friend ? The legend says that Mme Steiff sewed her first elephant as a gift to her tailoring clients, thinking they would give it to their children when they actually used it as pin cushions.
I can’t help but imagine scenes in other households where the same pattern was seen and made into a toy by a dotting mother or a big sister. Yes, according to the time and the place, this would most likely have been a woman’s work. Let’s try and recreate their sewing room and partake for a little while in their domestic lives.
Let’s start with the thumbnails exercise. I want to illustrate a few key concepts.
First, this is not a very rich background. No ladies from this part of late 19th century western society would do this.
Then, this is a seamstress skilled enough to be able to stitch up the toy without ordering the pattern. The text is inspiring enough and maybe with a few modifications, she can visualize what she needs. Remember, we are in a period where companies like Singer were developing a sewing machine per-month rental business.
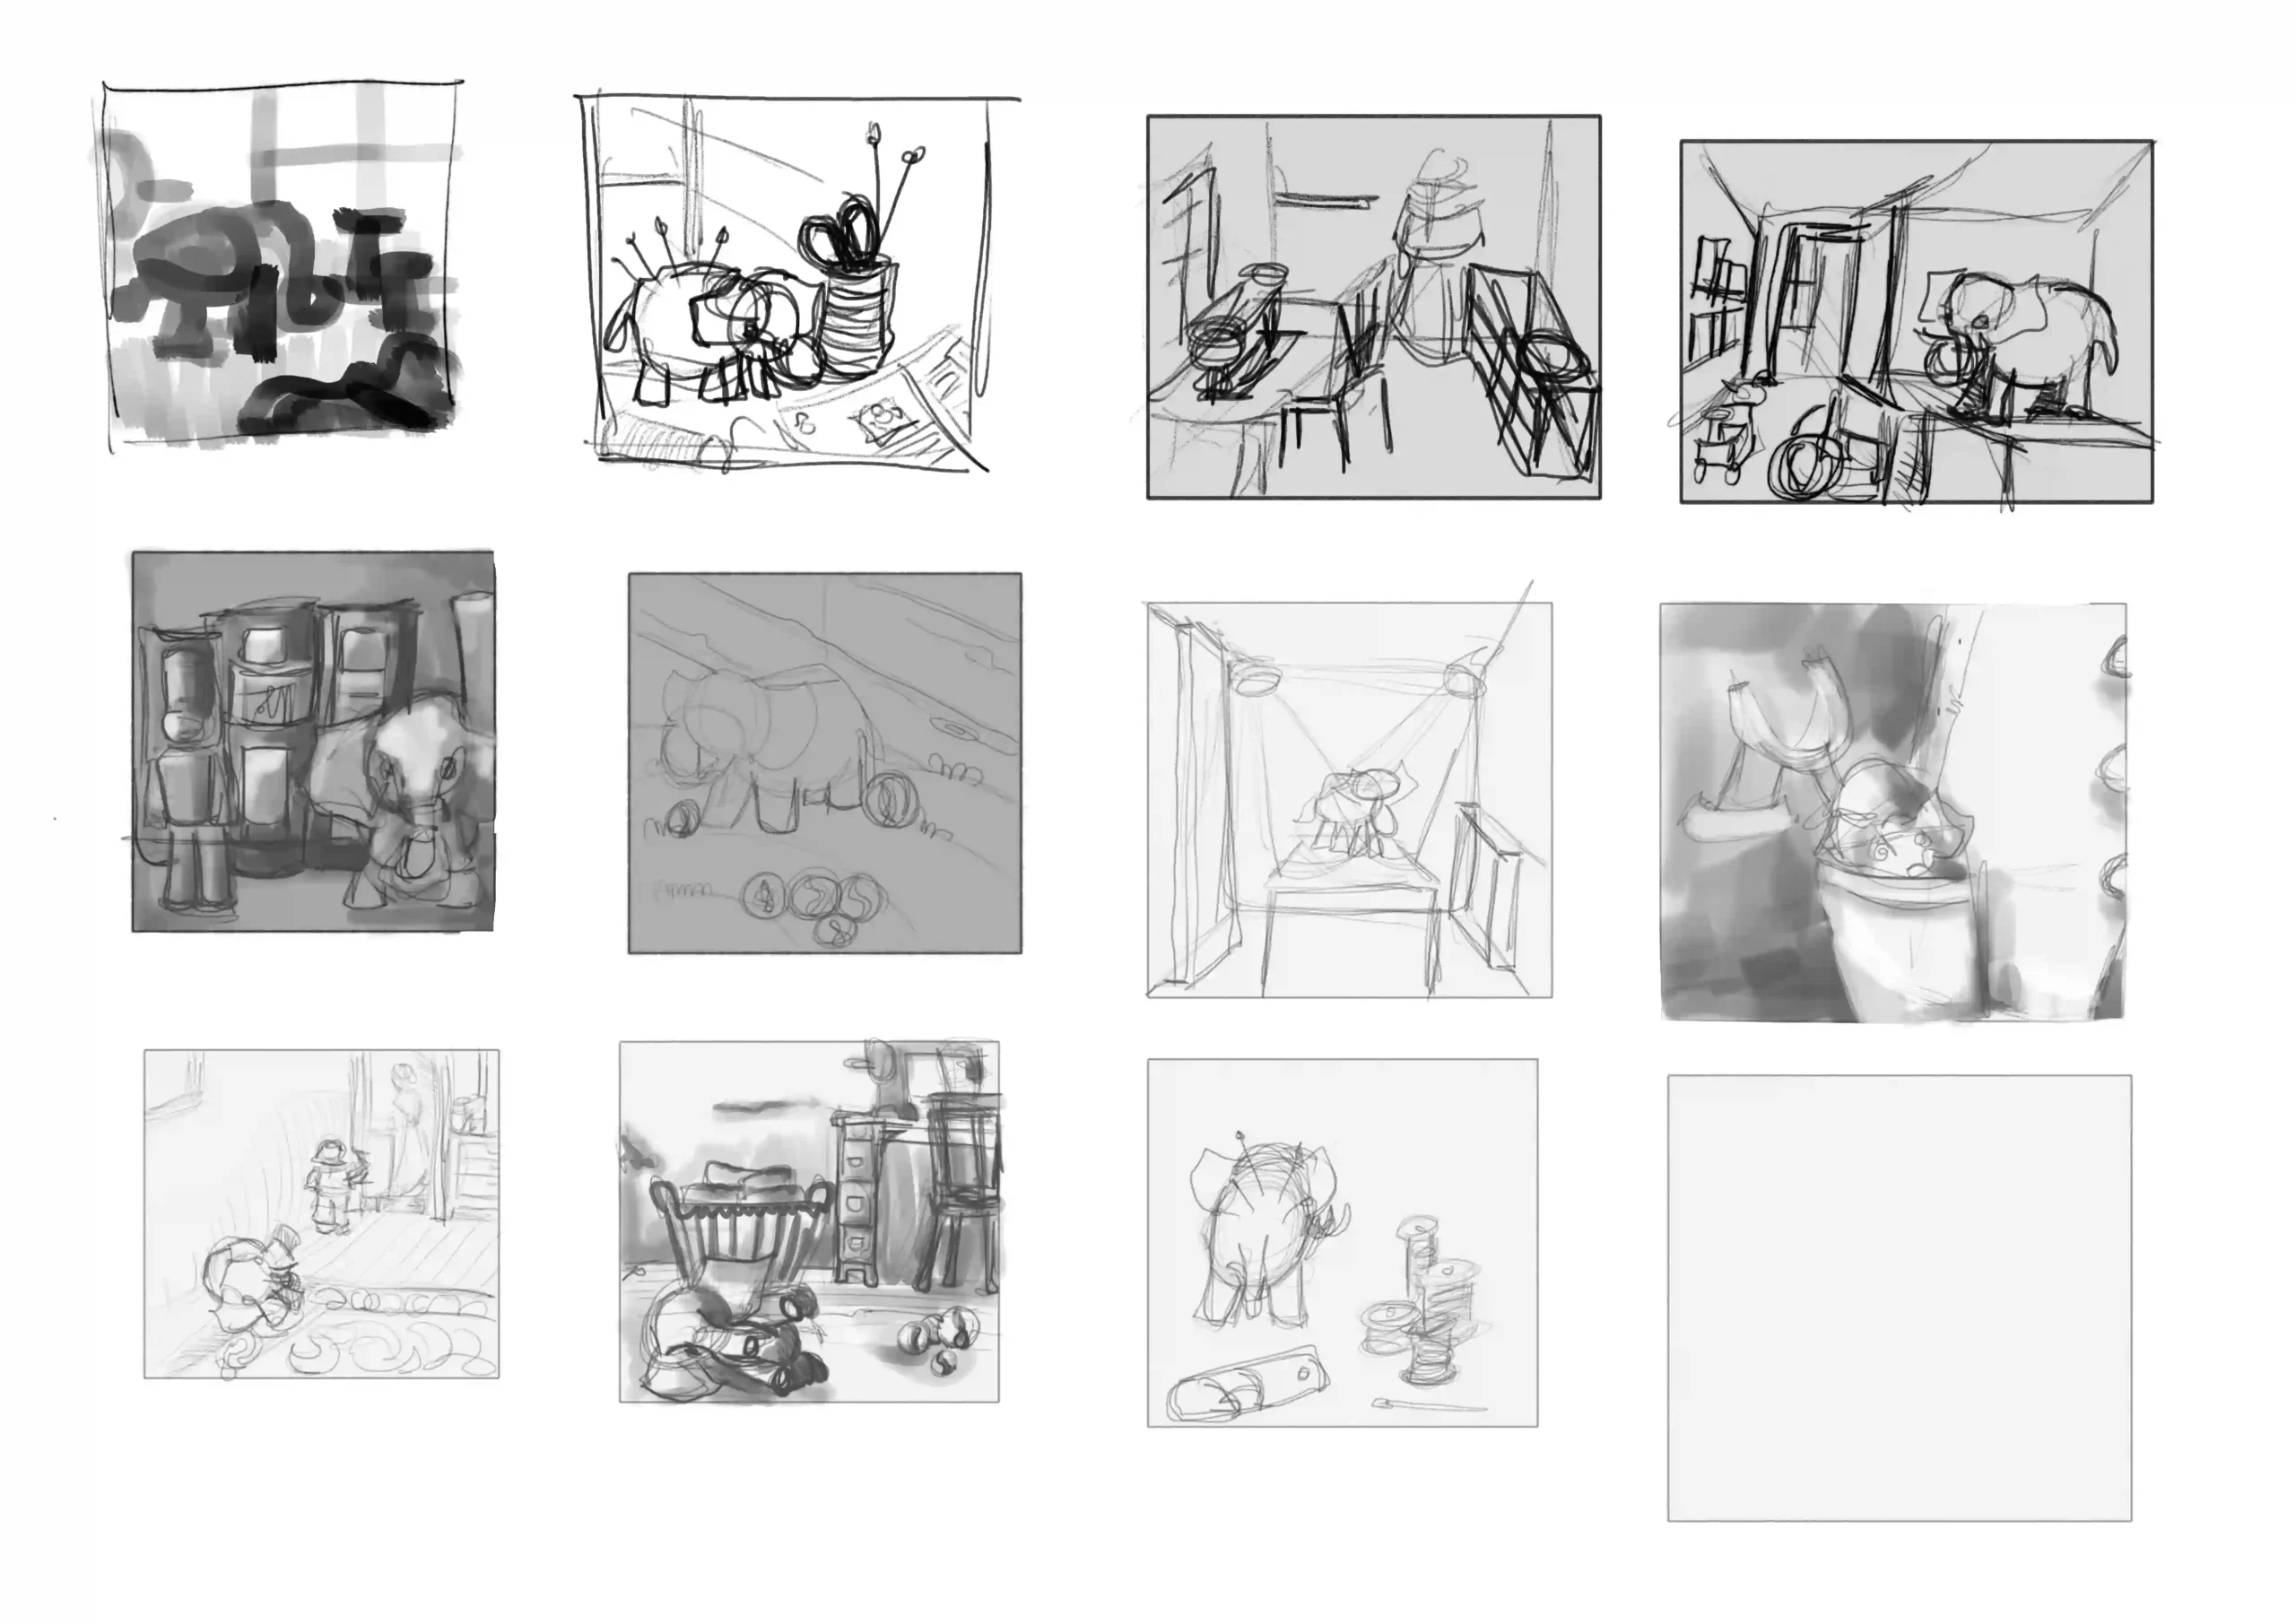
They were selling the concept of “side-gig” where the lady of the house can create clothes for herself and for the family (“prêt-à-porter” is just beginning), as well as have a small complementary income. So there is most likely a place in the house that is devoted to this activity.
Finally, there needs to be the mess that comes with having little ones around. The sewing place is not a playground and can be a dangerous place with very sharp needles, as mother repeated multiple times. It is also a fascinating place for a small adventurer, with just the right amount of rule-breaking thrills !
Credit
Unless otherwise mentioned, all images credit to LGS.
Iconography
Print screen of Christies auctioneer website for the Live auction n°9271, lot 3843112, showing a “very rare Steiff elephant pin-cushion”, the page seems offline now.
Pumpie, Elephant soft toy made of grey felt, dressed as a sailor in a smart, dark blue, woollen jacket and matching trousers, England, ca. 1900, with additional outfits, Cattley family, INV n°MISC.58-1979, Victoria and Albert Museum, London.
Sewing machine model, Sebastian Kansik, via Sketchfab
A little horse on wheels, The Seweryn Udziela Ethnographic Museum in Kraków,
model 3D, cc0, via sketchfab
Portret van Adrien Wagemakers, Eduard Fuchs, 1859 – 1870, Rijksmuseum
Portret van een onbekende jongen met prent, E. Cornelisse, 1863 – 1875, Rijksmuseum
Man met donkere bril, Rudolf Martinelli, c. 1885, Rijksmuseum
Dress catalog, Bibliotheque nationale de France.
Bibliography
The Delineator magazine, Butterick and Co, O’Loughlin, Robert S. , dec 1878, p 9, available online